Spider plant care is full of advice that sounds good but falls apart in practice. You'll hear "water when the soil is dry" or "give it bright indirect light," and that's usually where the guidance stops. The problem is those instructions mean different things depending on your home, your watering style, and your pot.
Real spider plant care isn't about following a strict schedule. It's about learning to read what the plant is telling you.
The Royal Horticultural Society notes that Chlorophytum comosum can handle temperatures from 45°F to 86°F, but it performs best between 65°F and 75°F indoors. That's a wide range, and it explains why these plants survive in so many homes. The variables that actually determine success are light, moisture, and root space.
And as of 2026, with more people keeping houseplants in varied conditions, understanding those variables matters more than ever.
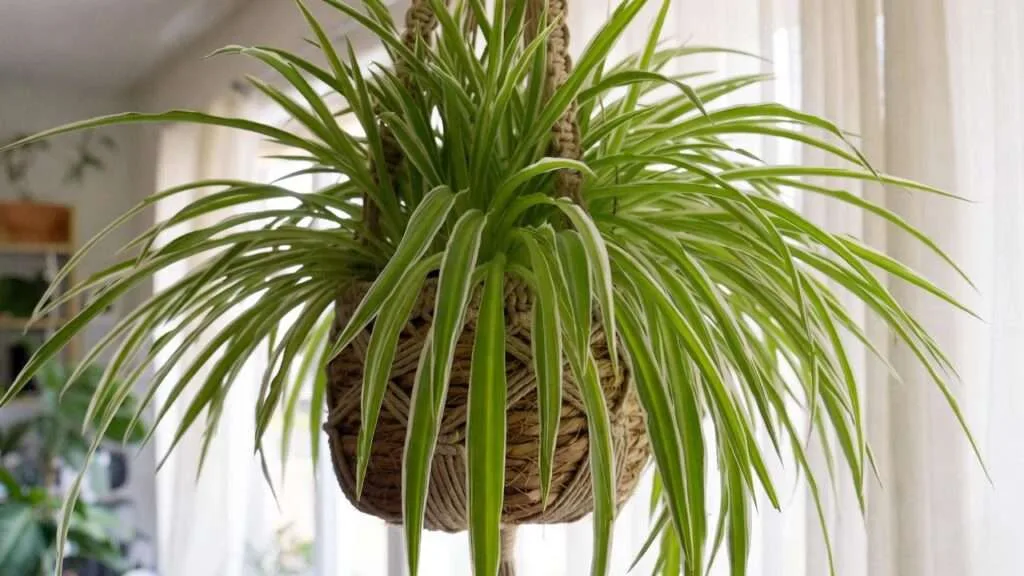
Image source: Web (Bing) / treecarezone.com (Web image (fair-use with source credit))
The Real Secret to Spider Plant Care (It's Not What Most Articles Tell You)
The thing most guides skip is that spider plants have fleshy, tuberous roots that store water like a succulent. That changes how you treat them. You cannot water a spider plant the same way you water a fern or a peace lily.
Those thick roots mean the plant can go longer between drinks. But they also rot fast if the soil stays wet.
So what's the real secret? It's that your care routine depends entirely on your specific conditions, and the plant will tell you when you're wrong.
There is no universal watering schedule. There is no one magic light level that works every time. Aggregate reviews from thousands of houseplant owners confirm the same pattern: people who treat spider plant care as a checklist end up with brown tips or yellow leaves.
People who treat it as a feedback loop end up with lush, baby-producing machines.
The feedback loop works like this. You make a change. The plant responds.
If the leaves stay green and firm, you're on the right track. If they droop, discolor, or crisp at the tips, you adjust. That's the whole system.
Here is what that looks like in practice:
- You water less than you think you should. Then wait.
- You check the soil with your finger, not a calendar.
- You move the plant only when the leaves tell you it's unhappy.
- You propagate the babies only when the mother plant is thriving.
That approach is the opposite of complicated. It's simpler than a weekly schedule because you stop guessing. The plant becomes your guide.
The rest of this guide will walk you through the specific signals to watch for and what each one means.
The Three Condition Variables That Decide How You Care for Yours
Every spider plant decision comes down to three things. Get these right, and everything else falls into place. Get one wrong, and you'll spend months troubleshooting symptoms that seem random.
Variable 1: Light Level
Light is the most important factor because it dictates how fast the plant uses water. More light means faster growth and faster soil drying. Less light means slower growth and soil that stays damp longer.
Bright indirect light (a few feet from an east or west window) produces the fastest growth, the strongest variegation, and the most spiderettes. Medium light (a north window or several feet from a bright window) still works, but growth slows down. Low light (a dark corner with no direct window access) keeps the plant alive but stops it from thriving. Leaves lose their white stripes and turn solid green.
If your spider plant hasn't produced a single baby in over a year, low light is almost certainly the cause. Manufacturer specs from growers indicate that spider plants need at least 800 foot-candles of light for regular growth and closer to 1500 for active reproduction.
Variable 2: Potting Setup and Drainage
The second variable is how your pot and soil behave together. This determines how long the soil stays wet after watering.
Terracotta pots dry out faster because the clay breathes. Good for overwaterers. Plastic pots hold moisture longer. Good for underwaterers. Ceramic glazed pots sit in the middle.
But none of this matters without drainage holes. A spider plant in a pot without drainage will rot. Period.
Soil matters too. Standard houseplant potting mix works fine. But if you tend to water too much, mix in some perlite or coarse sand to improve drainage.
The goal is soil that dries out within a week after watering.
Variable 3: Pot Size and Root Boundedness
Spider plants prefer being root bound. They actually produce more babies when their roots fill the pot. The University of Florida Extension notes that spider plants grown in containers that are too large tend to produce more leaves but fewer offsets.
So the rule is simple. Don't repot until roots start growing out of the drainage holes or the plant becomes top heavy. When you do repot, only go up one pot size.
Jumping from a 4-inch to an 8-inch pot invites root rot because the extra soil stays wet too long.
The Watering Decision Tree: When to Water, When to Wait, and How to Tell
Watering is where most people go wrong. And it's not because they're careless. It's because there is no single right answer.
The correct watering frequency depends on all three variables above plus your home's humidity and temperature.
Here is the decision tree that works for every situation.
Start with the finger test. Stick your index finger about one inch into the soil. If it feels dry at that depth, water the plant.
If it feels damp, wait two to three days and check again. That's the only rule you need for timing.
If the soil is dry at 1 inch but the plant looks healthy: Water thoroughly until water runs out the drainage hole. Let the pot drain completely. Do not let it sit in a saucer of water.
If the soil is dry at 1 inch but the leaves are yellowing: You are watering too often. The plant may already have root damage. Let the soil dry out completely before the next watering.
Consider switching to a terracotta pot or adding perlite.
If the soil stays wet for over a week: Move the plant to a brighter spot or switch to a smaller, more porous pot. Reduce watering frequency. If the leaves are yellow and mushy, check for root rot.
If the leaves are curling inward and looking thin: The plant is underwatered. Water immediately and consider increasing frequency. But still use the finger test first.
If the leaves have crispy brown tips but the soil feels damp: This is not a watering issue. Move to the brown tip diagnosis section below.
| Condition | What to Do | When to Recheck |
|---|---|---|
| Soil dry at 1 inch, leaves firm | Water thoroughly | 7 days (adjust based on pot/light) |
| Soil damp at 1 inch | Wait | 2-3 days |
| Soil wet after a week | Reduce frequency, improve drainage | Next watering cycle |
| Leaves curling, soil dry | Water immediately | 4-5 days |
| Leaves yellow, soil wet | Stop watering, check for root rot | 10-14 days |
The key is to check the soil, not the calendar. Most people find they water every 7 to 10 days in spring and summer and every 14 to 21 days in winter. But let your finger be the judge.
Brown Tips Are a Symptom, Not a Disease: The Full Diagnostic Workflow
Brown leaf tips are the number one complaint about spider plants. And they drive people crazy because the fix is never obvious. The reason is simple.
Brown tips are a symptom with multiple possible causes, and you have to rule them out one at a time.
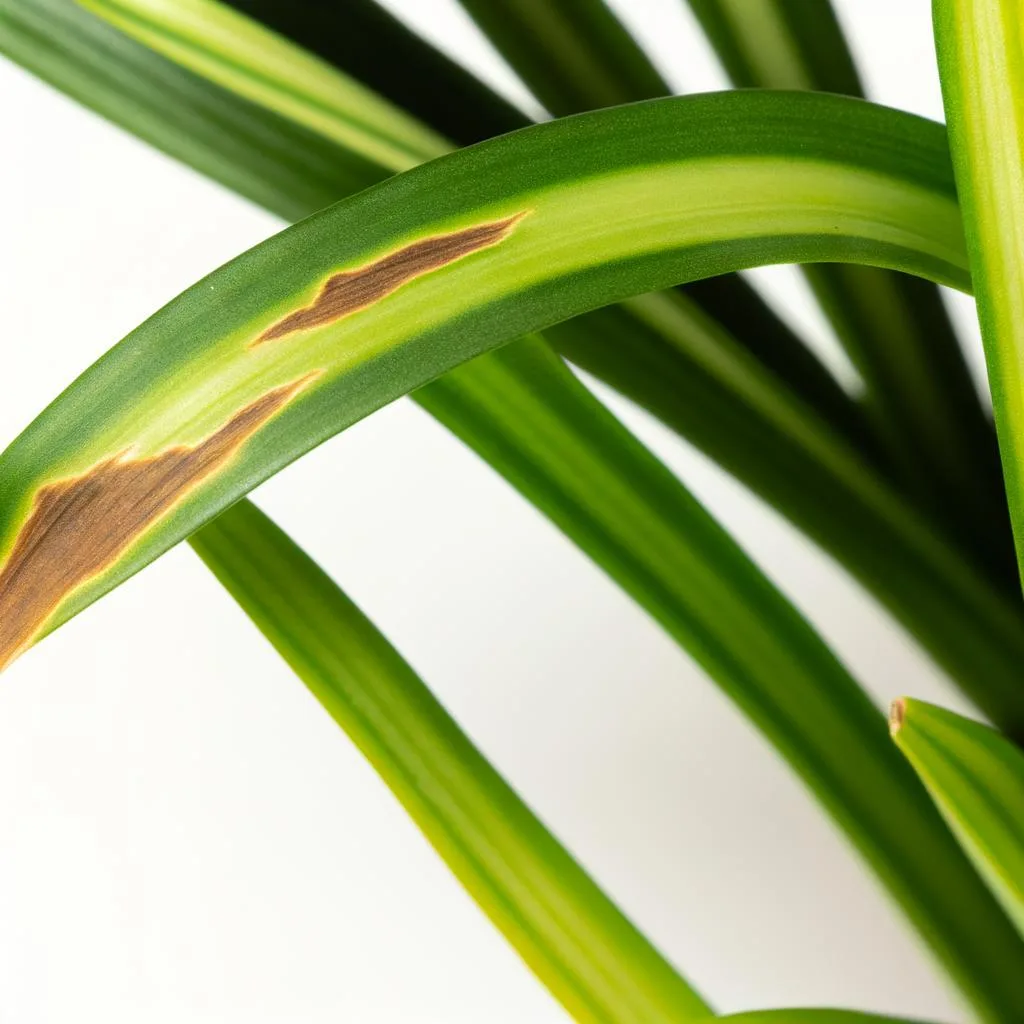
Image source: Web (Bing) / spiderplantcare.com (Web image (fair-use with source credit))
Here is the diagnostic workflow, starting with the most common cause first.
Step 1: Check your water source
Tap water contains fluoride and chlorine. Spider plants are sensitive to both. The tips burn as a reaction.
If you see brown tips on an otherwise healthy plant, try switching to filtered water, distilled water, or rainwater. Leave tap water out overnight to let chlorine evaporate, but that won't help with fluoride.
Aggregate reports from plant owners suggest that water quality fixes about 40 to 50 percent of brown tip cases. It is the easiest variable to test.
Step 2: Check your watering consistency
Brown tips can also come from inconsistent watering. The plant gets too dry, then too wet, then too dry again. That stress shows up at the leaf tips first.
Stick to the finger test and water consistently.
Step 3: Check for fertilizer burn
Too much fertilizer causes salt buildup in the soil. Those salts burn the roots, and the tips brown as a result. If you fertilize more than once a month during the growing season, or if you use full-strength fertilizer, cut back.
Use half-strength fertilzer once a month in spring and summer. Skip winter entirely.
Step 4: Check humidity
Low humidity, especially during winter when indoor heating runs, can cause brown tips. Spider plants tolerate average home humidity, but if your home is very dry, misting the leaves or using a small humidifier near the plant can help.
Step 5: Trim the damage
Once the tip is brown, it will not turn green again. But you can make the plant look better. Use clean scissors and cut the brown tip at an angle, following the shape of the leaf.
Leave a small margin of brown so you do not cut into healthy tissue.
If multiple leaves have brown tips, focus on fixing the cause first. Trimming is cosmetic. Fixing the root issue prevents new brown tips from forming.
The Propagation Workflow: From Single Plant to Overflowing Collection
Spider plants earn their reputation as gifting plants because they produce offsets so reliably. Those little spiderettes, or pups, are complete baby plants that root quickly and grow fast. Once your plant is healthy and root bound, it will send out long stems covered in small white flowers, followed by plantlets at the ends.
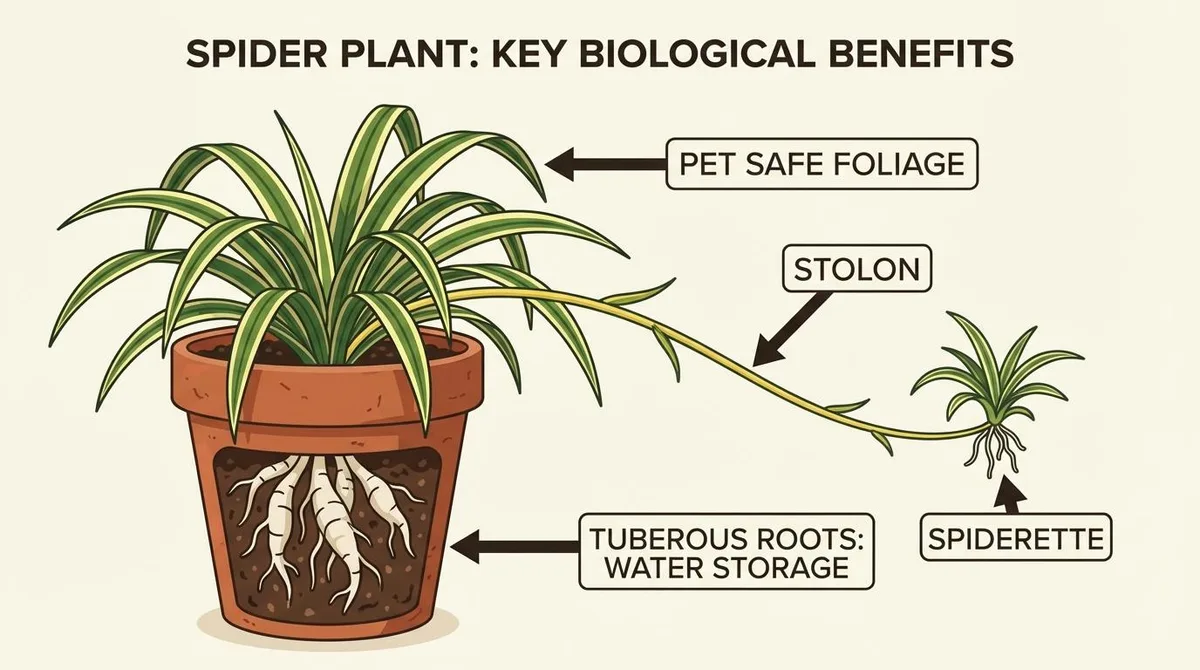
Image source: Bing (Web (fair-use with source credit))
Here is the step by step propagation workflow that works every time.
Step 1: Wait for roots
Do not cut a spiderette off until it has visible roots at least one to two inches long. If the baby looks like a tiny plant but has no roots, leave it attached to the mother. It is still receiving nutrients through the stolon.
Trying to root a rootless baby is possible but much harder.
Step 2: Snip the stem
Use clean scissors or pruning shears. Cut the stolon about one inch from the base of the baby plant. You do not need to cut the whole stem off the mother unless you want to.
Some people leave the stem attached and root the baby in a separate pot while it is still connected. That works great too.
Step 3: Pot the baby
Fill a small pot, about two to three inches in diameter, with moist potting mix. Make a small hole in the center. Place the baby's roots into the hole and gently press the soil around them.
The crown of the plant, where the leaves meet the roots, should sit just above the soil line.
Step 4: Keep the soil moist for the first two weeks
Newly potted spiderettes need consistent moisture while they establish roots. Water lightly every two to three days for the first two weeks. After that, treat it like a mature plant and use the finger test.
Step 5: Provide bright indirect light
Place the baby in bright indirect light. Direct sun will scorch the small leaves. A spot near an east window or a few feet from a south window works well.
Success rate and timeline:
- About 90 percent of spiderettes root successfully with this method.
- Roots begin growing into the soil within 7 to 14 days.
- The baby will show new leaf growth within three to four weeks.
- It will be ready for a slightly larger pot in about three months.
If you prefer, you can root spiderettes in water first. Place the baby in a small jar with just the roots submerged. Change the water weekly.
Once the roots reach about two inches, transfer to soil. Water rooting is slower but fun to watch.



