Your pruning shears crushed the branch instead of cutting it. To sharpen pruning shears correctly, you need to start by looking, not grinding. A jagged, mashed cut is a telltale sign of a dull edge.
The fix takes fifteen minutes once you know the steps.
Most bypass pruners carry a single bevel ground at 20 to 25 degrees, and the flat side stays untouched. Sharpening the wrong side is the fastest way to ruin a good tool. As of 2026, even entry-level shears from major manufacturers use hardened steel that holds an edge for years if you maintain it right.
The smart approach starts with your eyes, not your hands.
Quick Answer
To sharpen pruning shears, clean the blades first. Match the existing bevel angle with a file or stone. Push only away from your body, keeping the angle flat.
Feel for the burr, then remove it with light passes. Lubricate the pivot and test on paper.
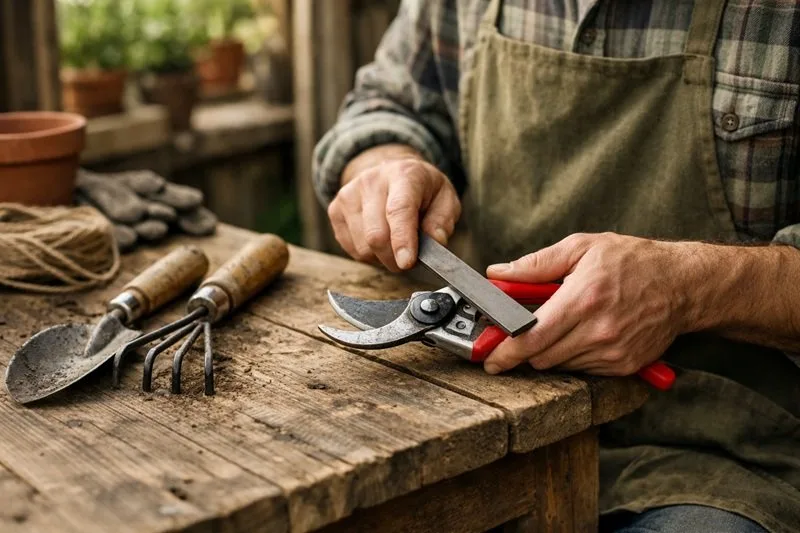
Image source: Web (Bing) / practicalbackyard.com (Web image (fair-use with source credit))
Why the Visual Side of Sharpening Matters More Than You Think
Skip the visual step and you're working blind. A dull edge can look many ways: a rolled-over tip, a nick, a worn and rounded corner, or a blade covered in pitch. Each one needs a slightly different fix.
That's why the first ten seconds of sharpening should be looking, not filing.
The human eye, even with a simple magnifying glass, can spot the glint of a rounded bevel. That glint means the edge got polished into a curve instead of meeting at a point. Rotate the blade slowly under the light.
If you see a bright line running along the cutting edge, the apex is rounded. A crisp bevel, by contrast, reflects light in a clean, even plane.
Then use the marker trick. Color the bevel with a permanent marker, and take one pass with the file. The ink disappears only where metal actually touches metal.
That visual feedback tells you whether your angle is right before you remove too much steel.
Our research across manufacturer guides and university extension materials keeps coming back to the same point: people mess up when they can't see the bevel. They guess. They rock the file.
They sharpen both sides. Every one of those mistakes is preventable with two seconds of visual inspection.
So set up a bright light, or work near a window. Right-angle lamps or a shop light work great. You don't need magnification for most blades, though reading glasses help on small pruners.
What you need is enough light to see the edge profile clearly.
Think about what a visual guide does that text can't. A written instruction like "keep the file flat" leaves too much to interpretation. A single photo of the file seated on the bevel, viewed from the end, removes all doubt.
That's the real reason this skill trips people up.
What You're Actually Looking For: Blade Anatomy and the Bevel
Before you touch anything, understand what you're working with. Most hand pruners fall into two categories: bypass and anvil.
Bypass shears work like scissors. Two blades pass each other, slicing through the stem. Usually only one blade gets a bevel, ground on the outside face at 20 to 25 degrees.
The inner face stays flat. The bevel does the cutting, and the flat side guides the blade past the hook.
Anvil shears work like a knife against a cutting board. A single beveled blade presses down onto a soft metal anvil. That anvil takes the impact, so anvil pruners often use a slightly steeper angle, closer to 30 degrees.
Here's where most guides lose people. They say "sharpen the beveled side," but never show you which side that is. If you hold a bypass pruner with the bevel facing you, you'll see a visible slope from the spine down to the edge.
Flip it over and the back is flat and shiny.
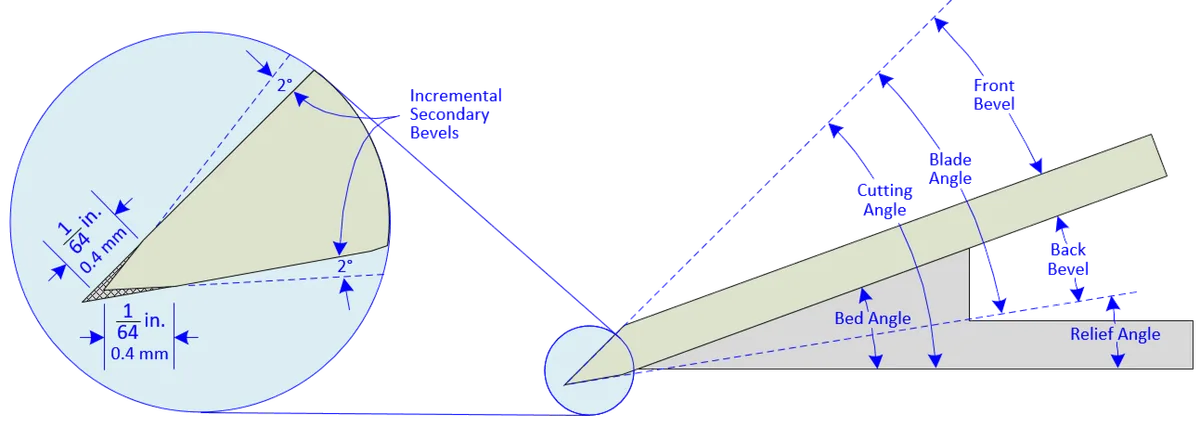
Image source: Web (Bing) / storage.googleapis.com (Web image (fair-use with source credit))
Manufacturer specifications from Felco, whose tools set the benchmark for hand pruners, indicate bevel angles around 23 degrees. You don't need a digital angle gauge. A simple visual match is enough.
Set the file or stone to the existing bevel, not to an exact number.
One more piece of anatomy: the edge apex. That's the thin line where the bevel meets the back. When you feel a burr, you're feeling displaced metal curling over that apex.
That burr is your visual and tactile confirmation that you've worked the edge to a sharp point.
| Feature | Bypass | Anvil |
|---|---|---|
| Cutting action | Blades pass each other | Blade presses onto anvil |
| Bevel location | One side, outer face | One side, cutting face |
| Typical angle | 20 to 25 degrees | 25 to 30 degrees |
| Sharpening risk | Flat side often ruined | Edges chip on hard stems |
Now, before you file anything, run the visual checklist.
The Visual Checklist You Need Before You Start
Sharpening a dirty blade is like sanding a muddy table. Every bit of dried sap and pitch clogs the stone and hides the edge. Clean both blades with warm soapy water and a stiff brush.
Dry them completely.
Then inspect. Hold the blade up to the light and look for three things: nicks, rust, and rounding. A nick looks like a tiny V-shaped chip in the edge.
Surface rust shows up as orange or brown discoloration. A rounded edge glints when you tilt it under the light, meaning the apex is rolled over, not sharp.
Loose pivot? That's part of the checklist too. If the blades wobble, they won't cut cleanly, even with a razor-sharp edge.
Tighten the pivot bolt so the blades move with light resistance but no side-to-side play. A drop of lubricant on the joint works wonders.
| Tools and Materials | Purpose |
|---|---|
| Diamond stone or flat file | Main sharpening surface |
| Ceramic rod or leather strop | Burr removal and polishing |
| 3-in-1 oil or honing oil | Lubrication and rust prevention |
| Safety glasses | Protect eyes from metal filings |
| Work gloves | Cut protection |
| Vise or C-clamp | Hold the shear steady |
| Permanent marker | Shows where metal is removed |
Mark the bevel with a permanent marker before you start. This is the single best trick for visual learners. Take one pass with the file, then look at what the ink reveals.
If the ink is removed evenly along the bevel, your angle is right. If only the bottom or top half is clean, you're angled wrong. Adjust until the ink comes off evenly.
Now secure the shear. Clamp it in a vise or use a C-clamp on a workbench. Never hold the pruner in one hand while filing with the other.
Slipping is not a matter of if, only when. Gloves and glasses make the job safer, but a solid clamp does more than both.
How to Sharpen Pruning Shears: A Step-by-Step Visual Guide
Here's the method that works for both bypass and anvil pruners, with small adjustments noted.
Step 1. Start with the blade secured in the vise, bevel facing up. Lay the file or stone flat against the bevel. Match the angle you found earlier.
If you marked the bevel with a marker, you'll see exactly where to spend your strokes.
Step 2. Push the file or stone along the bevel, moving away from your body. One direction only. Lift on the return stroke.
Never drag it backward, because that rolls the edge.
Step 3. Work the full length of the blade in slow, deliberate sweeps. Overlap each pass slightly. After five or six strokes, check the marker.
Adjust your angle if the ink wears unevenly.
Step 4. Switch grit when the edge feels uniform. Most blades need only a medium grit, around 400 to 600. If the edge has nicks, start coarse at 220, then move to medium, then finish with a fine 1000-grit pass for a polished edge.
| Grit | When to Use |
|---|---|
| 220 coarse | Nicks, chips, very dull edges |
| 400 to 600 medium | Regular sharpening |
| 1000 fine | Polishing and edge refinement |
| Strop or ceramic rod | Burr removal and final honing |
Step 5. After a few strokes on the medium grit, run your thumb lightly across the flat side of the blade. You'll feel a tiny metal lip. That's the burr, the displaced metal folding over the edge's apex.
The burr running the full length of the blade means the edge is finally thin enough.
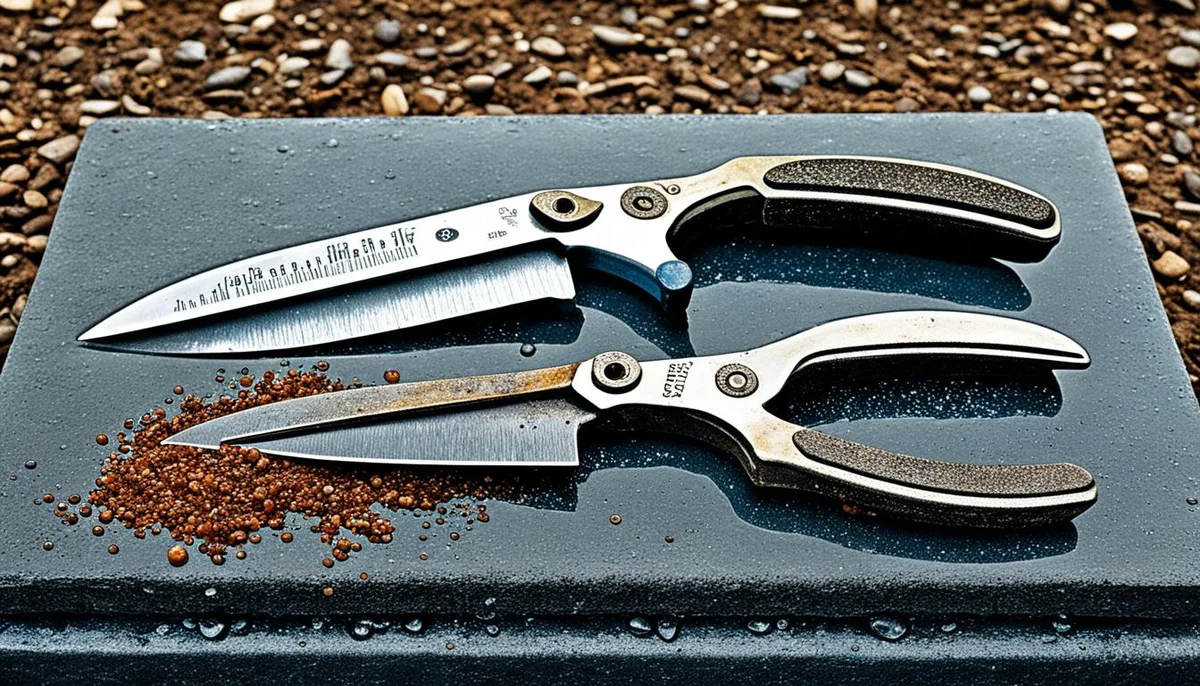
Image source: Web (Bing) / sublimegardens.co.uk (Web image (fair-use with source credit))
Step 6. Now flip the blade over and lay the stone flat against the back side. Absolutely flat, no angle. Two or three light passes remove the burr without creating a new bevel.
A ceramic rod or leather strop works even better for this step.
Step 7. Oil the pivot with a drop of 3-in-1 oil. Work the blades open and closed a few times. Then test the cut on a piece of paper or a green twig.
A sharp pruner slices cleanly with minimal pressure. If it still crushes, you likely tilted the bevel angle and need to repeat, watching that marker.
Expect the whole job to take five to fifteen minutes. The first time may feel fiddly. By the third pair of shears, you'll move with confidence.
The #1 Mistake People Make (And How to Spot It)
The single most common mistake is sharpening the wrong side. People assume both sides need work because most knives have a double bevel. So they flip the pruner over and file the flat back.
That's the fastest way to ruin a good shear.
The flat side is a plane. It guides the blade and gives the edge its geometry. Once you start grinding it, the edge becomes a V shape instead of a chisel shape.
A V-shaped edge on a pruner wedges into wood, binds, and dulls almost immediately. You'll notice the cut feels "grabby," or the blade sticks halfway through a thick stem.
How to spot it on your own shears: look for scratches running across the flat side, parallel to the edge. Factory blades have a consistent, uniform finish. Hand sanding leaves inconsistent, directional marks.
If you see that, you've been sharpening the wrong face.
The second major mistake is speed. Power tools like bench grinders and rotary sharpeners remove metal fast, but they also generate heat. Heat above 300 degrees Fahrenheit ruins the blade's temper, the heat treatment that makes the steel hard.
Discoloration in the form of blue or brown blotches near the edge is the telltale sign. Once that happens, no amount of sharpening helps. The edge will keep rolling over.
Then there's the rocking motion. It happens when you don't control the file's angle across the blade. Instead of Instead of keeping the file locked at one angle, you push the handle up halfway along the stroke.
The edge ends up rounded, not flat. That rounded edge never cuts well because it contacts the branch at an inconsistent point.
The fix for all three mistakes is the marker trick. Mark the bevel. Take one stroke.
Look at where the ink remains. If you're rocking, the wear pattern will show a crescent instead of a clean strip. If you're on the wrong side, the marker won't wear at all because you're filing a surface that never contacts the branch.
If heat has ruined the steel, the discoloration is already there before you start.
Aggregate reviews from experienced gardeners and arborists confirm that catching these mistakes early saves a pair of shears. Waiting until after a full sharpening session means you've already removed good metal.
How to Check Your Work: The Paper Test and the Burr Check
Sharpening isn't done until you verify the result. Two quick tests tell you everything.
First, the burr check. Run your thumb lightly across the flat side of the blade, perpendicular to the edge. You should feel a faint catch, like a tiny wire.
That's the burr, and it confirms you've worked the metal thin enough. If you feel nothing, the edge is still dull and needs more strokes on the bevel.
Second, the paper test. Hold a piece of printer paper with one hand. Draw the blade through it at a slight angle, same direction you'd cut.
A sharp pruner slices through with no tearing. If the paper crumples or tears rather than cuts, go back to the stone.
For a more practical test, snip a green twig about a quarter inch thick. A sharp blade makes a clean, smooth cut with a single squeeze. A dull blade crushes the bark, leaves frayed fibers, or requires extra force.
Keep testing until you feel a crisp, effortless cut.
One more thing: check the pivot tension after sharpening. Sometimes removing metal changes how the blades align. Open and close the shears a few times.
If they feel loose, tighten the bolt an eighth of a turn. If they bind, back it off. The goal is smooth motion with no side wobble.
Pro Tips and Maintenance for Keeping That Edge
Sharpening is only half the story. Keeping that edge sharp between sessions saves you work later.
Clean after every use. Dried sap is acidic and dulls steel fast. Wipe the blades with a rag or rinse them with water. Dry immediately.
Never let them soak.
Oil the pivot monthly. A single drop of 3-in-1 oil keeps the joint smooth. Work it in by opening and closing the shears a few times. Wipe off the excess so it doesn't attract dirt.
Store shears closed and dry. Throw them loose in a damp tool bucket and you'll find rust within days. A holster, a hook, or a dedicated drawer works much better. For long winter storage, spray the blades with a thin coat of rust preventive oil.
Strop between sharpenings. A quick swipe on a leather strop every few pruning sessions realigns the edge and postpones the need for a full sharpening. It takes thirty seconds.
Know when to stop. After ten to fifteen sharpenings, the bevel gets wider and the blade wears thin. At that point, replace the blade or buy new shears. A blade that feels fragile or refuses to hold an edge is telling you it's done.
Frequently Asked Questions
How often should I sharpen pruning shears?
For regular home garden use, sharpen once or twice per season. Professional landscapers may need to sharpen every few weeks, especially when working with thick or dirty branches. Watch for crushed stems as your signal.
Can I use a bench grinder to sharpen pruning shears?
No. Bench grinders generate too much heat and ruin the blade's temper. The edge will lose hardness and dull quickly.
Stick to hand files, diamond stones, or whetstones.
Do anvil pruners get sharpened differently than bypass pruners?
The technique is the same. Both use a single bevel sharpened on the cutting face. Anvil pruners often have a wider bevel angle around 30 degrees.
The anvil itself should never be sharpened, only replaced if worn.
What does a burr feel like?
A burr feels like a tiny rough ridge or wire. Run your thumb gently across the flat back of the blade. If you feel a slight catch or texture, the burr is present.
That means your bevel is fully sharpened.
Why does my pruner cut well at the tip but crush near the base?
That's a sign of an uneven bevel or inconsistent sharpening. You likely spent more strokes near the tip than toward the pivot. Mark the bevel and take even strokes across the full length of the blade.
Can I sharpen pruners with sandpaper?
In a pinch, yes. Wrap 400-grit sandpaper around a flat block and use the same technique as a stone. It works best on clean blades with light dullness.
Sandpaper wears out fast, so keep a fresh section ready.