If you’ve ever stared at a seed packet in January and wished you could get a head start without setting up grow lights in your living room, winter sowing might be exactly what you need. The trick is knowing which seeds to winter sow, and more importantly, which ones will actually thrive with this method.
University extension research confirms that winter sowing works by mimicking natural cold stratification, the same process seeds go through when they fall to the ground in autumn and sprout in spring. For many cold-tolerant perennials, germination rates can top 80 percent, often matching or beating indoor setups. Let’s walk through how it works, whether it fits your situation, and the exact steps to get it right.
Quick Answer
Winter sowing means starting seeds outdoors in recycled plastic containers during winter. Seeds get natural cold and moisture. They germinate when temperatures rise in spring.
The method works best for hardy perennials, many native plants, and cold-tolerant vegetables like kale and spinach. Tender annuals and warm-season crops usually fail.
What Is Winter Sowing (And How Does It Actually Work?)
At its core, winter sowing is pretty simple. You plant seeds in a container, most people use recycled milk jugs or clear plastic soda bottles, poke drainage holes in the bottom, cut the container nearly in half and leave a hinge, add a seeding mix, sow the seeds, tape the whole thing shut, and leave it outside through the cold months.
The magic is in the natural cycle. Many seeds, especially perennials and wildflowers, require a period of cold and moisture before they will germinate. This is called cold stratification.
Indoors, you would have to fake this by putting seeds in the refrigerator for weeks. Winter sowing outsources that work to Mother Nature.
The plastic container acts like a mini greenhouse. When winter sun warms the jug, moisture condenses inside and keeps the soil damp. When temperatures drop again, seeds rest safely.
As spring arrives and the days get longer, the seeds sense the warmth and light cues and sprout on their own schedule.
What makes this method especially appealing is how low-effort it is. Once you set up your jugs, you barely touch them until transplant time. No hardening off, no daily watering, no worrying about leggy seedlings.
The plants that emerge are naturally tough, because they have been outside the whole time.
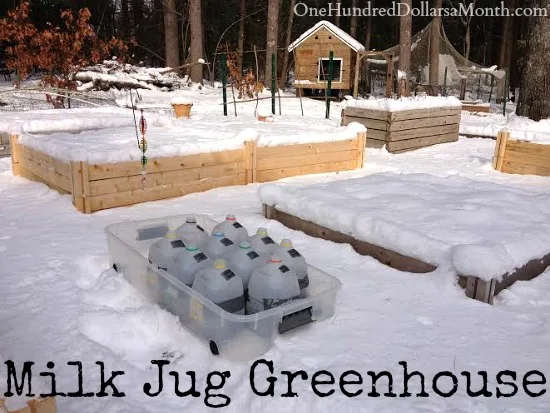
Image source: Web (Bing) / onehundreddollarsamonth.com (Web image (fair-use with source credit))
As of 2026, gardeners in cold climates continue to refine the technique, but the basic science has not changed. Seeds that need cold to germinate are the best candidates. Seeds that are sensitive to damp cold or that need steady warmth will not survive a winter outdoors.
Will Winter Sowing Work For You? (A Simple Decision Tree)
Not every gardener will get good results with winter sowing. Your climate, your seed choices, and your setup all matter. Let’s run through the three most important conditions so you can decide if it is worth your time.
Is Your Climate Cold Enough?
Winter sowing relies on consistent cold weather and a freeze-thaw cycle. It works best in USDA hardiness zones 3 through 7. If you live in a region where winter temperatures regularly dip below freezing and stay there for at least eight weeks, you are in the sweet spot.
In zones 8 and above, winters are too mild. Seeds may germinate too early during a warm spell, then get killed by a late frost. You can still try with a few hardy species, but do not expect high success rates.
In zones 9 and 10, this method is generally not recommended.
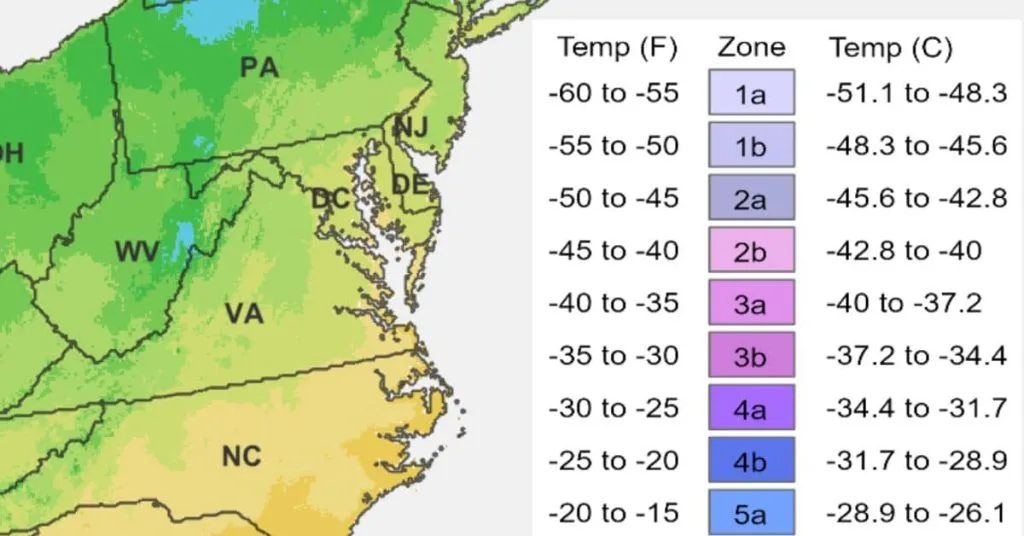
Image source: Bing (Web (fair-use with source credit))
If you are not sure what zone you are in, the USDA Hardiness Zone map is a good place to start. University extension offices in your state can also provide more localized guidance.
Are Your Seeds the Right Type?
This is the most common reason winter sowing fails. People try it with tomatoes, peppers, basil, or other warm-season crops, and the seeds rot or never germinate. Those seeds do not need cold; they need warmth.
Seeds that work well for winter sowing include:
- Hardy perennials like coneflower, black-eyed Susan, lupine, and Joe-Pye weed
- Native wildflowers that naturally drop seed in fall (most of them)
- Cold-tolerant vegetables such as kale, spinach, chard, and Brussels sprouts
- Hardy herbs including chives, parsley, and dill
Seeds that almost never work:
- Warm-season vegetables like tomatoes, peppers, eggplants, squash, and cucumbers
- Tender annuals such as marigolds, zinnias, and impatiens
- Tropical or subtropical species
Check the seed packet for any mention of cold stratification. If it says “sow indoors eight weeks before last frost” and says nothing about cold treatment, it probably will not survive winter sowing.
Do You Have the Containers and Space?
You do not need fancy equipment. A gallon-size milk jug, a few inches of seed-starting mix, and some duct tape are enough for your first try. You also need a spot outdoors that is sheltered from strong winds and gets some winter sun.
If you live in an apartment with a balcony, you can still do winter sowing. The jugs are small enough to tuck into a corner. Just make sure they cannot blow off in a storm.
Weight them with a rock or a brick if needed.
If you have a yard, choose a spot that is not in a low area where water pools. Too much moisture causes rot. A spot near a south-facing wall works well because it gets some warmth on sunny days.
Step-by-Step: Setting Up Your First Winter Sowing Jugs
Once you have confirmed that your climate and seeds are a good fit, the process is straightforward. Here is exactly what to do.
What you will need:
- Clear or translucent plastic milk jugs (gallon size) or similar containers
- Seed-starting mix (light, sterile, not garden soil)
- Duct tape
- Permanent marker for labels
- A knife or scissors for cutting
- A hot nail or drill for drainage holes
Step 1: Prepare the container. Wash the jug and remove the label. Use a knife to cut around the middle, about four inches from the bottom, but leave a two-inch hinge so the top can open and close like a clamshell. Remove the cap and set it aside, you will leave it off permanently.
Step 2: Add drainage. Poke four to six holes in the bottom of the jug with a hot nail or a drill. Without drainage, seeds will rot.
Step 3: Fill with mix. Dampen your seed-starting mix until it feels like a wrung-out sponge. Fill the bottom half of the jug about three inches deep. Do not pack it down.
Step 4: Sow the seeds. Follow the depth guidelines on the seed packet. Tiny seeds just need a light dusting of mix. Larger seeds go a quarter-inch deep or slightly more.
Step 5: Label. Write the seed name and date on the jug with a permanent marker. Labels fade outside, so go over them once more after the tape goes on.
Step 6: Seal and place. Fold the top half closed over the soil. Tape all the way around the cut line with duct tape to keep the halves together. Leave the cap off so rain and snow can enter.
Set the jug in your chosen outdoor spot, in a location that gets some sun but is not exposed to constant wind.
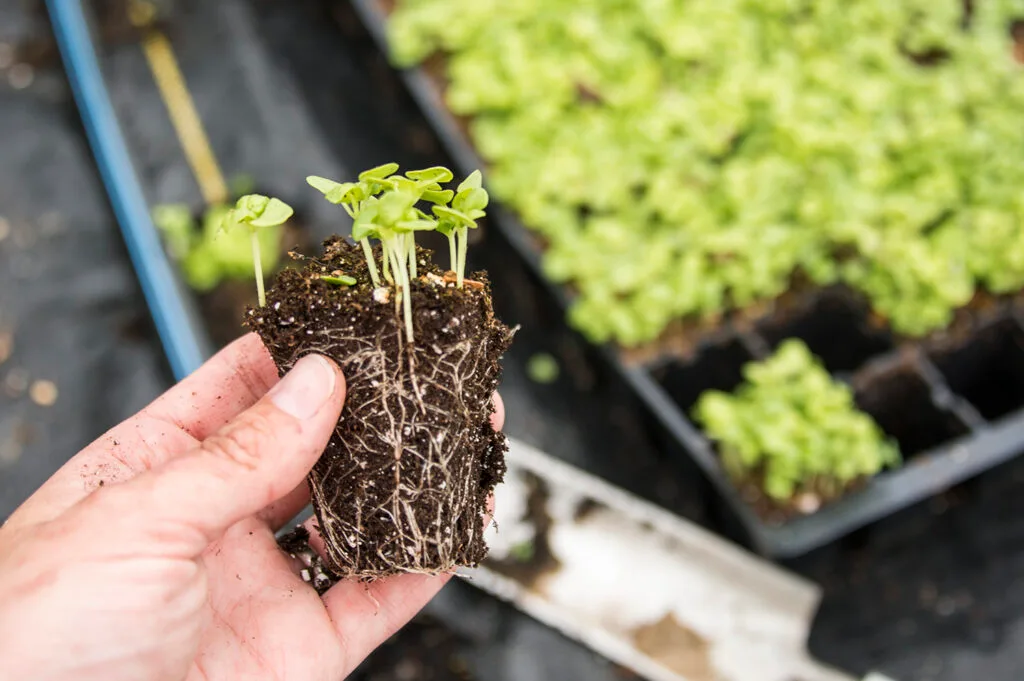
Image source: Bing (Web (fair-use with source credit))
Step 7: Wait. Check the jugs once a month if you are curious, but there is not much to do. If the mix looks bone dry during a warm spell, add a little water through the top opening. If it looks soggy, open the top for a few hours to let excess moisture escape.
When you see green sprouts, congratulations, it worked. Leave the jugs alone until the seedlings have two to four true leaves and outdoor temperatures are above freezing consistently. Then you can gently transplant them into your garden.
There is no need to harden them off, because they have been outside the whole time.
Common Winter Sowing Mistakes (And How to Avoid Them)
Winter sowing is forgiving, but a few mistakes can ruin your batch. Here are the most common ones we see in user reports and garden forums, plus how to steer clear.
Mistake 1: Using the wrong soil. Garden soil holds too much moisture and can introduce weed seeds or pathogens. Use a sterile seed-starting mix every time. It stays light and drains well.
Mistake 2: Overwatering or underwatering after setup. The jug’s open cap lets rain and snow in naturally. In most climates, you never need to water until spring. If you live in a dry area or get a long dry spell, check every few weeks and add water sparingly.
Mistake 3: Leaving the cap on. The cap traps too much moisture. Remove it before you place the jug outside. Rain and snow will enter through the open neck, and excess moisture can escape through the same opening and the drainage holes.
Mistake 4: Using opaque containers. Seeds need light to germinate once temperatures rise. Brown or green jugs block too much light. Use clear or translucent containers.
Milk jugs that are slightly cloudy still work fine, as long as some light passes through.
Mistake 5: Placing jugs in full midday sun. In late winter, strong sun can cook the inside of a sealed jug. On a 40-degree day, the interior can reach 80 degrees or more. That tricks seeds into germinating too early, and a subsequent freeze kills them.
Place jugs where they get morning sun or dappled light, not direct noon sun.
Mistake 6: Starting too late. The whole point is that seeds experience winter cold. If you start in March, they may not get enough chilling hours before spring arrives. Aim for December through February in most cold climates.
If you are in zone 6 or colder, December is ideal.
Mistake 7: Not anchoring the jugs. A strong wind can tip over empty or light jugs. Weight them with a rock or brick on top, or nestle them into a snowbank. Once snow melts, you can relocate them to a sheltered corner.
Mistake 8: Transplanting too early or too late. Seedlings need at least two sets of true leaves before they go into the ground. But do not leave them in the jug so long that they become rootbound or leggy. Check weekly once they sprout.
If you see roots poking out the drainage holes, it is time to transplant.
Winter Sowing vs. Other Seed Starting Methods (What Fits Your Situation)
Winter sowing is not the only way to start seeds. But it fills a specific niche that other methods do not. Here is how it compares to the main alternatives so you can pick what fits your setup.
Vs. Indoor seed starting with grow lights. Indoor starting gives you control over temperature and light. You can start seeds earlier and grow a wider range of plants.
The downside is cost and space. Grow lights, heat mats, and shelving add up fast. You also have to harden off seedlings before transplanting.
Winter sowing skips all of that. It costs nearly nothing and requires almost no daily attention.
Vs. Direct sowing in the garden. Direct sowing works well for many vegetables and annuals, but it has a narrow window. If spring is rainy, seeds can rot in the ground.
If it is dry, they may not germinate at all. Winter sowing gives you a head start without indoor equipment.
Vs. Cold frames. A cold frame is a great tool if you have the space and are willing to build or buy one. But it costs more than recycled milk jugs and takes up more room.
Winter sowing containers are portable and stackable. You can start dozens of seed varieties in a few square feet.
Vs. Refrigerator stratification. Some gardeners put seeds in damp sand or a paper towel in the fridge for six to twelve weeks. That works, but it takes up fridge space and requires monitoring.
Winter sowing naturalizes the process with zero refrigerator real estate.
Who winter sowing is best for: Gardeners in cold climates who want to grow perennials, native plants, or cold-hardy vegetables with minimal effort and expense.
Who should skip it: Gardeners in mild climates, anyone wanting to grow warm-season crops early, and folks who want complete control over every variable.
Frequently Asked Questions
Can I use any plastic container for winter sowing?
Clear or translucent gallon jugs work best because they let light through. Milk jugs, soda bottles, and water jugs are ideal. Opaque containers like dark detergent bottles block too much light.
Do I need to water my winter sowing jugs?
Usually not. Rain and snow enter through the open cap and keep the mix moist. If you hit an unusually dry stretch in late winter, add a splash of water through the top.
If the mix looks soggy, open the jug briefly to let moisture escape.
When should I start winter sowing?
In zones 3 through 6, December through January is ideal. February still works for many species. In zones 7 and higher, wait until January or February so seeds do not germinate too early during a warm spell.
What seeds should I not winter sow?
Avoid warm-season vegetables like tomatoes, peppers, eggplant, and squash. Tender annuals like marigolds and zinnias also fail. Tropical plants and any seed that needs steady warmth to germinate will rot or never sprout.
How long does it take for winter-sown seeds to germinate?
It depends on the species and your local weather. Most seeds germinate in spring when soil temperatures rise consistently, usually March through May. Some native plants may take two to three months after the first warm days.
Do I need to harden off winter-sown seedlings?
No. Because the seedlings have been outside the entire time, they are already acclimated to outdoor conditions. You can transplant them straight into the garden once they have two to four true leaves and frost risk has passed.
Quick Decision Guide
Winter sowing is a good fit if you live in a cold climate, want to grow hardy perennials or cold-tolerant vegetables, and prefer a low-cost hands-off method. It is a poor fit if you are in a mild zone, want to start tomatoes and peppers early, or need precise control over germination conditions.
Here is a quick summary of the decision points:
| Condition | Winter Sowing Works | Winter Sowing Fails |
|---|---|---|
| Climate | USDA zones 3 to 7 | Zones 8 and warmer |
| Seed type | Perennials, natives, hardy veggies | Warm-season crops, tender annuals |
| Time investment | Minimal after setup | Needs regular checks only in spring |
| Cost | Near zero (recycled jugs) | N/A |
If you checked yes on climate and seed type, go ahead and try it. Start with five to ten jugs of different species. Note what germinates and what does not.
Over time, you will learn which seeds thrive in your specific yard and which are better started indoors or direct sown.
Winter sowing is not a complete replacement for other methods. It is a complementary tool that fills a specific gap. Use it for the seeds it handles well, and save your indoor space for the warmth-loving crops that genuinely need it.



