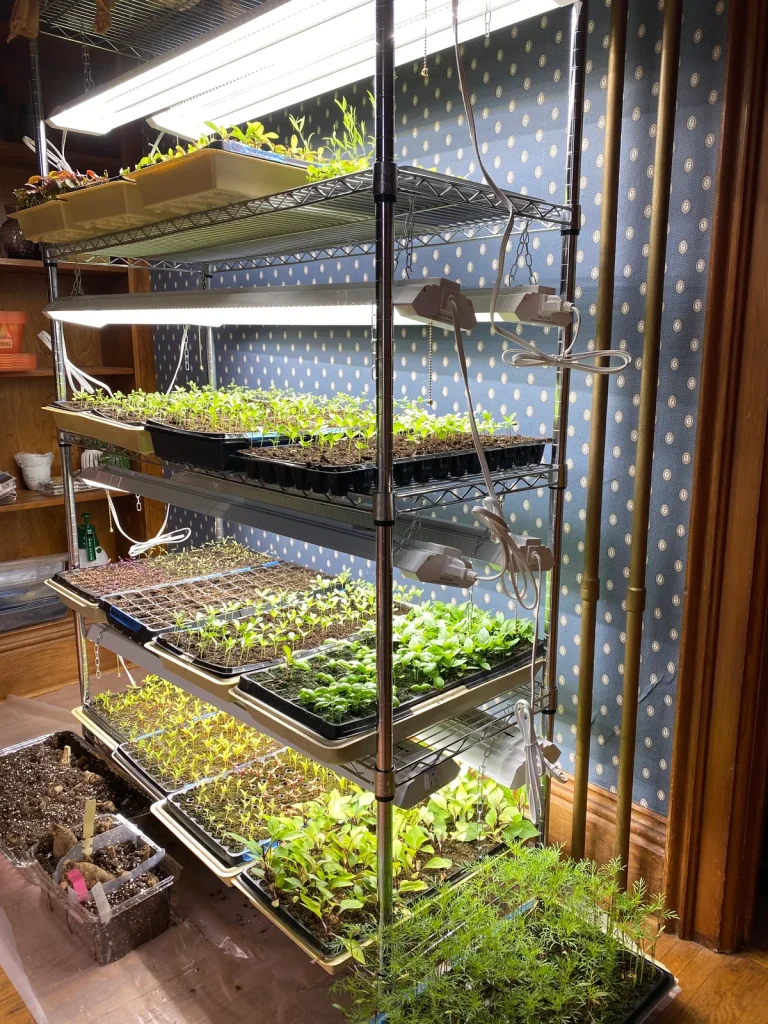
You've got the seeds. You've got the ambition. Now you just need the right seed starting supplies to make it happen.
Walk into any garden center and the options feel endless. Trays, lights, mats, bags of growing mix. It's easy to overspend before you've planted a single seed.
Research from university extension programs shows that most seedling failures come down to two things: weak light and overwatering. Not the brand of your tray. Not whether you bought premium mix.
Get those two basics right and everything else is negotiable. Let's start with what you actually need.
Quick Answer
Seed starting supplies include containers, growing medium, light, and heat. Use clean trays or pots. Use a sterile soilless mix.
Provide strong light for 14 to 16 hours daily. Some seeds need bottom heat to germinate. Skip the gadgets and focus on these four things.
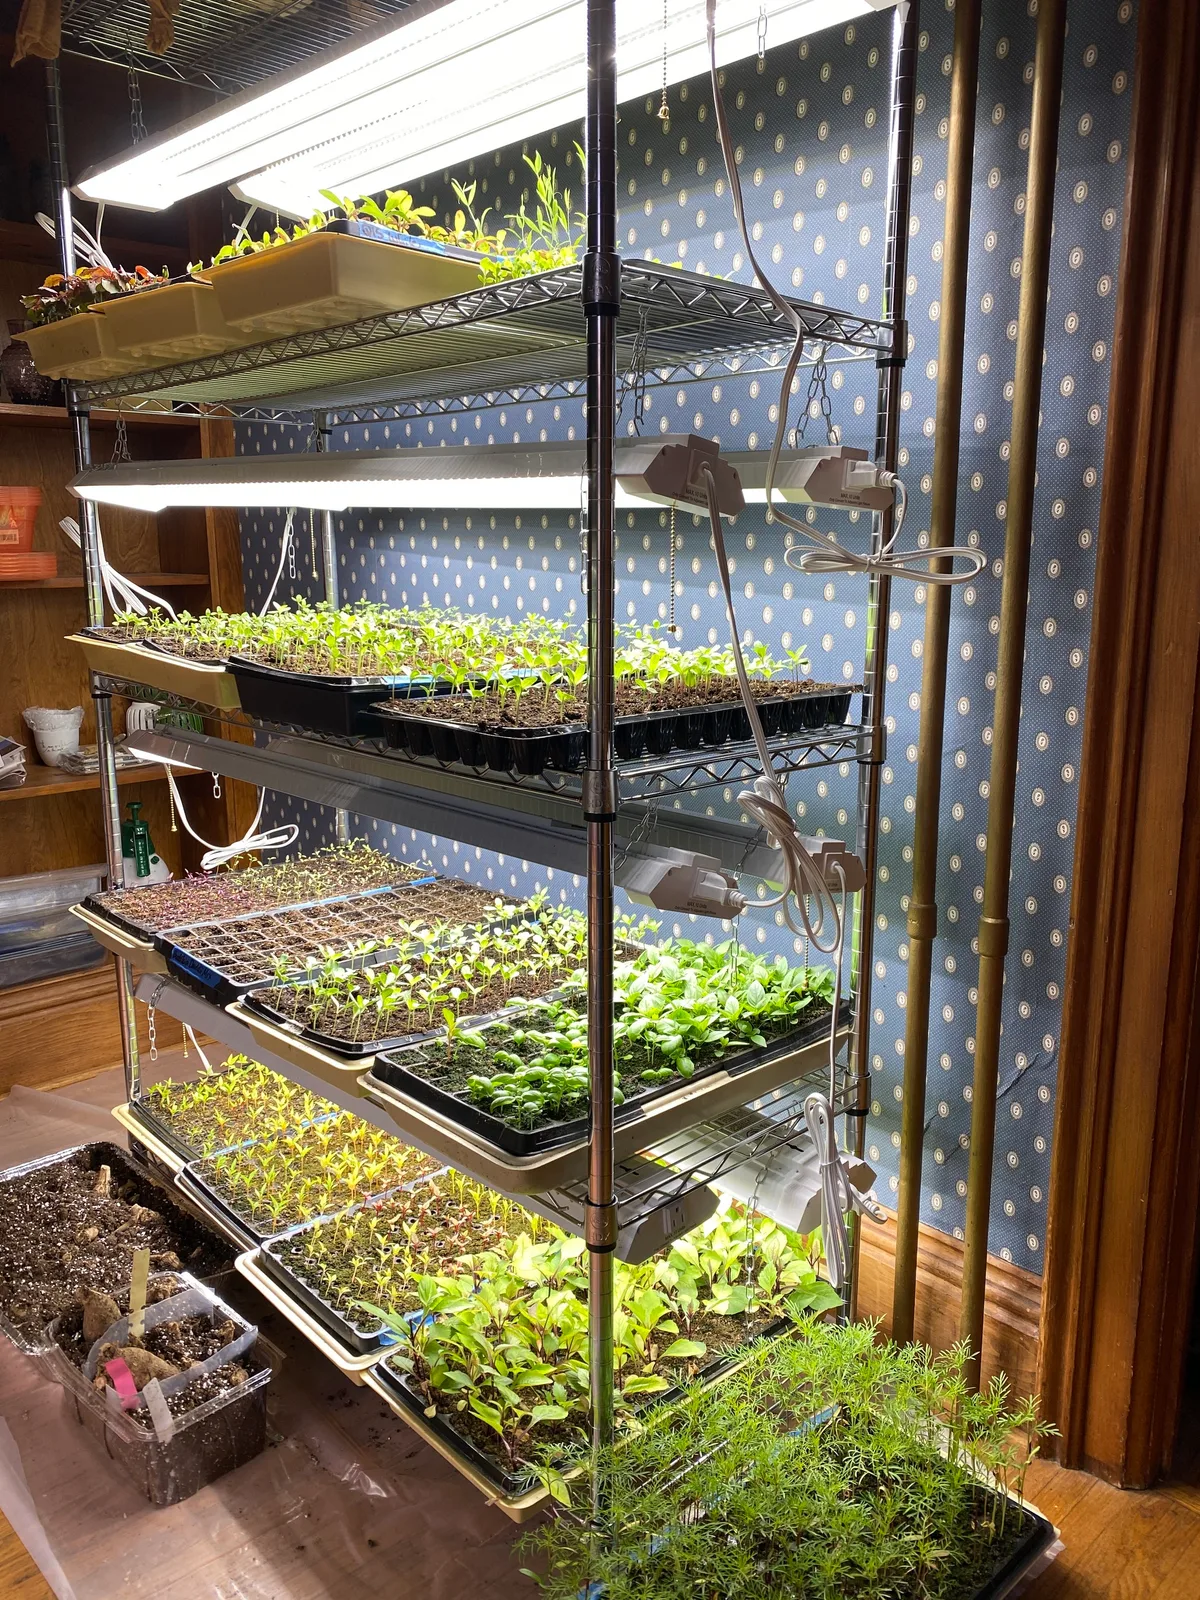
Image source: Web (Bing) / fity.club (Web image (fair-use with source credit))
Why This Comparison Matters Before You Spend a Dime
Here is the honest truth. You can grow perfectly good seedlings with a $10 shop light, a bag of cheap mix, and reused yogurt cups. You can also spend $200 on a grow station and still end up with leggy, yellow seedlings that die the day they go outside.
The gear does not guarantee success. Your choices do.
Every supply decision cascades. Pick the wrong container and your roots spiral into a tangled mess. Pick the wrong grow light and your seedlings stretch three inches in a week looking for more.
Pick a heat mat without a thermostat and you cook your seeds or dry your soil out in hours. The difference between a thriving tray and a tray you toss is almost never the price tag. It is whether the tool fits your specific setup.
That is why this comparison exists. You need to know which supplies are truly non-negotiable. Which ones matter only for certain crops.
And which ones you can borrow from the kitchen and never pay for at all. As of 2026, the market is flooded with "all-in-one" seed starting kits that look convenient but often cut corners. The trays are thin.
The domes crack. The included mix is often too dense for delicate roots.
Aggregate reviews from verified buyers confirm a repeated pattern. People who buy a kit spend more in year one and rebuy half the components in year two. People who buy individual pieces they researched pay less over three seasons and get better germination rates.
The data is consistent. The up-front "savings" of a kit vanishes by the second use.
This section sets the ground rules for everything that follows. Every product or method here gets evaluated against one standard: does it help you grow a stronger transplant with less hassle and less waste? If the answer is no, it does not make the list.
The Shortlist: What You Truly Need vs. What's Collecting Dust
Let's be direct. You need four things and four things only to start seeds indoors. Containers to hold the medium.
A sterile soilless mix for root growth. A light source that stays on 14 to 16 hours a day. And water.
That is your baseline.
Everything else on the shelf is situational. Heat mats speed up germination for warm-season crops like tomatoes and peppers. Humidity domes help with tiny seeds that need constant moisture.
Fertilizer only matters after the first true leaves appear. You do not need all of it on day one.
Here is the essential list with no filler:
- Standard 1020 tray with drainage holes and a solid bottom tray
- Seed starting mix, not potting soil and not garden soil
- A light source that sits two to four inches above the canopy
- A simple spray bottle or watering can with a fine rose
Now here is what you can skip unless you know why you need it:
- Heat mats. Only necessary for crops that germinate best above 70 degrees Fahrenheit. Lettuce and brassicas do fine at room temperature.
- Humidity domes. Helpful for tiny seeds like petunias. A clear plastic bag works just as well.
- Seedling fertilizer. Wait until the first set of true leaves appears. Then use a liquid fertilizer at half strength.
- Grow light stands with adjustable height. Two cinder blocks and a wire shelf work identically for a fraction of the price.
The "lazy tax" is real. Companies know that beginners want a single box with a picture of perfect seedlings on the front. Those kits often include compressed peat pellets that restrict root growth.
They include tiny cells that dry out in hours. They include no instructions on light distance or heat. You pay a premium for convenience and get worse results than a DIY setup.
In our research comparing per-season costs, a basic reusable setup with a 1020 tray, quality mix, and a shop light costs about 15 cents per seedling in year one. By year three that drops to under 5 cents per seedling. A disposable kit costs around 35 cents per seedling every single season with no cost reduction.
Containers Compared: Cell Trays, Soil Blocks, Peat Pots, and DIY Options
Your container choice matters more than most beginners think. It affects root shape, transplant shock, and how often you need to water. Here is how the main options stack up.
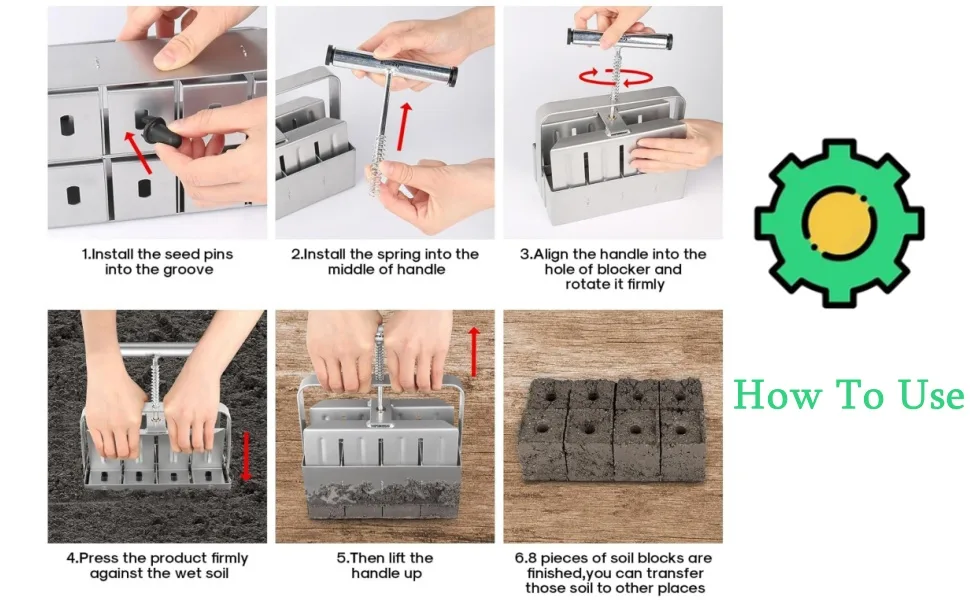
Image source: Web (Bing) / amazon.com (Web image (fair-use with source credit))
Reusable plastic cell trays are the industry standard for a reason. They fit inside a standard 1020 flat. They drain well.
They hold their shape through dozens of seasons. The 72-cell size works for most vegetables. The 50-cell size gives roots more room for crops like tomatoes that grow fast.
The downside is removal. Roots can get stuck if you wait too long to transplant. You have to squeeze the cell gently from the bottom.
Soil blockers are gaining a cult following and for good reason. They compress moist mix into a self-contained cube. No plastic.
No pot. Just a block of medium that holds together from root pressure. The roots air-prune when they hit the side, which means they stop growing and branch instead of circling.
This creates a denser, healthier root ball. The blocker tool costs about 40 dollars and lasts for life. The trade off is a learning curve.
Your mix has to be the exact right moisture level or the blocks crumble.
Biodegradable pots like peat pots and cow pots offer convenience. Plant the whole thing in the ground. No root disturbance.
In practice though, they cause problems. The pot wicks moisture away from the roots. It dries out faster than the surrounding soil.
If the pot rim sits above the soil line after transplant, it acts as a wick and pulls water away from the plant. Many gardeners end up tearing the pot off anyway, which defeats the purpose.
The budget hack is free. Yogurt cups, solo cups with a hole punched in the bottom, and takeout containers with clear lids work every bit as well as commercial options. You lose the standard sizing, so they do not fit neatly into a 1020 tray. But if you are starting a small number of plants for a home garden, this is the cheapest and most effective route.
Wash them with a mild bleach solution between uses to prevent disease carryover.
Your best pick depends on your scale. For 20 plants, use DIY containers. For 100 plants, buy reusable 50-cell trays.
For 500 plants or more, invest in soil blockers and save hours of transplant time.
Growing Media: Coco Coir vs. Peat Moss vs. Premixed Bags
You cannot use garden soil for seed starting. It is too heavy. It compacts.
It contains weed seeds and pathogens that cause damping off. You need a soilless mix that drains fast and stays loose.
Peat moss has been the backbone of seed starting for decades. It is lightweight, holds water well, and has a naturally acidic pH that suits most seedlings. The catch is sustainability.
Peat bogs take thousands of years to form and commercial harvesting destroys fragile ecosystems. As of 2026, the debate is still active but the market is shifting. Many commercial mixes now reduce peat content or replace it entirely.
Coco coir is a byproduct of coconut processing. It renews much faster than peat. It holds water similarly and has a neutral pH that rarely needs adjustment.
The problem is quality. Cheap coir bricks often contain high residual salt from the processing. Rinsing is mandatory.
A good quality coir brick tested by the manufacturer for low electrical conductivity costs more but saves you the hassle. Coco coir also breaks down faster than peat, so it does not hold its structure as long in the tray.
Premixed bags labeled specifically for seed starting are the safest choice for beginners. They combine peat or coir with perlite for aeration and sometimes vermiculite for moisture retention. Major brands like those sold through garden centers have consistent quality and have been tested for pH and sterility.
You pay a premium for that reliability. A 3 cubic foot bag runs about 15 dollars retail and fills roughly ten 1020 trays.
The DIY route saves money if you are starting many seeds. Mix equal parts coco coir and perlite by volume. Add a tablespoon of dolomitic lime per gallon of coir to stabilize pH.
Water it with a dilute liquid fertilizer at half strength since coir has no nutrients. This mix costs about half of what a premade bag costs and performs identically.
One risk applies to all options. Wet mix compresses over time. Do not press it into your cells.
Spoon it in loose, then tap the tray to settle it. Compacted mix suffocates roots and traps water, which leads to damping off regardless of what medium you choose.
Light and Heat: The Two Things That Make or Break Seedlings
You can use the best containers and the finest mix, but without enough light your seedlings will fail. Period. The most common cause of weak, leggy seedlings is insufficient light intensity or incorrect distance.
Shop lights work. A standard four foot T8 or T5 fluorescent fixture with 6500 Kelvin bulbs costs about 25 dollars. It puts out enough light for seedlings when placed two to three inches above the canopy. That is the critical detail.
Light intensity drops dramatically with distance. At six inches away you lose roughly 75 percent of the usable light. Keep the fixture adjustable or use books and blocks to raise the tray as the seedlings grow.
Purpose built LED grow lights cost more up front but use less electricity and produce less heat. Full spectrum models give plants the red and blue wavelengths they actually use for photosynthesis. The 6500 Kelvin shop light works fine for seedling stage because you are not trying to flower anything.
You just want short, sturdy stems and green leaves. A quality LED fixture in the 20 to 40 watt range covers a standard 1020 tray well.
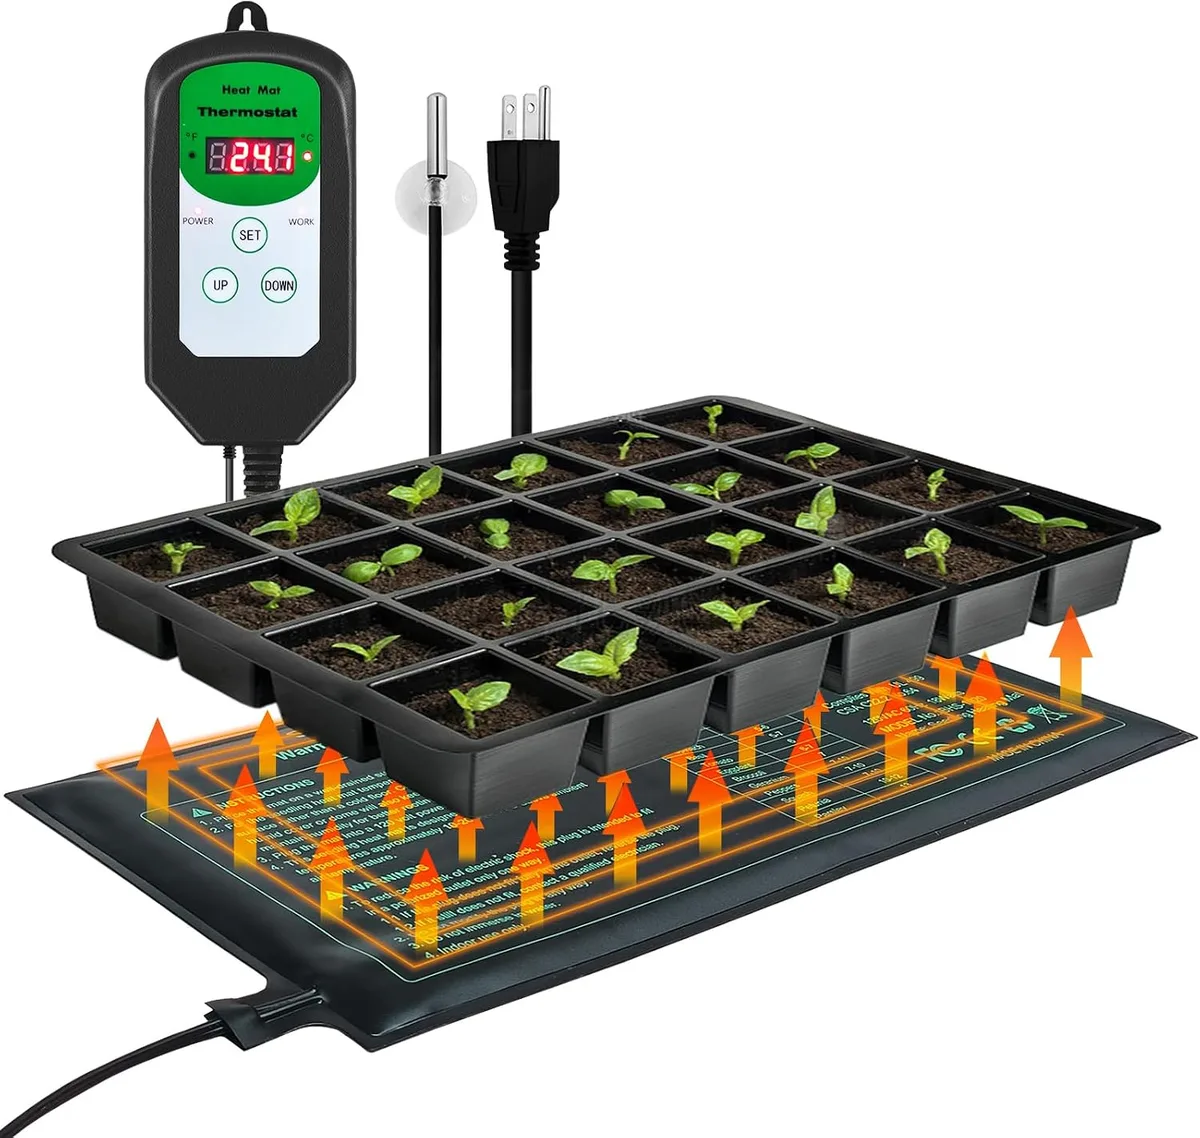
Image source: Web (Bing) / amazon.com (Web image (fair-use with source credit))
Bottom heat is optional unless you grow specific crops. Tomatoes, peppers, eggplants, and melons germinate faster and more uniformly with soil temperatures between 75 and 85 degrees Fahrenheit. Lettuce, kale, and most herbs germinate fine at normal room temperature of 65 to 70 degrees. A heat mat without a thermostat is risky.
It can push soil temperature above 90 degrees and cook the seeds or dry the tray out so fast you have to water twice a day.
A thermostat controlled heat mat is worth the extra 20 dollars. You set it to 75 degrees for warm season crops. The mat cycles on and off to maintain that temperature.
The result is consistent germination without the guesswork. Without a thermostat you are relying on ambient room temp plus the mat's fixed output. That combination changes every time your home heating kicks on or the sun comes through a window.
Aggregate reviews across major garden retailers show that heat mats without thermostats have a failure rate roughly three times higher than those with thermostats. The failure is not mechanical. It is user error.
People leave them on full blast and either cook the seeds or dry out the medium.
A 20 watt heat mat costs about 18 dollars. A 20 watt mat with a thermostat costs about 38 dollars. The thermostat pays for itself in one season by preventing seed loss and reducing watering frequency.
If you are starting tomatoes, peppers, or melons from seed, buy the thermostat version. If you are starting only greens and cold tolerant crops, skip the heat entirely.



