Quick Answer
Repotting seedlings means moving them when they have one to two sets of true leaves. Use containers two to four inches wide with drainage holes. Fill with pre-moistened potting mix.
Handle by the leaves, not the stem. Water gently after transplant. Timing matters: repot before roots start circling the bottom.
Why Repotting Seedlings Is a Key Step
Think of a seedling as a small engine. It needs room to rev up. When roots hit the sides of a tiny cell tray, they start circling instead of branching out.
That circling leads to a root-bound plant that struggles to take up water and nutrients later. It’s a slow decline you won’t see until the plant is already stressed.
Repotting breaks that cycle. It gives roots fresh soil and space to spread. More roots mean better access to food and water.
That translates to thicker stems, larger leaves, and a stronger plant overall. University extension research shows that seedlings potted up at the right stage develop root masses up to forty percent larger than those left in original cells.
The payoff isn’t just cosmetic. Stronger root systems help plants bounce back faster after transplanting into the garden. They also cope better with heat, wind, and dry spells.
If you’ve ever had seedlings stall out after planting, cramped roots are often the culprit.
| Growth Factor | Not Repotted | Repotted Once |
|---|---|---|
| Root mass at 4 weeks | Small, coiled | Larger, branching |
| Stem thickness | Thin, leggy | Sturdy |
| Transplant survival | Lower | Higher |
| Time to harvest (tomatoes) | Later by 1–2 weeks | On schedule |
That table sums up what you’re really buying with forty five minutes of work. It’s not extra labour. It’s insurance.
How to Tell Seedlings Are Ready to Repot
Waiting too long is the most common mistake. But doing it too early can also set them back. So what’s the Goldilocks window?
Look for these three signs together.
They have at least one set of true leaves
Cotyledons are the first leaves that pop up. They look different from the real leaves. Wait until you see at least one set of true leaves that look like the mature plant.
For most seedlings, that happens seven to twenty one days after germination.
Roots are visible at the bottom
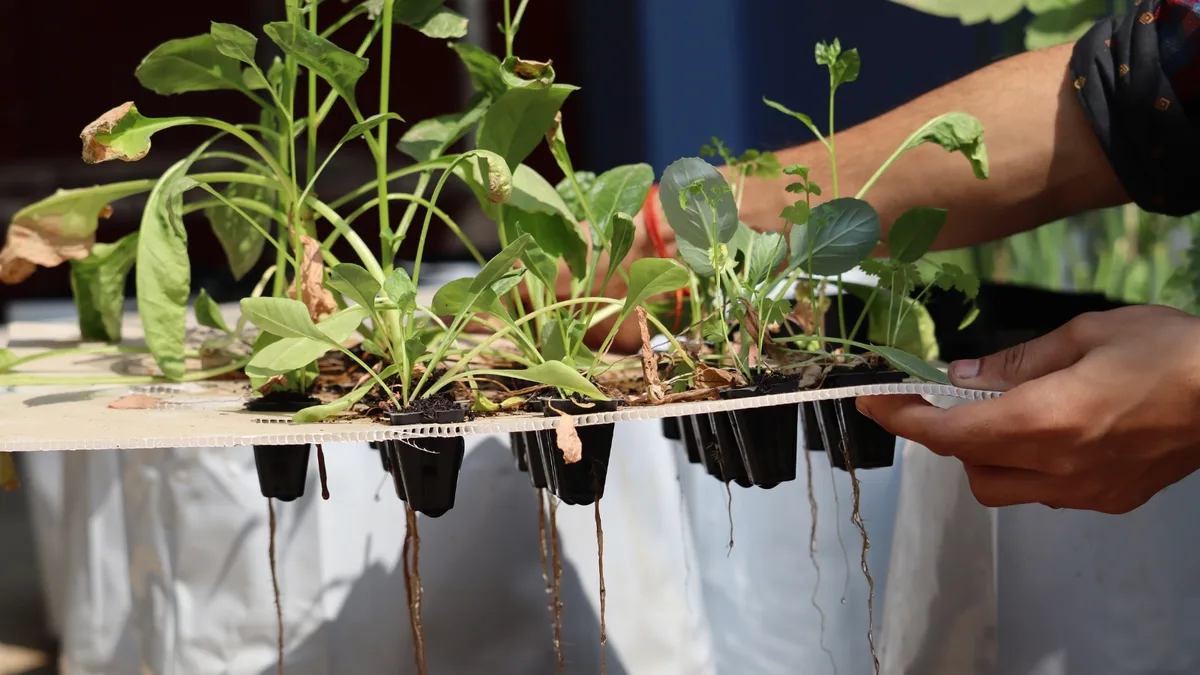
Gently lift the cell tray and peek at the drainage holes. If you see white root tips pushing through, it’s go time. If roots are already circling the bottom of the cell, you’re a day or two late but still okay.
Brown or mushy roots mean you missed the window.
Growth has slowed noticeably
If the seedling has stopped putting out new leaves even with good light and water, roots have likely run out of space. It’s a silent signal that the plant is redirecting energy to root searching rather than top growth.
Quick checklist for readiness:
- 1+ set of true leaves present
- Roots visible at drainage holes or touching the cell walls
- Stem height matches pot depth for burying needs (more on that later)
- Seedling looks healthy, not stressed or wilted
If you check all three, it’s time to repot. If only one or two are true, wait a couple of days and check again.
Selecting the Right Pots and Mix for Seedlings
Not all pots are equal. Not all soils work the same. The right combination makes repotting a breeze.
The wrong one can cause waterlogging, disease, or stunted growth.
Pot size and material
For most seedlings, go with a container that’s two to four inches wide. That gives enough room for root growth without drowning the plant in soil that stays wet too long. A four-inch pot works for tomatoes and peppers.
Two-inch cells work for herbs and small brassicas.
| Container Type | Best For | Pros | Cons |
|---|---|---|---|
| Plastic pots | Most seedlings | Reusable, cheap, holds moisture well | Can overheat in sun, not breathable |
| Biodegradable pots | Tomatoes, cucumbers | Plant directly in ground, reduces root disturbance | Can wick moisture away from soil, break down too fast indoors |
| Fabric pots | Heat-loving plants | Air-prunes roots, excellent drainage | Dries out fast, needs more frequent watering |
| Cell trays (2-inch) | Herbs, small brassicas | Space-efficient, easy to water | Roots circle quickly if repotting is delayed |
Drainage holes are non-negotiable. Without them, water pools at the bottom and invites damping-off disease. If you’re using recycled yogurt cups, punch at least four holes in the bottom.
Potting mix matters
Regular garden soil is too heavy. It compacts in containers and suffocates roots. Seed-starting mix is too light for the next stage.
What you want is a standard potting mix, not the seed-starting kind.
Potting mix holds moisture and air in better balance. It contains perlite or vermiculite for drainage and a small amount of fertilizer to support growth. If the bag says “for containers” or “potting soil,” you’re on the right track.
Avoid mixes labelled “topsoil” or “raised bed mix.”
One pro tip: Moisten the mix before you fill the pots. Dry potting mix is dusty and hard to wet evenly. Add water slowly and stir until it feels like a wrung-out sponge.
Then let it sit for thirty minutes.
Step-by-Step: Repotting Seedlings Without Transplant Shock
Transplant shock is the most feared word in seedling growing. Leaves droop, stems wilt, and the whole plant looks like it’s giving up. The good news is that almost all of that shock comes from mistakes you can avoid.
Follow these steps and your seedlings won’t even notice they moved.
1. Prep your workspace
Gather everything before you start: pots, pre-moistened potting mix, a dibber or pencil, a spray bottle, and your seedlings. Water the seedlings about an hour before repotting. Wet roots slide out of the cell much easier than dry ones.
2. Fill the new pot
Fill the new container about two thirds full with moistened potting mix. Gently tap the pot to settle the soil. Don’t pack it down.
Roots need loose soil to grow into.
3. Make a hole in the center
Use your finger or a dibber to create a hole deep enough for the root ball. For tomatoes and other stem-rooting plants, make the hole deep enough to bury part of the stem. For most others, the hole should be just deep enough so the seedling sits at the same soil level it had before.
4. Remove the seedling
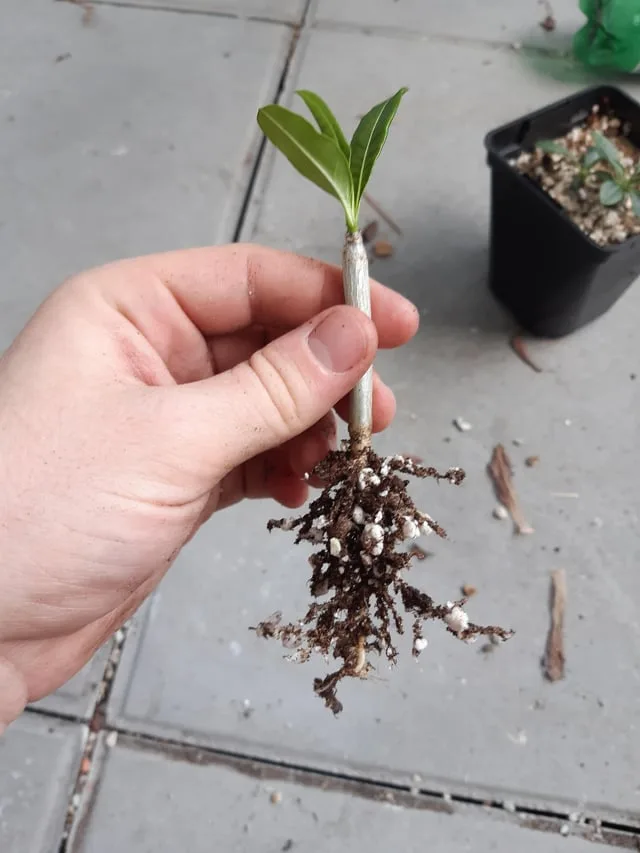
Turn the old cell tray upside down and let the seedling slide out into your hand. If it’s stuck, gently squeeze the sides of the cell or push up from the bottom through the drainage hole. Never yank the stem.
5. Handle by the leaves
This is the golden rule. The stem is fragile. If you crush it, the seedling will be damaged or die.
Instead, hold the seedling by one of its true leaves. If the leaf tears, the plant grows new ones. If the stem breaks, it’s over.
6. Place and backfill
Lower the root ball into the hole. Backfill with potting mix around the roots. Firm the soil gently with your fingertips.
Don’t compress it into a brick.
7. Water from the bottom
Place the repotted pot in a tray with about half an inch of water. Let the potting mix wick up moisture from the bottom. This prevents water from washing away the loose soil and keeps the stem dry.
After ten to fifteen minutes, feel the top of the soil. When it’s damp, remove the pot from the tray and let it drain.
8. Label and rest
Write the variety and date on a label and stick it in the pot. Place the seedlings back under grow lights or in a bright window, but out of direct sunlight for the first day or two. They need a gentle transition.
Repotting Different Seedlings: Tomatoes, Peppers, Brassicas, and Herbs
Not all seedlings handle repotting the same way. The general process above works, but a few tweaks per plant type make a big difference.
Tomatoes: bury deep
Tomatoes are the exception to almost every rule. They can be planted deep, even burying most of the stem. Those tiny hairs on the stem turn into roots when buried.
It makes the plant stronger and sturdier.
How deep: Pinch off the lowest set of leaves and bury the stem up to just below the next set. Use a pot that’s at least four inches deep to accommodate the buried stem.
Peppers: stay shallow
Peppers do not like being buried deep. Their stems rot easily. Keep the soil line at exactly the same level as the original container.
Peppers also hate root disturbance. Be extra gentle when removing them. If you can, pot them up into a similar size container before the final transplant.
Brassicas: cool and fast
Broccoli, kale, cabbage, and cauliflower are fast growers. They respond well to repotting and don’t mind being slightly root-bound. Use two to three inch pots.
They prefer cooler temperatures after repotting, around sixty to sixty five degrees Fahrenheit. Keep them away from heat mats.
Herbs: small pots
Basil, cilantro, parsley, and dill don’t need big containers. Two-inch pots or cell trays are plenty. Herbs are sensitive to overwatering.
Use a well-draining mix with extra perlite. Let the top inch of soil dry out between waterings.
| Seedling Type | Stem Burying Depth | Ideal Pot Size | Special Care |
|---|---|---|---|
| Tomato | Deep (up to first true leaves) | 4+ inches | Remove lower leaves before burying |
| Pepper | Same level as original | 3–4 inches | Minimize root disturbance |
| Brassica | Same level as original | 2–3 inches | Keep cool after repotting |
| Herb (basil, cilantro) | Same level as original | 2 inches | Extra perlite in mix, let soil dry |
The main takeaway? When in doubt, bury at the same level unless you’re growing tomatoes. And always handle by the leaves.
That single habit saves more seedlings than any fancy potting mix ever will.
Common Repotting Mistakes and How to Avoid Them
Even experienced gardeners mess this up sometimes. The good news is that nearly every seedling-killing error is avoidable once you know what to look for.
Mistake 1: Overwatering after repotting
Newly repotted seedlings don’t need extra water beyond what you gave them at transplant. Wet soil suffocates roots and invites damping-off disease. That fungal disease kills more seedlings than anything else.
Wait until the top inch of soil feels dry before watering again.
Mistake 2: Burying non-tomato stems too deep
Peppers, brassicas, and herbs will rot if you bury their stems. Only tomatoes and potatoes benefit from deep planting. For everything else, keep the soil line right where it was in the original container.
Mistake 3: Handling by the stem
Crushing the stem kills the seedling instantly. It’s the easiest way to lose a whole tray in seconds. Always grab a leaf instead.
A torn leaf grows back. A snapped stem does not.
Mistake 4: Repotting too early or too late
Too early means the roots can’t hold the soil ball together. Too late means they’re already circling and stressed. Stick to the one-to-two true leaves rule and the drainage-hole check.
Mistake 5: Using garden soil
Garden soil is too dense for containers. It compacts quickly, drains poorly, and can carry pests and pathogens. Always use a sterile potting mix labelled for containers.
It’s a small expense that prevents a long list of problems.
The pattern here is simple. Gentle handling, proper depth, and the right soil solve ninety percent of repotting failures.
Repotting Aftercare: Watering, Light, and Hardening Off
The work doesn’t end when the seedling is in its new pot. The next few days decide whether your seedling thrives or sulks. Here’s how to nurse it through the transition.
Watering for the first week
Water from the bottom for the first week. Place pots in a tray with half an inch of water and let the mix wick upward. This keeps the stems dry and encourages roots to grow downward toward the moisture.
Check the top of the soil daily. When it feels dry to the touch, water again.
Light requirements after repotting
Seedlings need bright light to recover and grow. Under grow lights, keep them six to eight inches below the bulbs for fourteen to sixteen hours a day. If you’re using a sunny windowsill, turn the pots a quarter turn each day so they don’t lean toward the glass.
Temperature and airflow
Most seedlings prefer daytime temperatures between sixty five and seventy five degrees Fahrenheit. Keep them away from cold drafts and heat vents. A small fan set on low, pointed nearby, strengthens stems and prevents fungal issues.
It mimics the natural breeze they’ll face outdoors.
Hardening off before the garden
About seven to ten days before transplanting outside, start hardening off. Set the pots outside in a shaded spot for an hour or two. Increase time and sunlight gradually each day.
This step reduces transplant shock and prevents sunscald. As of 2026, most university extension guides recommend at least a full week of this gradual exposure.
Simple Decision Guide: When to Repot or Wait (FAQs)
How long after germination should I repot seedlings?
Most seedlings are ready seven to twenty one days after germination. The exact timing depends on the species and how fast they grow. Check for true leaves and visible roots at the drainage holes before taking action.
Can I repot seedlings before they have true leaves?
It’s risky. Cotyledons provide the young plant’s first nutrition. Moving a seedling before true leaves appear stresses it unnecessarily.
Wait unless roots are already filling the cell. In that case, handle with extreme care.
When should I repot leggy seedlings?
Leggy seedlings have tall, weak stems from insufficient light. Repot as soon as you notice. For tomatoes, bury the stem deep to encourage new roots.
For other plants, pot them at the same soil level and provide more light immediately.
How big should the new pot be?
Use a two to four inch container for most seedlings. Bigger is not better. An oversized pot holds excess moisture that can rot young roots.
You want enough room to grow, not a swimming pool of soil.
What do I do if seedlings wilt after repotting?
Wilting is often transplant shock. Keep them out of direct sunlight for a day or two, maintain consistent moisture, and avoid fertilizing for the first week. Most seedlings recover within forty eight hours if the roots weren’t damaged.
If they’re still drooping after three days, check the drainage and soil moisture.
Should I fertilize right after repotting?
No. Fresh potting mix already contains enough nutrients for several weeks. Fertilizing too early risks burning tender roots.
Wait until you see new growth, then apply a half-strength balanced liquid fertilizer.



