Propagating aloe plants might sound tricky, but it's one of the easiest houseplant projects you can try. You don't need a green thumb or special equipment, just a healthy mother plant and a little patience. The trick is knowing exactly what to look for, since aloe propagation is a visual process where small cues make all the difference.
University extension research shows that aloe pups with at least two inches of root development have a success rate above 90% when separated correctly. That's the kind of edge you want before you make your first cut.
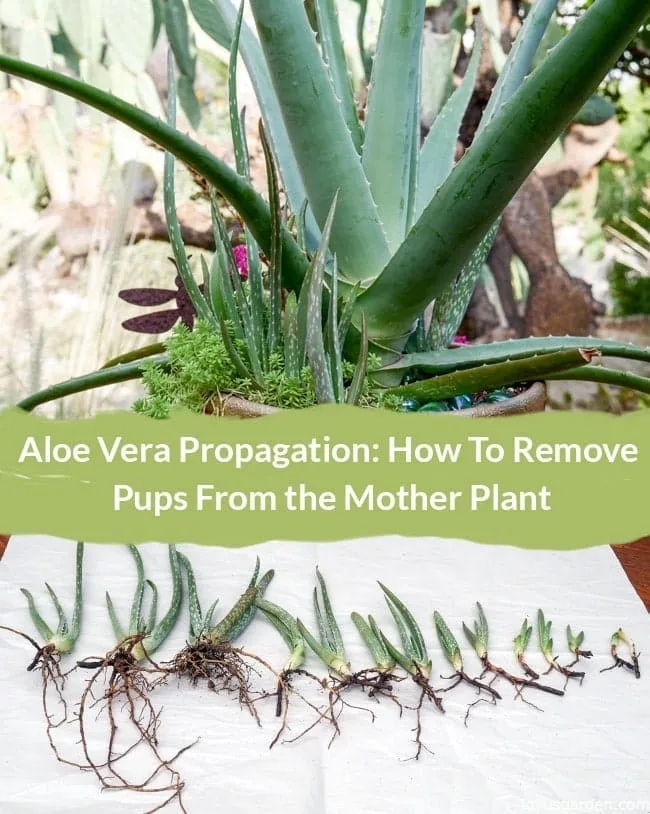
Image source: Web (Bing) / joyusgarden.com (Web image (fair-use with source credit))
Quick Answer
Propagating aloe plants means removing offsets called pups. Wait until pups are 3-4 inches tall. Separate them with a clean knife.
Let cuts dry 2-5 days. Pot in succulent mix. Water after 3-5 days.
Keep in bright indirect light.
Why Visuals Matter for Aloe Propagation
Aloe propagation is different from propagating most other succulents. Many succulent types root easily from leaf cuttings. Aloe vera generally does not.
Leaf cuttings on aloe almost always rot before they root. That's why the visual approach matters so much.
When you rely on pictures and diagrams instead of text-only instructions, you catch the early warning signs. You see what a healthy pup root looks like compared to a broken one. You spot the difference between a calloused cut ready for potting and a fresh cut that needs more time.
You recognize rot before it spreads. Generic AI advice often skips these visual details and recommends leaf cutting, which is the wrong method for common aloe species. Real results depend on seeing what's happening.
The best information on propagating aloe plants comes from university extension programs and botanical garden guides. These sources include close-up photos that show exact pup sizes, root conditions, and callousing progress. As of 2026, the same visual-first approach applies whether you are a first-time plant parent or an experienced grower.
What You Need Before You Start
Having the right tools and materials ready prevents mistakes. Here is what you need and what to look for in each item.
| Tool / Material | Visual Cue | Why It Matters |
|---|---|---|
| Sharp knife or pruning shears | Clean, rust-free blade | A dull or dirty cut damages tissue and invites infection. |
| Rubbing alcohol | Clear liquid | Sterilizing the blade prevents disease transfer. |
| Small pot with drainage holes | Drainage holes in bottom | Standing water rots aloe roots within days. |
| Succulent or cactus potting mix | Gritty, coarse, fast-draining | Regular potting soil holds too much moisture. |
| Rooting hormone (optional) | Powder or gel labeled for succulents | Can speed rooting but is not required. |
How to Tell Your Mother Plant Is Ready
Your aloe vera plant needs to be mature enough to produce pups. Look for these signs:
- The pot is crowded with leaves pressing against the rim.
- You see small offsets emerging from the soil near the edge.
- Pups have their own leaves and are at least 2-3 inches tall.
- The mother plant looks healthy with firm, upright leaves.
If the mother plant is stressed, droopy, soft, or discolored, wait until it recovers. Propagating from a struggling plant gives poor results.
Step-by-Step: Separating Aloe Pups the Right Way
Follow these steps in order. Each one has a visual checkpoint.
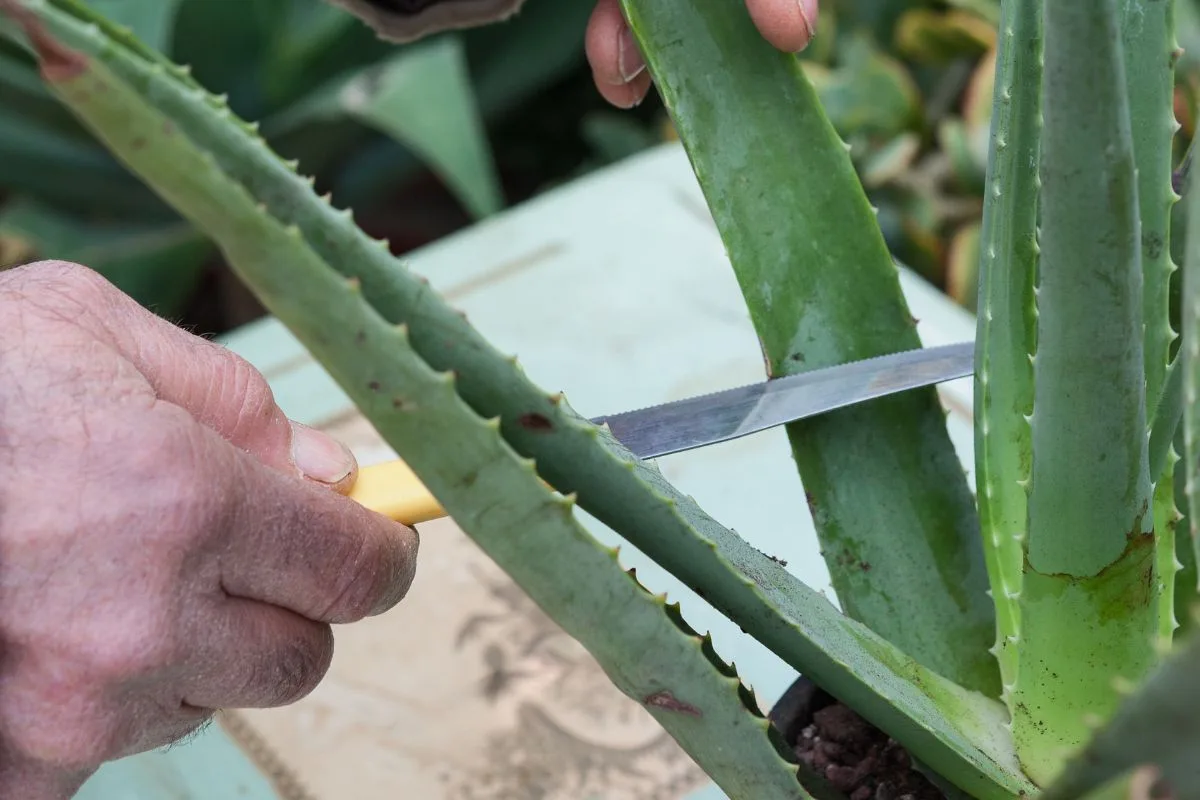
Step 1: Identify pups worth separating. Look for pups that are 3-4 inches tall with at least two leaves of their own. Gently brush soil away from the base. If you see a visible root system attached, that pup is ready.
If the pup has no roots and is very small, leave it attached longer.
Step 2: Sterilize your cutting tool. Wipe the blade with rubbing alcohol and let it air dry. Clean between each cut if separating multiple pups.
Step 3: Make the cut. Slide the blade into the soil about half an inch away from the pup. Cut the connecting stolon, the small stem that attaches the pup to the mother. Aim for a clean, straight cut.
Do not twist or pull.
Step 4: Callous the cut. Place the pup on a paper towel in a dry, shaded spot. Let the cut surface dry completely. This takes 2-5 days depending on humidity.
The cut should look dry, slightly sunken, and lighter in color. If it looks wet, shiny, or soft, give it another day.
Step 5: Pot the pup. Fill a pot with succulent mix. Make a shallow hole. Place the pup so the base sits just above the soil line.
Backfill gently and tap the pot to settle the soil. Do not bury any leaves.
Step 6: Wait before watering. Do not water immediately. Wait 3-5 days after potting. This prevents rot while the calloused end adjusts to the soil.
What Healthy New Roots Look Like (And What Doesn't)
After potting, roots begin forming within 2-4 weeks. Here is the weekly visual timeline.
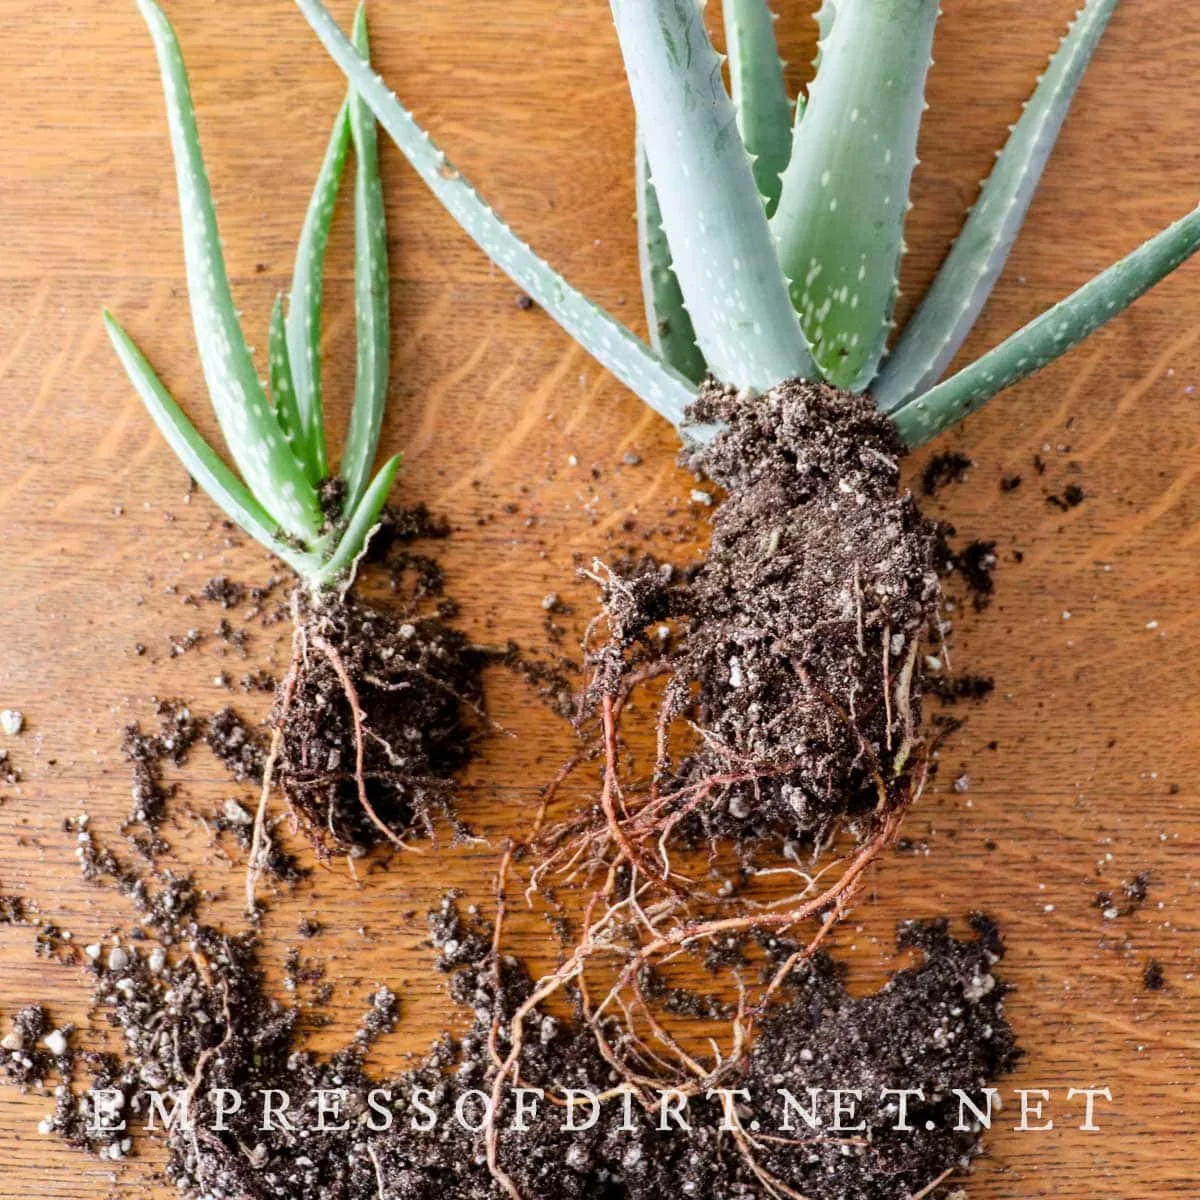
Week 1-2: No visible change above soil. The pup may look slightly less firm. That is normal.
The plant is directing energy to root growth. Gently tug the pup after 10 days. If it resists, roots have started.
If it lifts easily, check for rot.
Week 3-4: New leaves may appear. The plant looks firmer. Watering can increase to every 10-14 days when the top inch of soil feels dry.
Signs of success:
- New growth at the center of the rosette
- Firm, upright leaves with a healthy green color
- Resistance when tugged
- Soil drying between waterings
Signs of trouble:
- Leaves turning yellow or translucent, overwatering
- Base of plant turning soft or brown, rot
- Pup tilts or lifts easily, no root development
- Leaves shrivel despite water, roots may be dead
University extension guidance from programs like Texas A&M AgriLife confirms that the single most important factor in root success is proper callousing before potting. Skip this step and your success rate drops significantly.
Common Visual Mistakes (With Photos of What Goes Wrong)
Even experienced growers make these errors. Know what to look for so you can catch them early.
Rotting Pups: Overwatering vs. Underwatering
- Overwatering: Leaves turn yellow, then brown and mushy. The base feels soft and smells sour. The soil stays wet longer than a week. Stop watering immediately. If rot has reached the center, the pup is likely lost.
- Underwatering: Leaves wrinkle and feel thin but remain firm at the base. The soil is bone dry. This is easy to fix with a thorough soak.
Pups Without Roots — When to Try Anyway
Pups with no visible roots have a lower success rate but can still root with patience. Use rooting hormone and callous for 5-7 days. Plant in a very small 2-inch pot.
Expect rooting to take 4-6 weeks. If the pup starts to shrivel without rooting, discard it.
Leaf Cutting Failures
It is tempting to cut a single leaf and root it like a jade plant. For most aloe species, especially aloe vera, this rarely works. The leaf holds too much moisture and rots before roots form.
In rare cases, a leaf may produce a pup after months, but this is not a reliable method. Skip it.
Sunburn on New Plants
Newly potted pups cannot handle direct sun. Leaves turn white or brown on the side facing the window. Move them to bright indirect light immediately.
The damaged leaves will not recover, but new growth will be healthy.
Quick Troubleshooting Reference
| Visual Symptom | Likely Cause | Fix |
|---|---|---|
| Yellow, mushy leaves | Overwatering / rot | Unpot, trim rot, dry, repot in dry soil |
| Wrinkled, thin leaves | Underwatering | Soak soil thoroughly |
| White or brown patches | Sunburn | Move to indirect light |
| Pup lifts out of soil | No roots formed | Check for rot, recut and callous |
| Black spots on leaves | Fungus from wet foliage | Improve airflow, avoid getting leaves wet |



