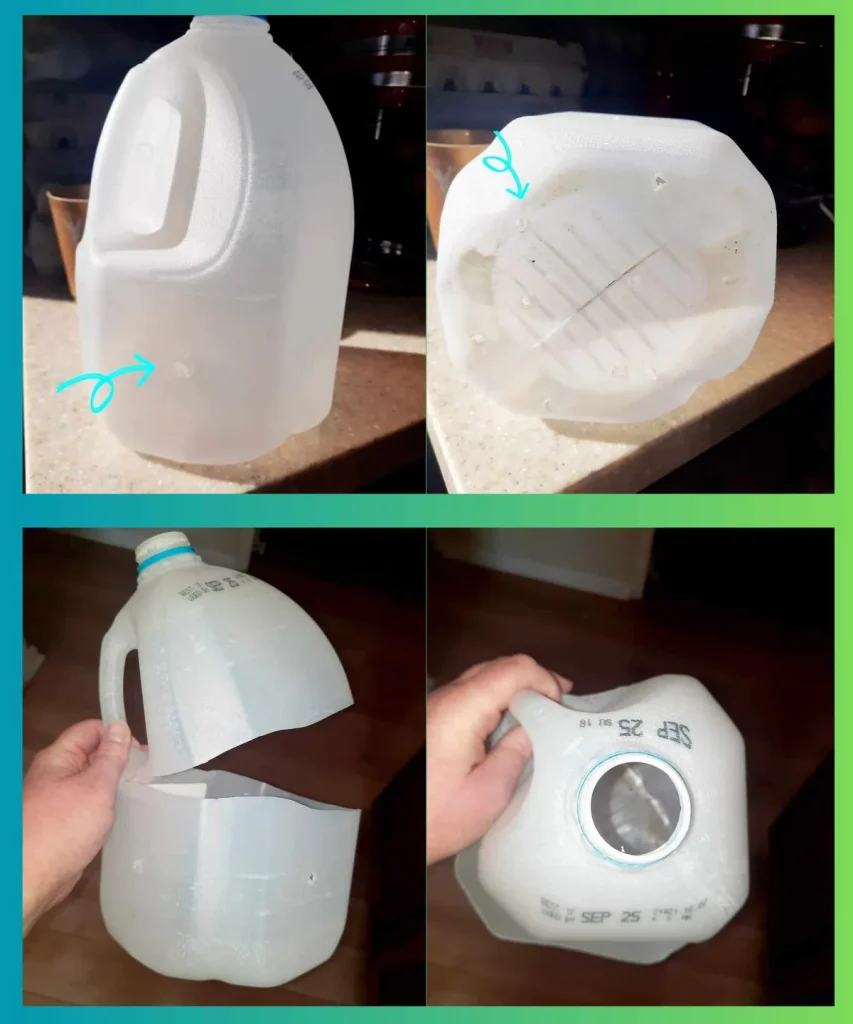
You’ve got a stack of empty milk jugs, a roll of tape, and a vague memory that someone on the internet said you can grow seeds in them outside in the middle of winter. The idea sounds brilliant, free mini greenhouses, no grow lights, no fuss. But the first time you cut into that jug, you realize: how deep do I cut?
Do I need holes in the bottom? What about the lid? And why does every tutorial show a different method?
That’s where preparing winter sowing containers stops being a clever hack and starts feeling like a science project with unclear instructions. The good news? The basic recipe is simple, and once you understand what the container actually needs to do, trap humidity, let light in, drain excess water, and survive freeze-thaw cycles, the visual choices make sense.
As of 2026, the standard approach uses repurposed 1-gallon plastic jugs, and the method has been refined by tens of thousands of gardeners across USDA hardiness zones 2 through 7 who wanted cheap, reliable seed-starting without indoor clutter.
Quick Answer
Winter sowing containers are mini greenhouses made from clear plastic jugs. You cut the jug almost in half, leaving a hinge. You drill drainage holes in the bottom.
You add ventilation slits near the top. Fill with moist seed-starting mix. Sow your seeds.
Tape the lid closed. Set the jug outside before spring. Seeds get natural cold stratification.
Seedlings emerge when conditions are right. No hardening-off needed.
How Winter Sowing Containers Work: The Science Made Simple
You might wonder why anyone bothers with milk jugs when seed trays and heat mats exist. The answer comes down to what cold-hardy seeds actually need to germinate. Many perennials, native wildflowers, and even some vegetables require a period of cold, moist conditions before they'll sprout.
That process, called cold-moist stratification, is normally handled by winter itself. A winter sowing container lets you harness that natural cycle in a controlled little environment.
Think of the jug as a lightweight, portable greenhouse. The clear plastic lets sunlight in, warming the soil on sunny days. The sealed lid traps humidity, so the soil stays consistently moist from rain, snowmelt, and condensation.
The drainage holes prevent waterlogging, and the ventilation slits prevent the inside from overheating when the sun gets strong. Seeds sit in cold soil through January and February, get their required chill period, then germinate naturally as temperatures rise in early spring.
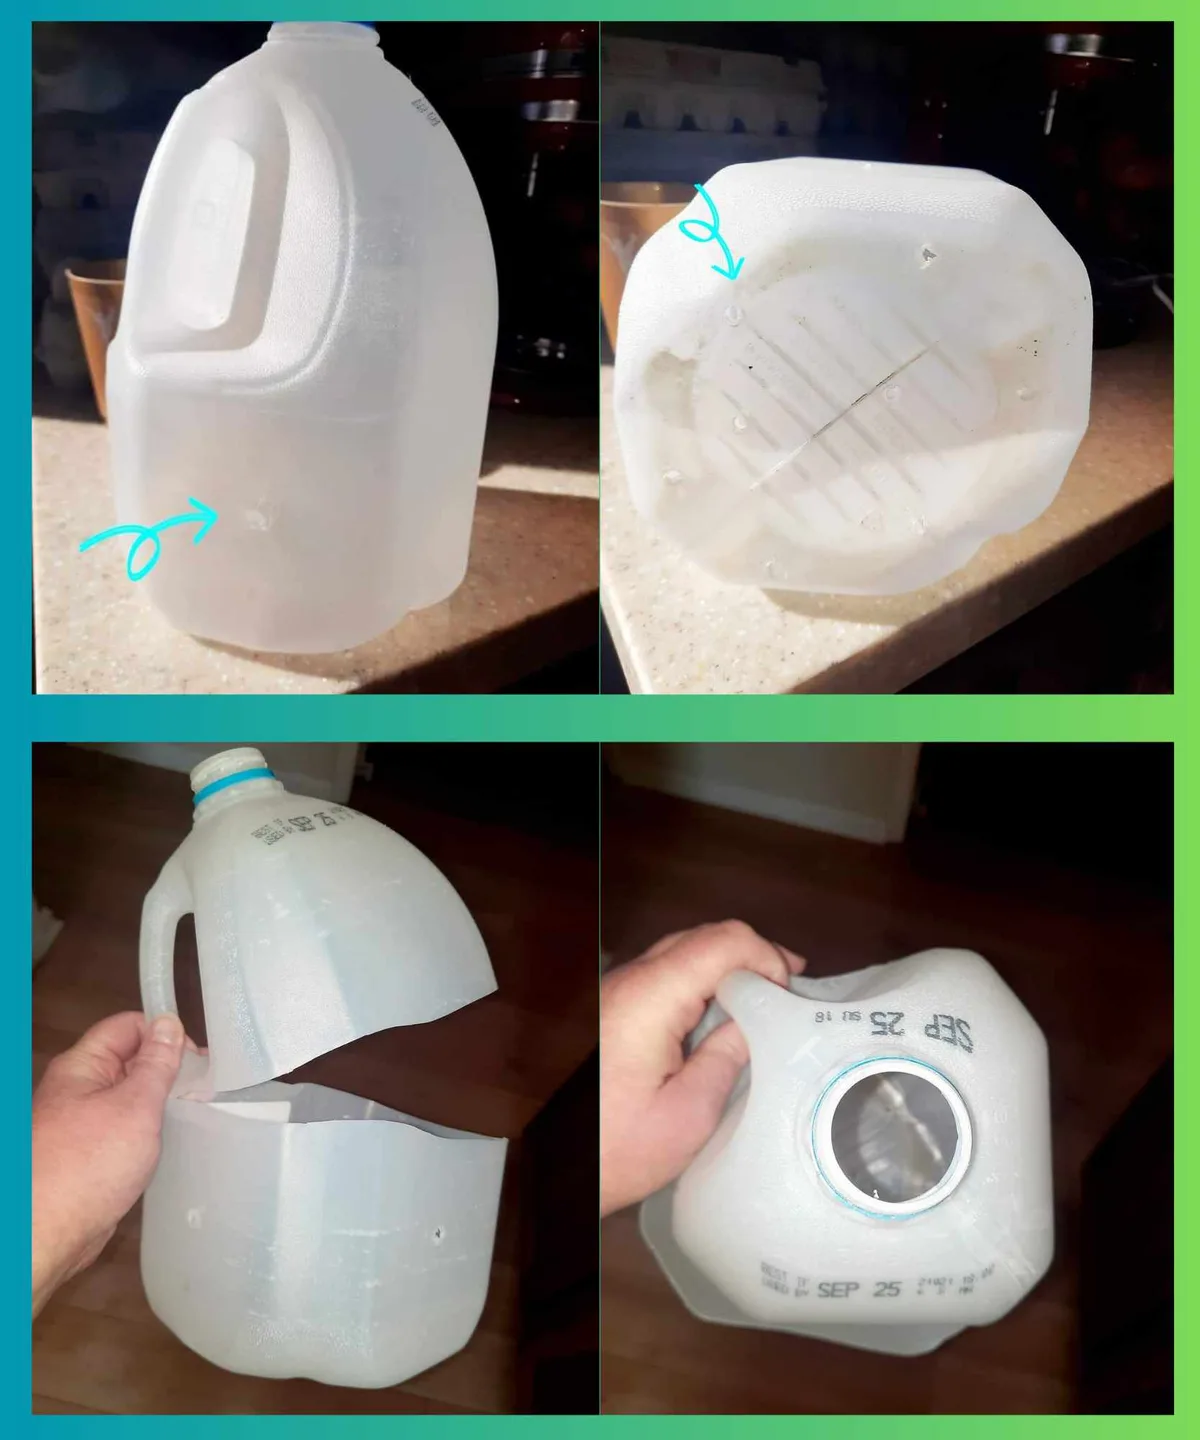
Image source: Web (Bing) / knps.org
The real magic is what happens to the seedlings. Because they grow from the start in outdoor temperatures, experiencing frost, wind, and fluctuating light, they emerge stocky and tough. You never need to harden them off the way you do with indoor-started plants.
Research from university extension services confirms that seedlings started this way often outperform their indoor counterparts when transplanted, precisely because they've never known a pampered life under a grow light.
What makes a container work well? Three things: light transmission, soil depth, and air exchange. Clear or translucent plastic lets enough light through for germination.
A minimum of 3 to 4 inches of soil depth gives roots room to develop before transplant. And the balance between drainage and ventilation keeps the microclimate stable. Too much ventilation and the jug dries out.
Too little and you get mold. That balance is where the preparation details matter most.
Choosing the Right Containers (What to Look For Visually)
Not every plastic jug makes a good winter sowing container. The right container is a visual decision as much as a functional one. Here's what to look for when you're standing in your recycling bin deciding what to keep.
The ideal container is clear or very translucent. Light needs to reach the soil surface. Opaque white jugs, like some bleach or laundry detergent bottles, block too much light. Tinted blue or green plastic also filters out wavelengths that seedlings need.
The best option is the classic translucent gallon milk jug, the kind that looks almost white but lets light pass through when held up to a window. Water jugs with a slight blue tint work fine too, as long as you can see the soil line through the plastic.
Size matters more than you think. A 1-gallon container gives you roughly 4 inches of soil depth, which is enough for most seedling root systems before transplant. Half-gallon jugs are too shallow. Two-liter soda bottles can work for smaller seeds, but they tip over easily and hold very little soil.
Clamshell containers from salad greens or rotisserie chickens are good for low-growing plants, but they lack the vertical space that tomatoes, peppers, or perennials need.
Plastic thickness is a hidden variable. Thin, flimsy jugs crack after one freeze-thaw cycle. You want plastic that feels rigid when you squeeze it gently. A good test: if the jug holds its shape when empty and full, it's thick enough.
The heavier-gauge jugs from store-brand milk or spring water outperform ultra-thin discount bottles every time.
What to immediately discard:
- Containers that held chemicals, solvents, motor oil, or cleaning products. Food-grade plastic only.
- Opaque or heavily tinted jugs.
- Containers with narrow necks that make filling and planting difficult.
- Anything smaller than 64 ounces unless you're using it for very shallow-rooted plants.
The simplest rule is this: if you can see your hand clearly through the plastic when the jug is empty, it's light-transmissive enough. If everything is a blur, find a different jug.
Step-by-Step Preparation: The Visual Cues That Matter
Now that you've gathered your containers, preparation follows a sequence that's easy to memorize once you understand why each step exists. Here's the workflow, with the visual cues you need to get right.
1. Clean and Label Before You Cut
Wash each jug with warm soapy water and rinse thoroughly. Remove labels and adhesive residue, leftover glue collects dirt and blocks light. Dry the outside.
Write the plant name and sowing date on a plastic plant label with an oil-based permanent marker, then tape or wire it to the jug handle. Labels written directly on the plastic with water-based markers fade in UV light within weeks. Oil-based markers hold up through a season of rain and snow.
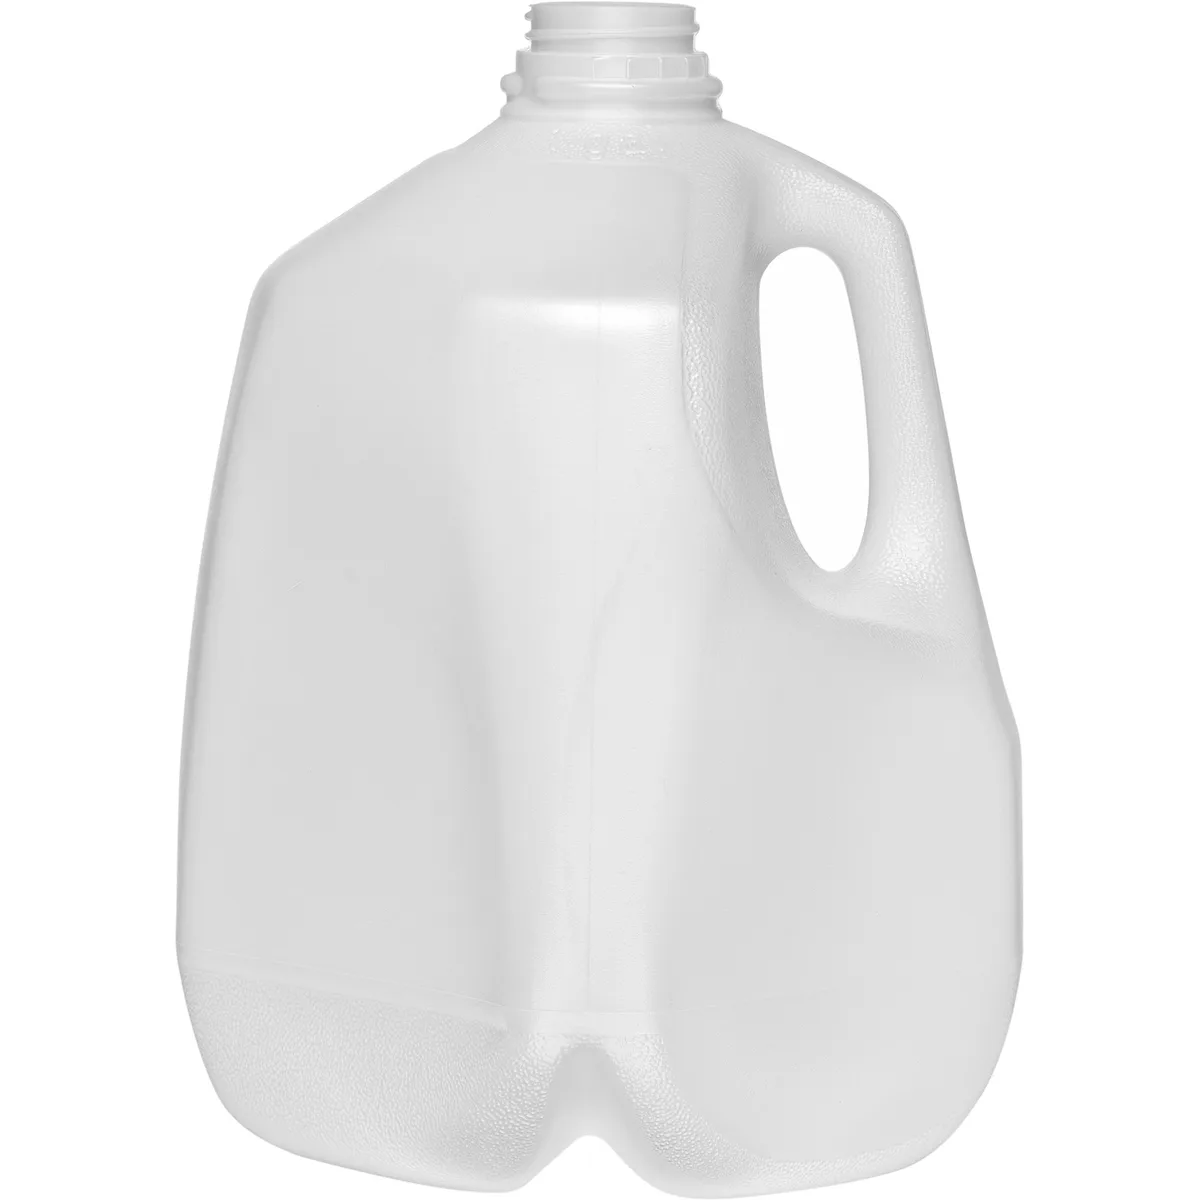
Image source: Web (Bing) / thecarycompany.com
2. Cut the Jug, Leaving a Hinge
This is the step that trips up most beginners. You want to cut horizontally around the jug's circumference, about 4 inches from the bottom. But do NOT cut all the way through.
Leave a 2-inch uncut section below the handle, that's your hinge. The lid should flop open like a clamshell. If you cut all the way through, the top half slides off and you lose the greenhouse effect.
Use a sharp utility knife or heavy-duty scissors. Cut in a well-lit area and watch your fingers, the plastic edge is sharp. A clean, straight cut reseals better than a jagged one.
3. Add Drainage Holes in the Bottom
Seeds sitting in standing water rot. Period. Use a drill with a 1/4-inch bit, a soldering iron, or a heated skewer to melt 6 to 10 holes in the bottom of the jug.
Space them evenly. If you use a soldering iron, work in a ventilated area and avoid breathing the fumes. The holes should be visible from the outside, if you can see light through them, they're big enough.
4. Cut Ventilation Slits Near the Top
Ventilation prevents condensation buildup that leads to damping-off disease. Using the same tool, cut 2 to 4 vertical slits about 1 inch long on the upper half of the jug, just below the cap. Position them on opposite sides.
In cold weather, these slits stay mostly closed. On warm sunny days, they open slightly as the plastic warms, releasing excess heat and moisture.
5. Fill with Moist Seed-Starting Mix
Do not use garden soil. It compacts, drains poorly, and can carry pathogens. Use a light seed-starting mix, typically peat or coir mixed with perlite and vermiculite.
Moisten the mix before filling so it's damp but not dripping. Fill the bottom half of the jug to about 1/2 inch below the cut line. Press the mix down gently to remove air pockets but don't compact it.
6. Sow Seeds and Seal
Scatter or place seeds according to packet depth guidelines. Write the species and date on your label if you haven't already. Press the top half of the jug back over the bottom, aligning the cut edges.
Seal the seam with weather-resistant duct tape or strong packing tape. Wrap tape all the way around the circumference, overlapping slightly. Secure the lid closed, do not screw the cap on tightly, as some airflow through the opening helps regulate temperature.
7. Set Outdoors in a Sheltered Spot
Place the sealed jug in a location that gets morning sun but some afternoon shade. Full, harsh south-facing exposure can overheat the jug on warm winter days. A north-facing spot against a wall or fence is ideal.
Make sure the jug sits on bare soil, gravel, or a wooden surface, not on concrete that conducts cold. Secure it against wind with a rock on top or a stake.
Common Visual Mistakes (And How to Spot Them Before They Wreck Your Seeds)
The difference between success and failure in winter sowing often comes down to small visual cues you can catch before the seeds are in the ground. Here are the mistakes that experienced winter sowers see immediately in a photo, and what to look for in your own setup.
Cutting too far down the jug. If your cut line is less than 3 inches from the bottom, you've left almost no soil depth. Roots hit bottom and circle before it's time to transplant. The visual clue: when you hold the cut jug upright, the bottom half should look like a short cup, not a flat saucer.
Four inches is the target. If it looks shallow, toss that jug and start another.
Skipping ventilation slits entirely. This is the most common error in photos posted to gardening forums. A jug with no slits turns into a steam bath on the first sunny 50-degree day. Seedlings cook.
Mold spreads. The visual fix: before you seal the jug, check that you can see at least two slits in the upper half. If there's condensation streaming down the inside walls without any visible openings, add more slits.
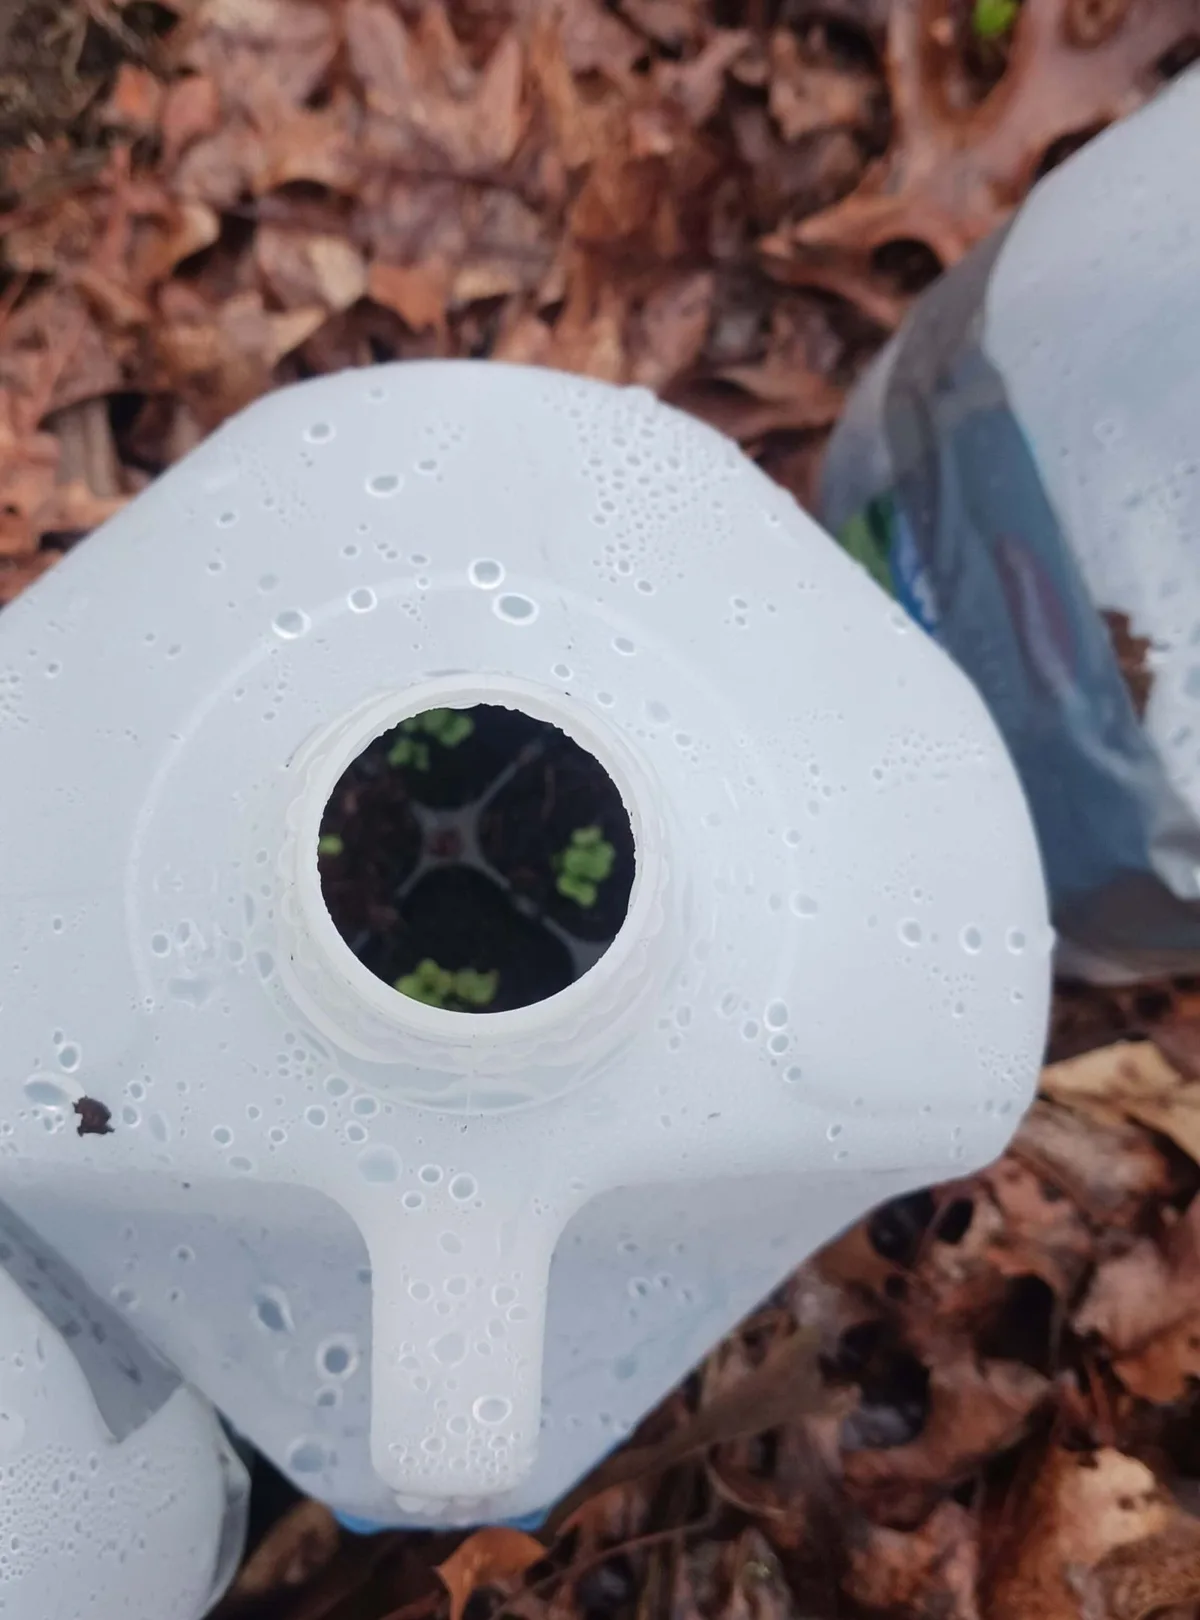
Image source: Web (Bing) / homesteadingalliance.com
Using tape that fails in wet weather. Masking tape, painter's tape, and cheap clear tape peel off after one rain and snow cycle. The visual sign of failure: tape edges curling up within a week, exposing the cut seam. Weather-resistant duct tape or heavy-duty shipping tape holds through freeze-thaw cycles.
If your tape is already peeling at day three, replace it before the jug splits open.
Labeling with a water-based marker. A permanent marker from a normal office supply store fades to unreadable within two weeks of UV exposure. The visual clue: by March, you can't tell which jug has liatris and which has lavender. Use an oil-based paint marker or a garden label written in pencil.
If you're labeling the plastic itself, write on a piece of masking tape first, then cover it with clear packing tape.
Putting jugs in full wind exposure. Winter sowing jugs are light. A strong gust knocks them over, spills the soil, and scatters seeds. The visual pattern you want to avoid: jugs scattered across the yard after a storm.
Place them against a wall, fence, or in a sheltered corner. If you see your jugs wobbling in a moderate breeze, move them.
Expert Tips for Healthy Germination and Transplanting
Once your jugs are prepared and sitting outside, the work shifts to monitoring and timing. Here's what experienced winter sowers pay attention to from February through transplanting.
Start checking for sprouts in early spring. Depending on your climate zone and the seeds you chose, germination can begin anywhere from late February to mid-April. Check your jugs once a week by looking through the clear plastic. Don't open them until you see green.
Opening too early releases humidity and lets cold air rush in.
Open containers gradually as temperatures warm. When daytime temperatures consistently stay above 50°F, start opening the lids on mild days. Peel back the tape on warm afternoons, then reseal at night. After a week of this, remove the top half entirely.
The seedlings are now fully exposed to outdoor conditions.
Watch for damping-off disease. Seedlings that flop over at the soil line, looking pinched and waterlogged, have damping-off, a fungal disease that thrives in stagnant, humid air. If you spot it, immediately increase ventilation. Remove the lid during the day.
Let the soil surface dry slightly before the next rain. In severe cases, transplant healthy seedlings early into pots with fresh mix.
Know which seeds thrive with this method. Winter sowing works best for plants that need cold stratification or tolerate cool soil. Classic winners include:
- Perennials: echinacea, rudbeckia, lavender, lupine, milkweed
- Native wildflowers: black-eyed Susan, bee balm, columbine, goldenrod
- Cool-season vegetables: kale, broccoli, Brussels sprouts, lettuce, spinach
- Annuals: snapdragon, calendula, larkspur, poppy
Seeds that struggle with winter sowing include tomatoes, peppers, eggplant, and basil, warm-season crops that need consistent 70°F soil to germinate. They'll sprout eventually in a jug, but they'll be weeks behind indoor-started plants.
No hardening-off needed, but timing still matters. Because your seedlings have lived outside their whole lives, they don't need the gradual outdoor introduction that indoor seedlings require. Transplant them into the garden when they have two sets of true leaves and the last frost date has passed. Water them in well, and they'll keep growing without missing a beat.
Frequently Asked Questions
Can I reuse the same jugs next year?
Yes, as long as they survived the season without cracking. Wash them with warm soapy water and a dilute bleach solution to kill any lingering pathogens. Inspect carefully around the cut line and hinge.
Replace any jug with cracked or brittle plastic.
What do I do if the seeds sprout during a warm spell and then it freezes?
Hardy seeds handle this naturally. The jug's microclimate buffers temperature swings. If the forecast shows a hard freeze below 20°F, cover the jugs with a lightweight row cover overnight.
Seedlings that have lived outside since winter are already cold-adapted and rarely suffer damage.
Do I need to water the containers at all?
Rarely. Rain and snowmelt keep the soil moist through capillary action. During extended dry spells in late spring, check soil moisture by lifting the jug.
If it feels light, add a small amount of water through the top opening. Overwatering is a more common problem than underwatering.
How many seeds should I put in one jug?
For small seeds, scatter 10 to 15 per jug and thin later. For larger seeds, plant 5 to 6 evenly spaced. Crowding leads to leggy seedlings and poor airflow.
You can always transplant extras to another jug or directly into the garden.
What if mold shows up on top of the soil?
White mold on the soil surface is usually harmless saprophytic fungi feeding on organic matter. Increase ventilation by opening the lid slightly on sunny days. Scoop off large patches with a spoon.
Gray or fuzzy mold near seedling stems requires immediate action. Remove affected seedlings and improve airflow.



