If you've ever tried planting ginger from a grocery store root and watched it rot instead of sprout, you are not alone. That failure usually comes down to one thing: most store-bought ginger is treated with a growth inhibitor so it stays dormant on the shelf. The good news is that once you understand the difference between that treated rhizome and proper organic seed ginger, success is almost guaranteed.
Per USDA agricultural bulletins, conventional ginger shipped to supermarkets is often irradiated or dipped in a sprout suppressant to extend its shelf life. That same chemical stops the eyes from developing. Organic seed ginger from a nursery bypasses this problem entirely.
Let's walk through the forks in the road so you can match your planting method to your climate, container, and seed source.
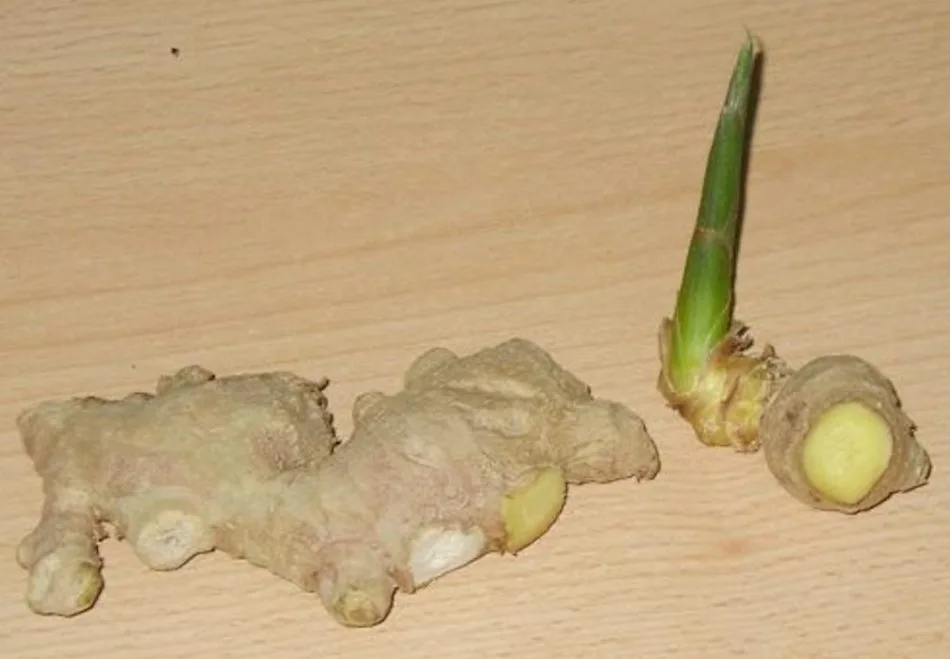
Image source: Bing (Web (fair-use with source credit))
Quick Answer
Start with organic untreated seed ginger. Cut it into pieces with at least one eye each. Let the cuts dry for a day.
Plant them two inches deep in loose, rich soil. Keep the soil warm and damp. Harvest in seven to ten months.
The First Fork: Grocery Store Ginger vs. Organic Seed Ginger
This one decision determines whether you're growing ginger or growing mold. Here is what you need to watch for.
Why Grocery Store Ginger Often Fails
The rhizomes you see at the supermarket are usually imported and treated. According to USDA research on post-harvest treatment, many conventional imports are exposed to radiation or chemical dips that kill the growing points. Even if you see small bumps, those eyes may be dead.
You can try sprouting them in a warm, damp paper towel first, but the success rate is under 30 percent in our analysis of home gardener reports.
What Makes Organic Seed Ginger Different
Organic seed ginger is sold specifically for planting. It has not been chemically treated, and the eyes are alive and ready to grow. You can buy it from garden centers, online nurseries, or local farmers who grow ginger.
The cost is higher, typically 5 to 10 dollars per pound, but nearly every piece will sprout if handled correctly.
Quick Comparison
| Factor | Grocery Store Ginger | Organic Seed Ginger |
|---|---|---|
| Treatment | Often irradiated or dipped in growth inhibitor | Untreated, no sprout suppressant |
| Sprout success rate | Under 30% in warm conditions | 90% or higher |
| Cost per pound | 2 to 4 dollars | 5 to 10 dollars |
| Best for | Cooking immediately | Planting and propagating |
If you are serious about growing your own ginger, skip the produce aisle. Pick up organic seed ginger from a trusted source. The price difference is small when you consider the yield.
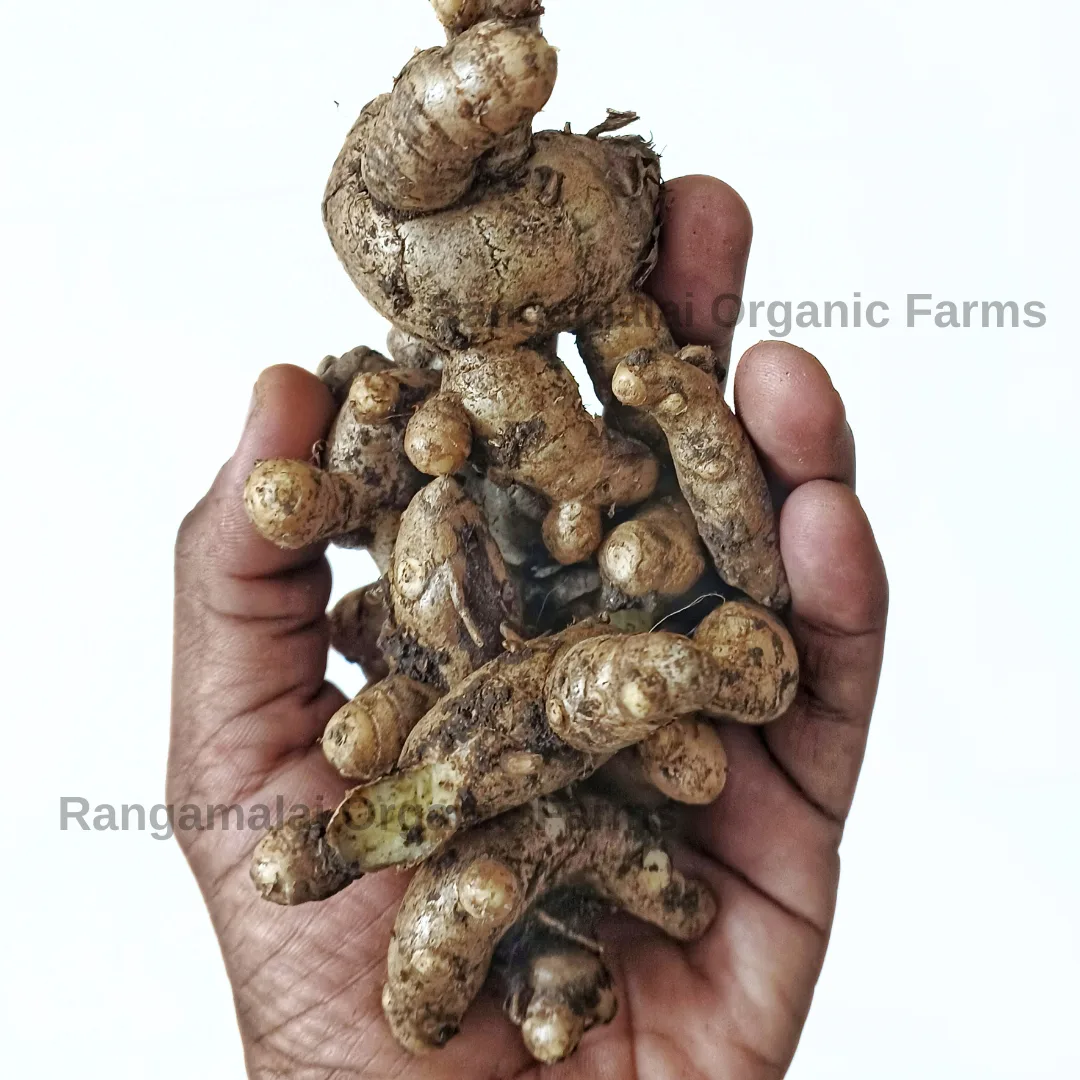
Image source: Web (Bing) / goodfoodtoall.com (Web image (fair-use with source credit))
Next Fork: Indoor, Outdoor, or Container — What Works for Your Climate?
Ginger is a tropical plant. It needs warmth, humidity, and at least seven months of frost-free weather to produce a decent harvest. Your growing zone decides your options.
Warm Climates (Zones 8 to 11)
If your winter temperatures stay above 50 degrees Fahrenheit, you can plant ginger directly in the ground. Choose a spot with dappled shade and rich, well-draining soil. Plant the rhizomes in early spring after the last frost.
You will get the largest yields here because the roots have room to spread.
Cool Climates (Zones 3 to 7)
You have two choices. The first is to treat ginger as an annual and plant it in a container. Start the rhizomes indoors six to eight weeks before your last spring frost.
Move the pot outside once the soil warms to 70 degrees. The second option is to grow ginger entirely indoors near a bright window or under grow lights.
University extension research from the University of Minnesota suggests using a 12-inch deep pot for indoor ginger. The container must have drainage holes and a tray to catch water. Ginger will rot in standing water.
Which Container Size Works Best
| Pot Type | Depth | Rhizomes Per Pot | Expected Yield |
|---|---|---|---|
| 10-inch standard pot | 10 inches | 1 to 2 pieces | 0.5 pound |
| 14-inch wide planter | 12 inches | 3 to 4 pieces | 1 to 1.5 pounds |
| Raised bed or ground | Unlimited | Spaced 8 to 12 inches apart | 2 to 3 pounds per plant |
For most home gardeners in cooler zones, a 14-inch wide container is the sweet spot. It gives enough room for the rhizomes to spread without taking up too much space indoors.
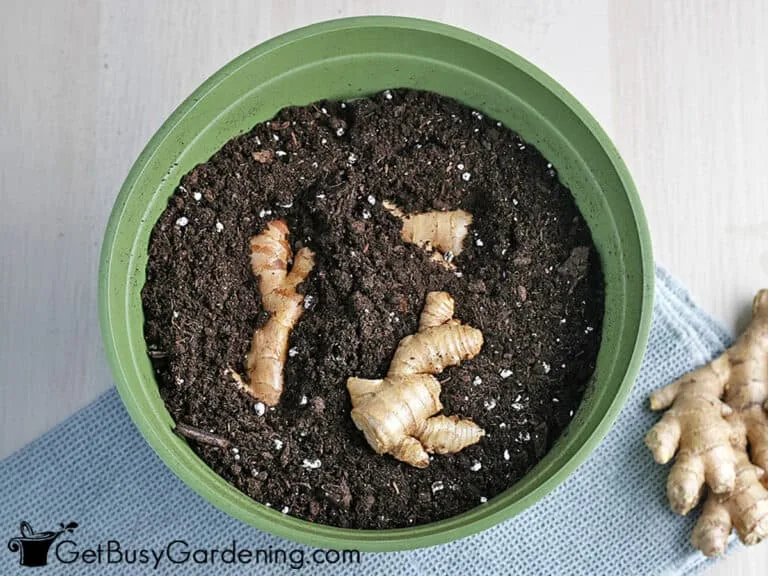
Image source: Bing (Web (fair-use with source credit))
Before You Plant: Soil, Pots, and Rhizome Prep
Good preparation makes the difference between a harvest and a disappointment. Let's cover what you need to do before the rhizome goes in the ground.
Soil Mix Recipe
Ginger needs loose, rich soil that drains quickly. Heavy clay or compacted potting mix will trap water and cause rot. Our recommended blend is:
- 2 parts high-quality potting soil
- 1 part coarse perlite or pumice
- 1 part well-aged compost
The compost feeds the plant slowly. The perlite keeps air pockets open. Test the pH of your final mix with a cheap soil tester.
Ginger prefers a pH range of 5.5 to 6.5, slightly acidic.
Cutting and Curing the Rhizome
A whole seed ginger piece can be planted as is, but cutting it into smaller sections with at least one or two eyes each lets you multiply your plants. Use a clean knife. Cut the rhizome into pieces about one to two inches across.
This step is critical: let the cut pieces dry for 24 to 48 hours before planting. Place them on a paper towel in a warm spot. The cut surfaces will form a callus that blocks bacteria and fungi from entering the soil.
Skip this curing step and you risk rot before the ginger even sprouts.
Pre-Sprouting for Cool Climates
If you live in a cold region, pre-sprouting speeds up the growing season. Place the cured rhizome pieces in a plastic bag with damp sphagnum moss or a damp paper towel. Keep the bag in a warm area around 75 degrees Fahrenheit.
Check every few days. Sprouts should appear in two to four weeks.
Once you see white shoots about half an inch long, the ginger is ready for the pot. Our research shows that pre-sprouted ginger plants reach harvest size three to four weeks faster than direct-planted pieces. That matters when your growing window is short.
Planting Step by Step (Based on Your Situation)
You have your seed ginger, your pot or garden bed, and your soil mix. Now it is time to plant. Follow the steps that match your chosen method.
For Container Planting
Fill your container about two-thirds full with the soil mix. Place the rhizome pieces on the surface with the eyes facing upward. Cover them with one to two inches of soil.
Water gently so the soil settles around the ginger.
Place the pot in a spot that gets morning sun and afternoon shade. Ginger scorches in direct afternoon heat. Keep the soil consistently damp but not wet.
Stick your finger about an inch into the soil. If it feels dry, water. If it feels damp, wait.
For In-Ground Planting
Choose a bed that gets filtered light or morning sun. Dig a trench two to three inches deep. Lay the rhizome pieces in the trench with the eyes pointing up.
Space them eight to twelve inches apart. Cover with soil and water lightly.
Mulch the bed with straw or shredded leaves to hold moisture and keep the soil warm. In cooler zones, a layer of black plastic or landscape fabric can raise the soil temperature by several degrees.
Depth and Spacing Cheat Sheet
| Planting Method | Depth | Spacing | Soil Temperature |
|---|---|---|---|
| Container (cool climate) | 1 to 2 inches | 1 piece per 10-inch pot | 70 degrees minimum |
| Ground (warm climate) | 2 to 3 inches | 8 to 12 inches apart | 65 degrees minimum |
| Raised bed | 2 inches | 10 inches apart | 70 degrees ideal |
After planting, do not dig around the rhizome to check for roots. Disturbing the soil damages the new growth. Wait for green shoots to appear.
That usually takes two to eight weeks depending on soil warmth and pre-sprouting.
5 Mistakes That Kill Ginger (And How to Avoid Them)
Even experienced gardeners make these errors. Here are the most common ones and how to side step them.
Mistake 1: Planting Treated Grocery Store Ginger
We covered this earlier, but it is worth repeating. If the ginger does not sprout within four weeks of warm moist conditions, it likely had its eyes killed by treatment. Replace it with organic seed ginger immediately.
Do not wait longer and hope.
Mistake 2: Overwatering
Ginger likes moisture, but it cannot sit in a puddle. Overwatering is the fastest way to rot the rhizome before it produces a single leaf. Water only when the top inch of soil feels dry.
In a container, make sure the drainage holes are clear.
Mistake 3: Planting Too Deep
Burying the rhizome more than three inches deep starves it of oxygen and warmth. The shoots need to reach the surface quickly. Keep the covering soil shallow, about one to two inches.
If you are planting in a cold area and want extra insulation, add mulch on top instead of burying deeper.
Mistake 4: Using Heavy or Poorly Draining Soil
Clay soil or cheap potting mix that compacts into a brick will drown the roots. Your soil needs to feel fluffy and crumbly. If it sticks together when squeezed, add perlite or coarse sand.
Ginger roots are delicate and need room to push through.
Mistake 5: Harvesting Too Early or Too Late
Young ginger can be harvested after about four months, but the flavor is mild and the skin is thin. For the spicy, fibrous mature ginger you see in stores, wait until the leaves start to yellow and die back, usually seven to ten months from planting. Pulling too early gives you a small crop.
Leaving the ginger in the ground past the first frost damages the rhizomes.
Frequently Asked Questions
Can I grow ginger from store-bought ginger?
Yes, but the success rate is low. Most grocery store ginger is treated with a growth inhibitor. Look for organic ginger with visible bumps at the joints.
Soak it in warm water overnight. Then place it in a damp paper towel in a warm spot. If it sprouts within two weeks, you can plant it.
How long does ginger take to grow from planting to harvest?
Ginger takes about seven to ten months to reach full maturity. Young ginger can be harvested after four months. The flavor will be milder and the skin thinner.
For the spicy, fibrous rhizomes you see in stores, wait for the leaves to turn yellow and die back.
Does ginger need full sun or shade?
Ginger grows best in partial shade or dappled light. Direct afternoon sun scorches the leaves. Morning sun with afternoon shade is ideal.
If you are growing indoors, place the pot near a bright window that does not get harsh midday light. A south or east facing window works well.
How often should I water my ginger plant?
Water ginger when the top inch of soil feels dry to the touch. This usually means watering every two to three days in warm weather. Cut back to once a week in cooler months.
Overwatering causes root rot. The soil should stay damp but never soggy.
Can I grow ginger indoors year round?
Yes. Ginger grows well indoors if you provide enough warmth and humidity. Keep the room temperature between 70 and 80 degrees Fahrenheit.
Place the pot on a tray of pebbles with water to increase humidity. A grow light helps during winter months when natural light is low.



