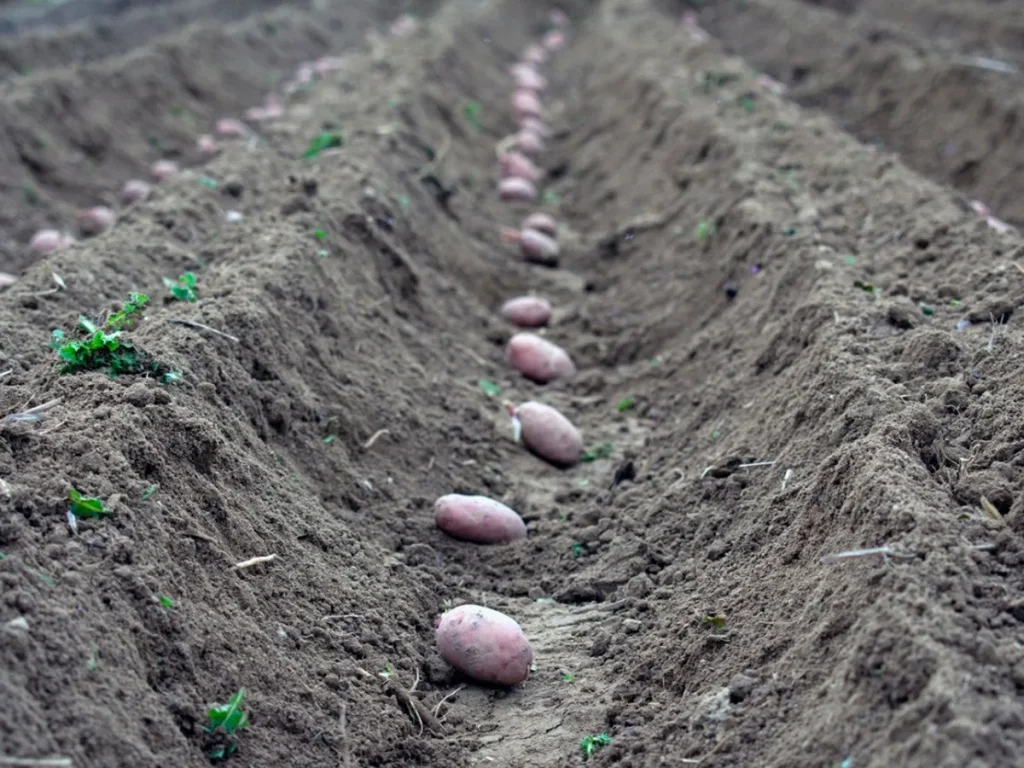
To plant potatoes successfully, you need to match your method to three specific conditions: your local frost dates, your available space, and your soil type. Most planting guides skip this part and give you generic advice that works perfectly in ideal soil with perfect weather. Real life is rarely that cooperative.
As of 2026, standard university extension guidance sets a clear minimum: soil temperature at 4 inches deep must be at least 45°F before planting. Below 42°F, seed rot rates jump dramatically. The good news is once you understand these three decision points, choosing your exact planting path gets simpler.
Let's walk through them.
Quick Answer
Plant seed potatoes 4 inches deep after soil reaches 45°F. Space them 12 inches apart in rows 30 inches apart. Hill soil around stems as they grow.
Harvest when foliage dies back. Store at 38-45°F in darkness.
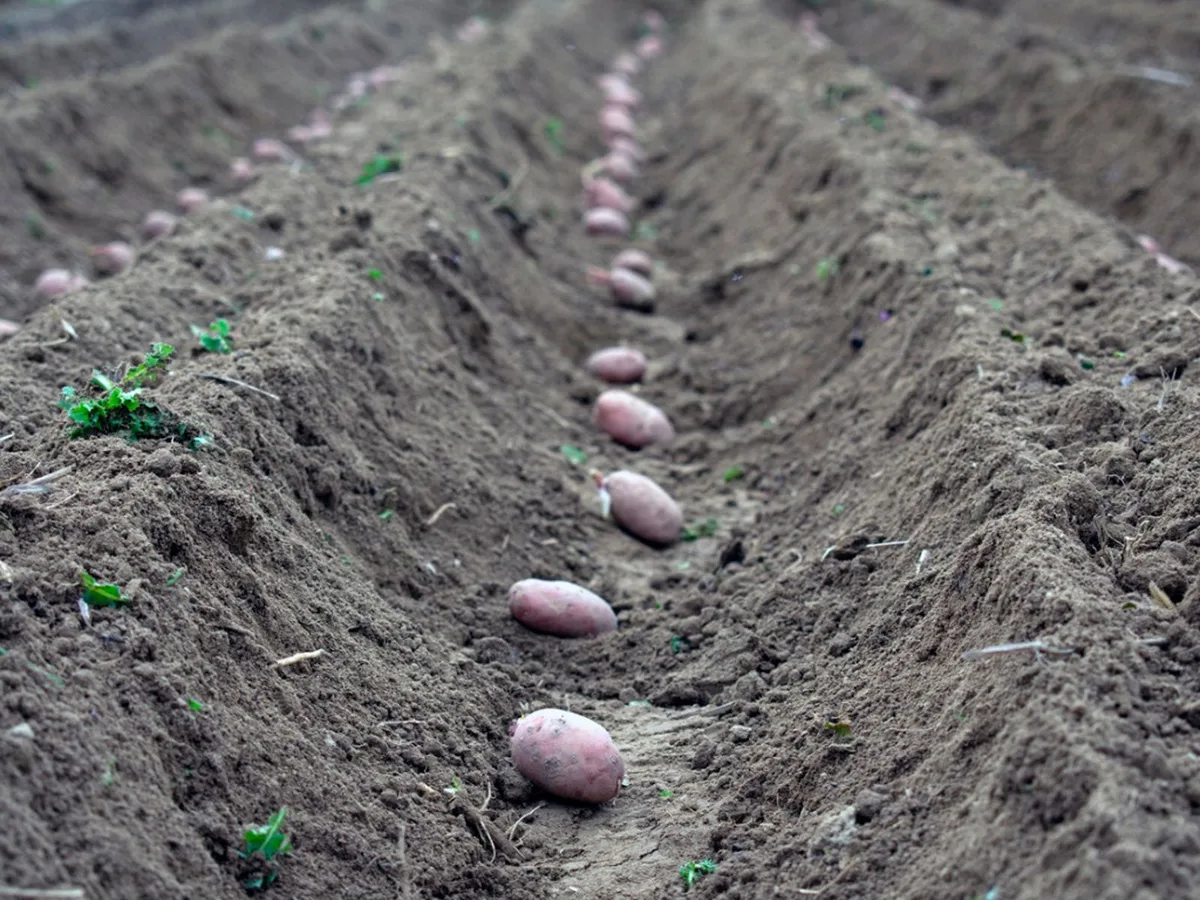
Image source: Web (Bing) / gardeningknowhow.com (Web image (fair-use with source credit))
Your Last Frost Date & Soil Temp (Why Timing Is Everything)
The "too cold" trap vs. the "too late" trap
Planting too early is the most common mistake. The soil looks workable, the calendar says spring, and your seed potatoes sprout only to rot in cold mud. Late blight and fungal diseases thrive in those conditions.
The opposite mistake is waiting until the soil warms into the 70s. Warm soil stresses the plants. Tubers set poorly, and yields drop.
The sweet spot sits between 50°F and 55°F at 4 inches deep.
Your last spring frost date tells you the safe calendar target, but soil temperature is the real decider. A dry, sunny week can warm soil faster than the calendar predicts. A wet, cloudy week can keep it cold for two weeks past the frost date.
How to check your soil temperature reliably
A simple soil thermometer is the best tool for the job. They cost around $10 from garden centers. Push it 4 inches deep into the soil at mid-morning after the sun has been on the ground for a few hours.
Take readings in three different spots in your garden, not just one. Soil temperature varies with sun exposure, drainage, and shade. Average them together.
If the average sits at 45°F or higher for three consecutive mornings, you are good to plant.
If you do not have a thermometer, use this rough rule of thumb: when dandelions are blooming and soil crumbles easily in your hand (instead of forming a muddy ball), soil temperature is likely in the safe zone. This is not as precise as a thermometer, but it works well enough for most home growers.
What happens when you ignore this step
Planting into cold soil means seed potato pieces sit in the ground for 3-4 weeks without sprouting. That window is long enough for rot to set in. You lose the seed piece entirely and end up with empty spots in your row.
Planting into warm soil above 70°F encourages the plant to focus on leaf growth instead of tuber development. You get tall, lush plants and a handful of marble-sized potatoes.
The Three Big Questions That Choose Your Method
Question 1: How much space do you actually have
This is the most practical starting point. If you have a full garden plot of 100 square feet or more, in-ground planting gives you the highest yield. If you have a 4×8 foot raised bed, the raised bed method works better.
If you only have a patio or balcony, containers or grow bags are your only real option.
Do not try to force a method that does not fit your space. Container potatoes in a small pot produce a tiny harvest. In-ground potatoes in heavy clay soil that stays wet produce a diseased harvest.
Match the method to your real situation.
Question 2: What kind of soil are you dealing with
Soil type determines drainage, and drainage determines whether your potatoes thrive or rot. Sandy soil drains quickly, warms up fast in spring, and needs more frequent watering. Clay soil holds moisture, stays cold longer, and requires raised beds or hilling to keep tubers dry.
If you dig a hole, fill it with water, and it takes more than 24 hours to drain, your soil is too heavy for in-ground potatoes. Raised beds or containers are the better choice. If water drains in 4-6 hours, your soil is ideal.
Question 3: Do you want new potatoes or storage potatoes
New potatoes are small, thin-skinned tubers harvested early. They taste sweet and fresh but only last a few days in the fridge. Storage potatoes are fully mature tubers with thick skin that can keep for 4-6 months in proper conditions.
This choice affects variety selection and planting depth. For new potatoes, plant determinate varieties closer together and harvest at 60-70 days. For storage potatoes, plant indeterminate varieties with deeper hilling and wait 100-120 days before digging.
Choose Your Path: In-Ground, Raised Bed, or Container
| Method | Best For | Key Tradeoff | Space Needed |
|---|---|---|---|
| In-ground | Large yields, storage potatoes | Soil must drain well | 30+ sq ft |
| Raised bed | Controlled soil, easy hilling | Initial setup cost | 8-32 sq ft |
| Container | Patios, balconies, beginners | Heat stress in summer | 5-10 gallon per plant |
| No-dig / straw | Minimal digging, soft harvest | Risk of slug damage | Any flat area |
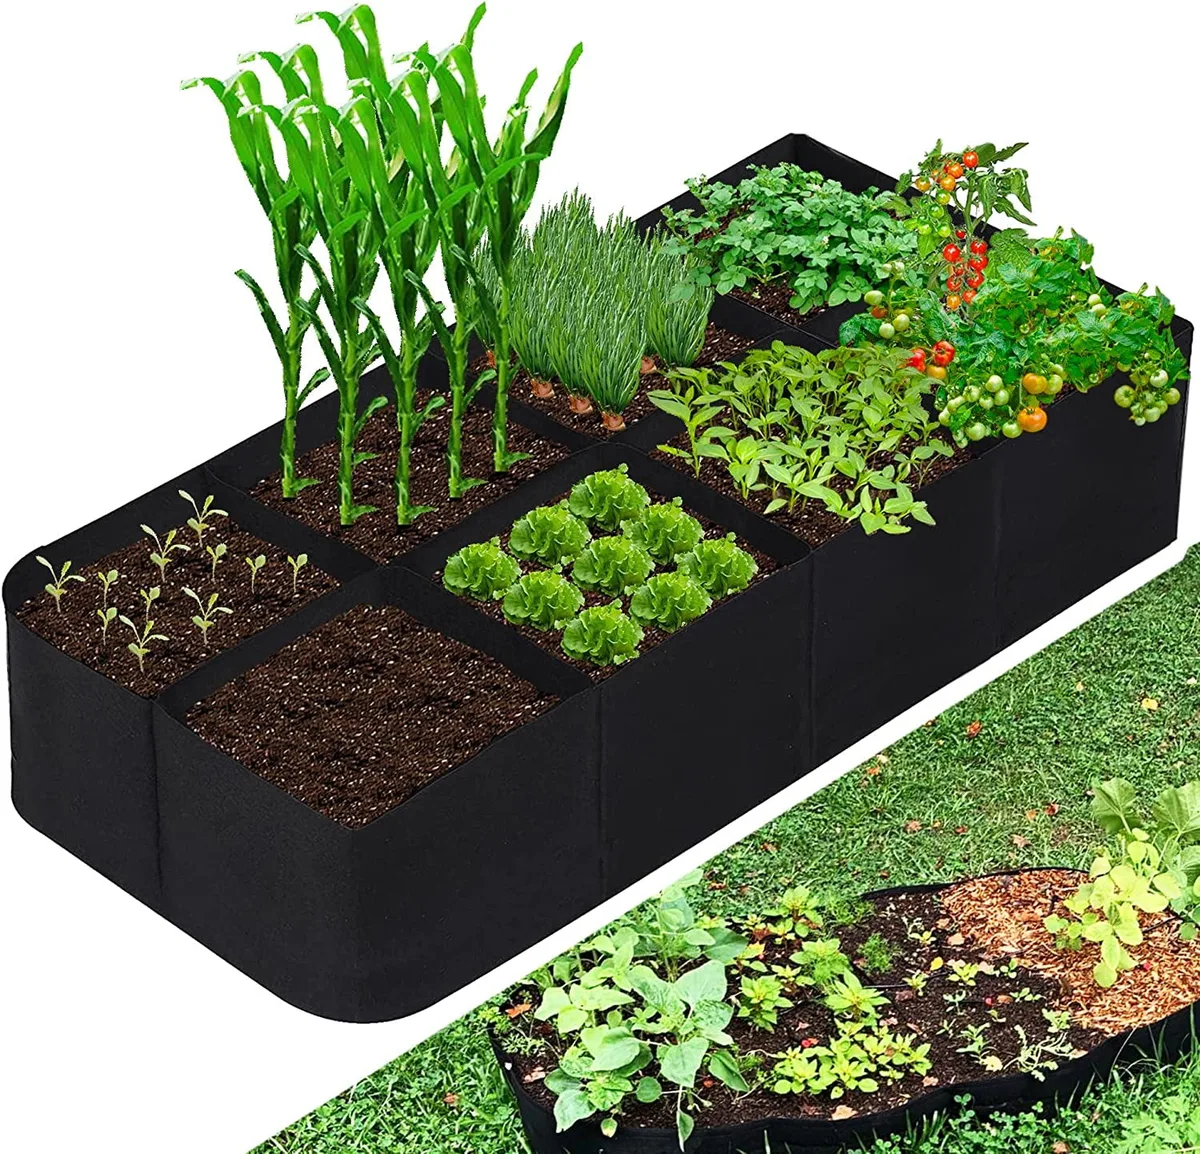
Image source: Bing (Web (fair-use with source credit))
In-ground: best for large yields, worst for cold clay soil
If your soil drains well and you have space, in-ground planting produces the most potatoes per square foot. The ground insulates against temperature swings and holds moisture more evenly than containers.
The downside is you are stuck with whatever soil you have. Heavy clay, rocky dirt, or soil contaminated with disease from previous tomato or pepper plantings can ruin your crop. Test drainage before committing to this method.
Raised bed: best drainage, easiest to hill, most control
Raised beds give you the advantage of controlled soil. You fill them with a mix of compost, topsoil, and organic matter that drains perfectly. Hilling is easier because you can add soil from a separate pile without disturbing the bed structure.
The cost is the main barrier. A 4×8 foot raised bed filled with quality soil mix can run $100-$200. But you can use it for years, and the yield per square foot is excellent.
Container / grow bag: best for patios, worst for heat stress
Grow bags made of fabric allow air circulation around the roots, which prevents overheating in moderate climates. In hot summer regions, fabric bags dry out quickly and can heat the root zone above 80°F, which stops tuber formation.
Use at least a 5-gallon container per plant, 10-gallon is better. Position containers where they get morning sun but afternoon shade if you live in a climate where summer temperatures regularly exceed 85°F.
No-dig / straw bed: best for lazy gardeners, riskier in wet climates
The no-dig method involves laying seed potatoes on the ground and covering them with a thick layer of straw or mulch, 8-12 inches deep. As the stems grow, you add more straw. Harvest is as easy as pulling back the mulch.
The problem is moisture. In humid climates, straw holds too much water against the tubers, which leads to rot and slugs. This method works well in dry climates but becomes a headache in the rainy Pacific Northwest or the humid Southeast.
How to Plant: Step-by-Step for Each Method
Prepping your seed potatoes
Start with certified disease-free seed potatoes. Grocery store potatoes are often treated with sprout inhibitors and may carry blight or viruses. Do not plant them.
Chitting (pre-sprouting) gives you a head start, especially in short-season climates. Place seed potatoes in a cool, bright spot (not direct sun) for 2-4 weeks before planting. Small sprouts, about 1/2 inch long, are ideal.
If your seed potatoes are larger than a hen's egg, cut them into pieces. Each piece should have at least 2 eyes and be roughly the size of a golf ball. Let cut pieces cure for 1-2 days at room temperature so the cut surfaces form a protective callus.
This callus prevents rot after planting.
Planting depth and spacing that actually works
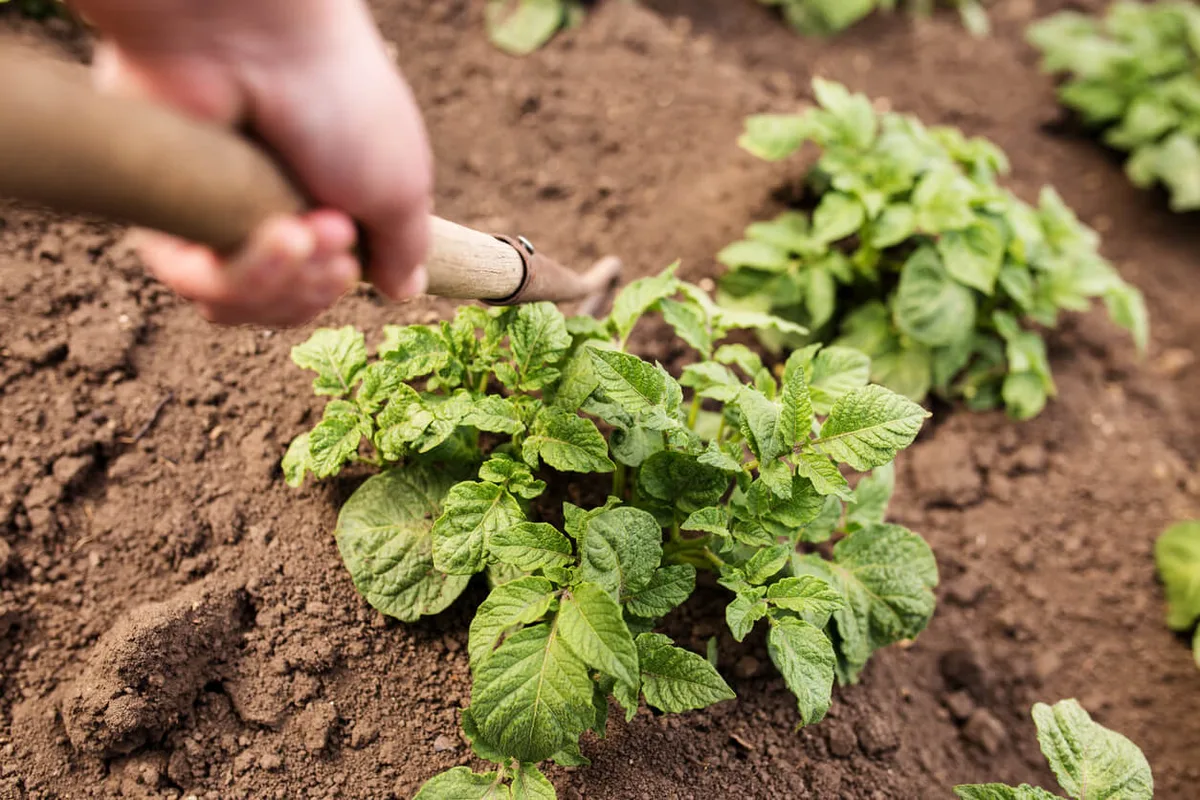
Image source: Web (Bing) / foodgardening.mequoda.com (Web image (fair-use with source credit))
Dig a trench or hole 4 inches deep for each seed piece. Place the piece with the eyes facing up. Cover it with 4 inches of soil.
Spacing depends on variety. Determinate (bush) varieties can go 10-12 inches apart. Indeterminate (vining) varieties need 12-18 inches.
Row spacing should be 24-36 inches so you have room to hill soil from between the rows.
If you are using containers, plant one seed piece per 5-gallon pot, or two pieces in a 10-gallon pot. Space them evenly within the container.
The hilling schedule that prevents green potatoes
Green potatoes contain solanine, a toxic compound that causes digestive upset and neurological symptoms. Green skin forms when tubers are exposed to light. Hilling prevents that.
When stems reach 6-8 inches tall, pile soil up around the stems, burying the lower half. Do this again when stems reach 12-15 inches. For indeterminate varieties, hill again when stems reach 18-20 inches.
The final hill should be 8-12 inches deep.
If you run out of soil to hill in raised beds or containers, add straw or compost on top as a makeshift barrier. The goal is to keep all developing tubers completely covered.
Watering and feeding
Potatoes need consistent moisture, about 1-2 inches of water per week. The critical window is during tuber set, which happens when the plants start flowering. Inconsistent watering during this period produces knobby, misshapen tubers.
Water deeply and evenly. Shallow watering encourages roots to stay near the surface, where they dry out faster. Drip irrigation or soaker hoses work best because they keep foliage dry, reducing disease risk.
For feeding, apply a balanced fertilizer with lower nitrogen at planting time. Too much nitrogen produces lush foliage and tiny tubers. A 5-10-10 formula works well.
Side-dress with the same fertilizer at first hilling.
Common Potato Planting Mistakes (And How to Fix Them)
Planting supermarket spuds
This is the single most common source of failure. Grocery store potatoes are often treated with sprout inhibitors to keep them shelf-stable. They may also carry late blight or bacterial ring rot, which can survive in your soil for years.
Use certified seed potatoes from a garden center or reputable online supplier. The small extra cost pays off in reliable growth and disease-free soil.
Skimping on hilling
New growers often hill once and call it done. By mid-summer, the hill has settled, and green potatoes poke through the soil surface. A single hour of sunlight can turn a tuber green and toxic.
Set reminders to hill every 2-3 weeks until the foliage closes over the rows. Six inches of hilled soil is the minimum and 10-12 inches is better. Do not let exposure happen.
Planting too early or too deep
Planting before the soil reaches 45°F wastes seed pieces. Planting deeper than 6 inches delays emergence and can suffocate the sprout in heavy soil. Four inches is the standard depth for initial planting.
If you accidentally plant too deep and the soil is warm enough, the sprout will eventually reach the surface. It may take 3-4 weeks instead of 2. Be patient and keep the soil moist but not waterlogged.
Ignoring crop rotation
Potatoes are susceptible to soilborne diseases such as scab and verticillium wilt. These pathogens build up in soil over time if you plant potatoes in the same spot every year.
Rotate to a different bed every year. A 3-4 year rotation is ideal. Do not plant potatoes where tomatoes, peppers, or eggplants grew the previous season.
They share the same disease family.
Watering like a lawn
Light sprinkling every evening keeps the soil surface damp but does not reach the root zone. Potatoes send roots down 12-18 inches. Shallow watering encourages shallow roots that dry out quickly.
Water deeply once or twice a week, delivering 1-2 inches total. A rain gauge helps you track how much water your garden actually receives. If you get rain, subtract that from your watering schedule.
Quick Decision Guide: Which Variety When & Where
Variety selection often gets treated as an afterthought. That is a mistake. The right potato variety can double your yield or save your season entirely.
The wrong one leaves you with tiny tubers and frustration.
Determinate vs. indeterminate: what this means for your space
Determinate varieties grow compact and produce in one flush. Indeterminate types vine out and keep setting tubers over a longer window. For containers and small beds, determinate is the easier choice.
For big gardens and storage, indeterminate wins.
| Variety Type | Best For | Examples | Days to Maturity |
|---|---|---|---|
| Early-season | Short summers, new potatoes | Yukon Gold, Red Norland | 60-75 |
| Mid-season | Balanced yields | Kennebec, Red Pontiac | 80-95 |
| Late storage | Long falls, winter storage | Russet Burbank, Katahdin | 100-120 |
| Container-friendly | Patios, grow bags | German Butterball, Red Norland | 70-90 |
Best early-season varieties for short summers
Early varieties reach maturity in 60-75 days. Yukon Gold and Red Norland are reliable picks. They suit cold climates, short seasons, and new potato harvests.
They store poorly, so plan to eat them fresh.
Best storage varieties for long winters
Late maincrop varieties like Russet Burbank and Katahdin need 100-120 days. They set heavy yields and keep 4-6 months in proper storage conditions. They need room to sprawl, so give them full rows or wide raised beds.
Best container varieties for tight spaces
Compact varieties work best in pots and grow bags. German Butterball and Red Norland stay manageable in 5-10 gallon containers. Expect 1-2 pounds per plant in containers, less in smaller pots.
Frequently Asked Questions
How late can I plant potatoes?
Count back 8 weeks from your first fall frost date. That is your latest planting window. Later plantings yield smaller potatoes, so choose short-season varieties.
In mild climates without hard freezes, you can plant year-round.
Can I grow potatoes from store-bought ones?
Not recommended. Store potatoes may carry blight and viruses that linger in your soil for years. Many are treated with sprout inhibitors.
Certified seed potatoes from a garden center cost little and come disease-free.
Do I really need to hill them?
Yes. Hilling keeps tubers covered so they stay green-free and safe. It also supports the stems and improves drainage.
Skip it, and exposed tubers turn toxic from light exposure.
How do I know when they're ready to harvest?
For new potatoes, dig 10-14 days after flowering starts. For storage potatoes, wait until vines turn yellow and die back. Cut the tops and rest 2 weeks before digging.
This sets the skins for longer shelf life.



