If you've ever looked at a bundle of asparagus and wondered whether you can preserve it without turning it into a limp mess, you're not alone. This pickled asparagus recipe is a home-canning staple, but it comes with strict safety rules. Get them right, and you'll have crisp, tangy spears for months.
Get them wrong, and you risk spoilage or worse.
Per the USDA Complete Guide to Home Canning, asparagus is a low-acid vegetable, and it must be acidified to a pH of 4.6 or lower before it's safe for water-bath processing. That means choosing vinegar with 5% acetic acid and following tested ratios, not eyeballing the brine. Here's how to sort through the methods, avoid the pitfalls, and make a batch you can actually trust.
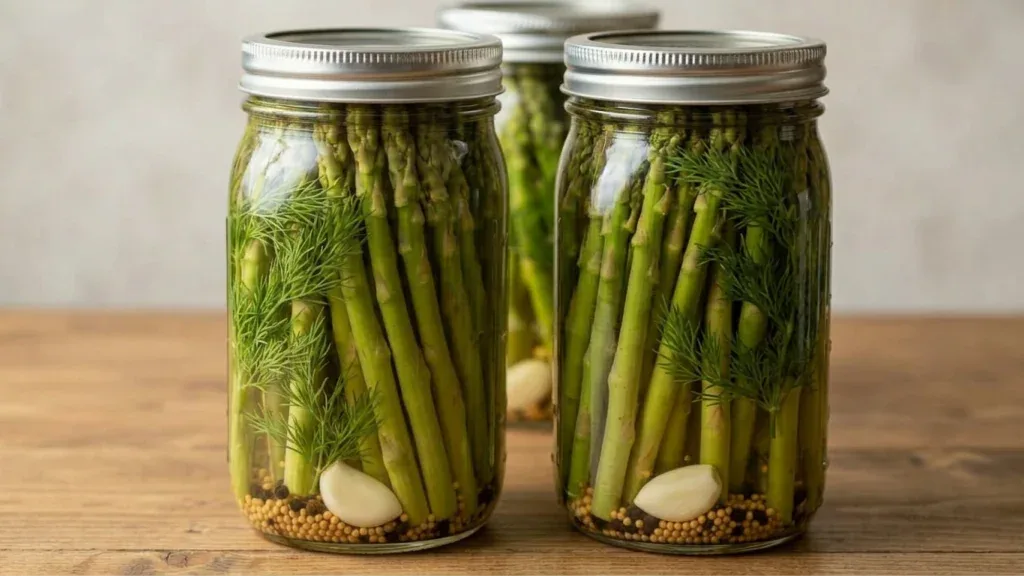
Image source: Bing (Web (fair-use with source credit))
Why Pickling Asparagus Isn’t a “Throw It Together” Recipe
Pickling asparagus is not like soaking cucumber slices in leftover vinegar. Asparagus is a low-acid vegetable, which means Clostridium botulinum, the bacteria that causes botulism, can survive in a sealed jar if the conditions are right. Those spores live naturally in garden soil.
They don't die in a boiling water bath, and they thrive without oxygen in a low-acid environment. That describes a sealed mason jar perfectly.
Old family recipes often skip the science and tell you to fill jars with vinegar and process them however your grandmother did. That works fine if your grandmother happened to follow tested canning guidelines. Untested recipes can leave you with bulging lids, foul smells, or potentially harmful bacteria.
Botulism is rare, but the consequences are severe enough that you don't gamble with an untested batch.
The goal is simple: make the jar acidic enough that spores can't grow. You do that with vinegar strength, brine ratio, and either refrigeration or proper heat processing. Every safety step exists for a reason, and none of them are negotiable when you plan to store jars at room temperature.
The National Center for Home Food Preservation publishes research-backed guidance, and any recipe you use should line up with their recommendations. Treat this like a chemistry experiment, not a freeform kitchen project. Follow the numbers, and the texture follows.
The Non-Negotiable: Vinegar Strength, Brine Ratio, and pH
Three numbers control whether your pickles are safe: 5%, 50%, and 4.6.
First, vinegar. The vinegar you use for canning must contain 5% acetic acid. Check the label carefully.
Some store-bought vinegars are 4% acidity, especially cheaper wine vinegars and some organic brands. Using them in a water-bath recipe could keep the brine above pH 4.6, and that's the danger zone where Clostridium botulinum can survive.
Second, brine ratio. A safe brine keeps vinegar at 50% or more of the total liquid, not counting the vegetables. Many tested recipes use a 1:1 ratio of vinegar to water.
Some, like the official pickled asparagus recipe from university extension offices, use heavier vinegar. More vinegar adds tang, but it also adds a margin of safety.
Third, pH. You want the finished brine to measure at 4.6 or lower. A pH meter or test strips are cheap insurance.
If you're unsure whether your brine is acidic enough, measure it before packing jars.
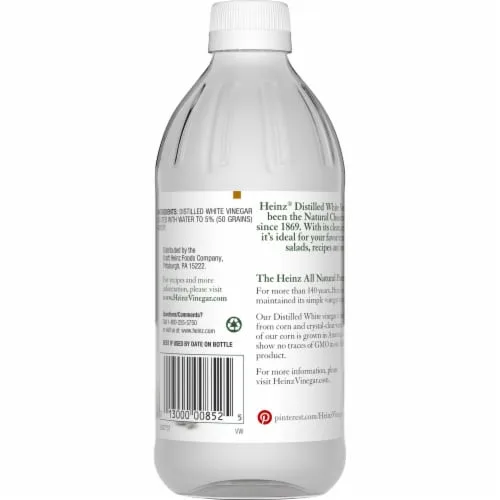
Image source: Bing (Web (fair-use with source credit))
Also, use pickling salt, not iodized table salt. Iodine can darken the brine and make it cloudy. Pickling salt dissolves clean and gives you the crisp, clear flavor you're after.
Avoid fine sea salt too, unless it's pure without anti-caking additives.
| Safety factor | Requirement |
|---|---|
| Vinegar acidity | 5% acetic acid |
| Brine ratio | At least 50% vinegar by volume |
| Target pH | 4.6 or lower |
| Salt | Non-iodized pickling salt |
Which Method Fits Your Situation: Refrigerator Pickling vs. Water-Bath Canning
The short answer: if you want a quick batch for the fridge, make refrigerator pickles. If you want shelf-stable jars that last through winter, water-bath can them.
Refrigerator pickles are the beginner-friendly route. You whisk together vinegar, water, salt, and sugar, pour it over fresh asparagus, and refrigerate. No heat processing, no altitude adjustments, and no botulism risk because the jars stay cold the whole time.
The catch? They only last 1 to 3 months in the fridge, and they never leave cold storage.
Water-bath canning is for long-term storage. You use the same brine ingredients, but you process sealed jars in boiling water. That kills spoilage organisms and creates a vacuum seal.
Processed properly, jars stay safe on the pantry shelf for up to 12 months. You can make gifts, holiday appetizers, and a stash that carries you past asparagus season.
How to decide? Look at your timeline. If you have a few pounds of asparagus and plan to eat it within a few weeks, skip the canner.
If you're dealing with a spring harvest surge or you want shelf-stable gifts, can them. Also consider your comfort level. Refrigerator pickles are practically foolproof.
Water-bath canning asks for more precision and patience.
Processing times change with altitude. Per the USDA Complete Guide to Home Canning, add 5 minutes if you live above 1,000 feet, 10 minutes above 3,000 feet, and 15 minutes above 6,000 feet. Your local university extension office can give exact recommendations for your specific elevation.
| Method | Processing | Shelf life | Risk level |
|---|---|---|---|
| Refrigerator pickles | None | 1-3 months refrigerated | Very low |
| Water-bath canned | 10-20 minutes in boiling water | Up to 12 months pantry | Low if processed correctly |
Step-by-Step: How to Make Safe, Crunchy Pickled Asparagus
This is the sequence we recommend for a 5-pound batch, enough to fill about 6 pint jars.
Step 1: Prep your jars and tools. Wash mason jars in hot, soapy water and keep them warm. Sterilizing isn't required for water-bath canning when processing time exceeds 10 minutes, but starting with clean, hot jars prevents breakage.
Step 2: Trim the asparagus. Cut spears to fit inside your jars with 1/2 inch of headspace at the top. Thin spears stay crunchier than thick ones.
Peel tough outer skin from thicker spears if you want a more tender bite.
Step 3: Pack the jars. Pack asparagus loosely with garlic cloves, fresh dill, mustard seeds, and red pepper flakes. Don't cram them in.
Tightly packed jars trap air pockets, and those pockets process unevenly.
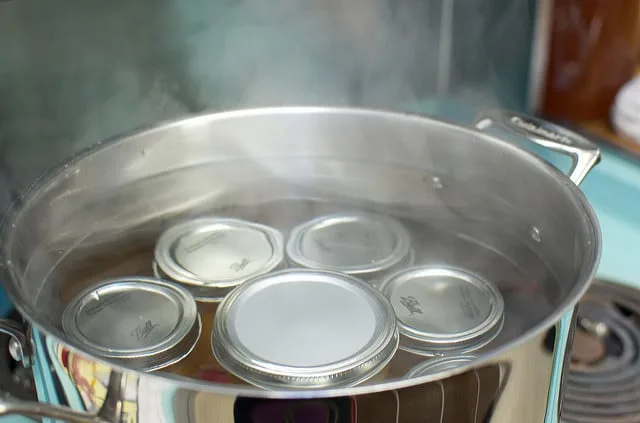
Image source: Bing (Web (fair-use with source credit))
Step 4: Make the brine. Combine 2 cups of 5% white vinegar, 2 cups of water, 2 tablespoons of pickling salt, and 1 tablespoon of sugar in a non-reactive pot. Bring it to a boil.
Step 5: Pour and bubble. Ladle the hot brine over the asparagus, leaving that 1/2 inch headspace. Run a bubble remover or a clean butter knife down the sides to release trapped air.
Wipe the jar rims with a damp cloth. Place the lids on and screw the bands fingertip-tight.
Step 6: Process. Lower jars into a water-bath canner. Cover them with at least 1 inch of water.
Process pints for 15 minutes at altitudes up to 1,000 feet, then adjust for your elevation.
Step 7: Cool and check. Stand the jars on a towel and leave them undisturbed for 12 to 24 hours. Press the center of each lid.
If it doesn't pop, the seal is good. Store sealed jars in a cool, dark pantry.
5 Mistakes That Compromise Safety or Texture
Using vinegar below 5% acidity. This is the biggest safety mistake. If the label doesn't say "5% acidity" or "50 grain," don't use it for canning. The numbers matter more than the brand.
Over-diluting the brine. More water makes mushier spears and raises the pH. Stick to the recipe. Don't add extra water to stretch the batch, and don't swap water for the vinegar portion.
Skipping altitude adjustments. Water boils at a lower temperature at higher elevation, so the heat doesn't penetrate jars as quickly. Process longer, and keep the water level at least 1 inch above the jar tops.
Packing jars too tightly. It's tempting to wedge in every last spear, but air pockets block heat from reaching the center. Pack loose, remove bubbles, and give the jars room to process evenly.
Ignoring spoilage signs. Bulging lids, leaking brine, a foul odor, or visible mold means the batch is bad. Never taste from a questionable jar. When in doubt, throw it out.
Texture tip: for refrigerator pickles, blanch the asparagus in boiling water for 2 minutes first, then shock it in ice water. That helps it stay crisp and bright green. For canned pickles, skip the blanching unless the recipe calls for it, since the processing time already provides the heat.
FAQ: Pickled Asparagus Recipe Questions You Shouldn’t Skip
Do I have to blanch asparagus before pickling?
No, but it helps. Blanching sets the bright green color and softens the spears slightly for better brine absorption. For refrigerator pickles, blanch 2 minutes in boiling water then shock in ice water.
For canned pickles, you can skip it since the water bath already provides heat.
What kind of vinegar works best for asparagus pickles?
Distilled white vinegar with 5% acidity is the standard choice. It has a clean, neutral tang that doesn't overpower the asparagus. White wine vinegar works too and adds a milder flavor.
Apple cider vinegar can be used, but it will darken the brine over time.
Can I reuse the brine for another batch?
No. Used brine has reduced acidity and may contain particles from the first batch. Reusing brine can push the pH above 4.6, making the second batch unsafe for room temperature storage.
Always make a fresh brine each time.
How long do pickled asparagus spears actually last?
Canned pickled asparagus stays safe on the pantry shelf for up to 12 months. The quality peaks in the first 6 months. Refrigerator pickles last 1 to 3 months in the fridge, though the spears soften gradually.
Always check for spoilage signs before eating.
Why did my pickled asparagus turn out limp or mushy?
Two common causes: over-processing or using thick spears. Thick asparagus has a tougher outer layer and a softer interior that breaks down in the brine. Thin spears hold their crunch better.
Also, processing jars longer than the recipe calls for softens the texture considerably.
Do I need to add sugar to the brine?
No, it's optional. Sugar balances the acidity and rounds out the flavor, but it doesn't affect safety. If you prefer a purely tangy pickle, skip the sugar.
If you want a milder, more approachable flavor, use 1 tablespoon per 2 cups of liquid.
The Bottom Line: Pickle Smart, Store Safe, Enjoy All Year
Pickled asparagus is one of the most rewarding ways to preserve a spring harvest. The spears stay crunchy, the brine is tangy, and a pint jar makes an instant upgrade to salads, charcuterie boards, and Bloody Marys. But the method matters more than the ingredients.
Stick to 5% vinegar. Keep the brine ratio at 50% vinegar or higher. Process with the correct time for your altitude.
And when in doubt, choose the refrigerator method over guessing at canning.
The best pickled asparagus recipe is the one you follow precisely. Trust the tested numbers, not the old family lore. Measure your pH if you're unsure.
Store your jars in a cool, dark place, and label them with the date so you know what to eat first.
As of 2026, the USDA and the National Center for Home Food Preservation still publish the same core guidelines. They haven't changed in decades because the science hasn't changed. Follow those standards, and you'll have crisp, safe, delicious spears that last from spring straight through winter.