Overwintering tender bulbs feels like a high stakes game. Many gardeners lose a third of their dahlias and cannas to rot or shriveling every winter. The problem is almost never bad luck.
It's a chain of small decisions that go wrong.
Our research shows the ideal storage temperature for most tender bulbs sits between 40 and 50°F (4-10°C). Staying in that narrow band keeps bulbs dormant without freezing or sprouting. Most storage failures happen because people guess the conditions rather than check them.
Let's walk through the exact decisions that change your approach.
Why Most Gardeners Kill Their Bulbs During Winter (and How You Won't)
The biggest mistake is treating every tender bulb the same. A dahlia tuber has different moisture needs from a gladiolus corm. A canna rhizome stored in damp peat moss rots fast, while a caladium bulb left out dries to a crisp.
You cannot apply one method to all of them.
The second mistake is timing. Digging too early means bulbs have not fully ripened. They lose stored energy and come back weak in spring.
Digging too late means a hard freeze turns them to mush. The window is narrow.
The third mistake is storage conditions. Warm garage air above 55°F triggers premature sprouting. A damp basement below 35°F freezes the bulbs from the inside out.
Many people just toss them in a cardboard box and hope for the best.
You win winter storage by making choices based on three things: your climate zone, your bulb type, and whether your bulbs are in the ground or in containers. The rest is just careful execution.
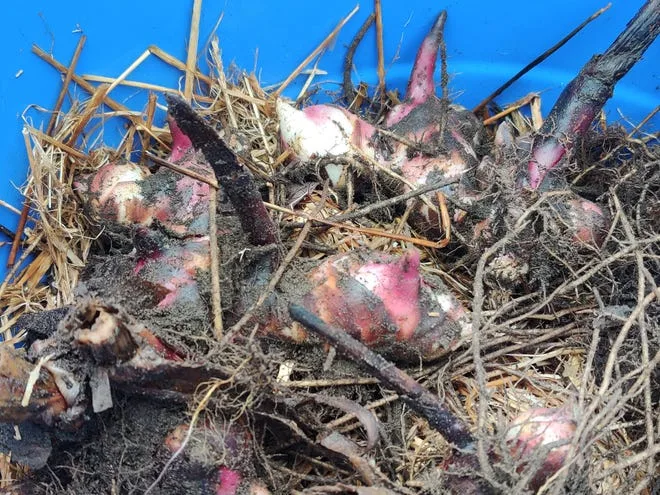
Image source: Web (Bing) / detroitnews.com (Web image (fair-use with source credit))
The Four Conditions That Decide Your Storage Method
You need to answer four questions before you do anything else. Your answers lead to completely different storage paths.
First, what is your USDA Plant Hardiness Zone? That sets the baseline for whether you even need to dig. The USDA Plant Hardiness Zone Map is the standard reference here.
Use it to check your average coldest winter temperature.
Second, what type of tender bulb do you have? Dahlias, gladiolus, cannas, elephant ears, caladiums, and tuberous begonias all require slightly different treatment. We will cover the main differences.
Third, are your bulbs in the ground or in containers? Container grown bulbs are far easier to store. You can move the entire pot into a cold garage or basement without digging up anything.
Fourth, what storage space do you have available? A cool, dark, dry basement works well. An unheated attached garage is often fine if it stays above freezing.
A root cellar is ideal. A heated living room is a disaster.
Here is a quick reference table for how these conditions interact:
| Condition | Decision Branch |
|---|---|
| Zone 8 or warmer | Likely safe in ground with mulch |
| Zone 7 or colder | Must lift or move containers |
| In-ground bulbs | Full dig, cure, pack, store workflow |
| Container bulbs | Move whole pot or dig and store |
| Cool basement (40-50°F) | Ideal for most bulbs |
| Warm garage (55°F+) | High risk of sprouting |
Use this table to identify your starting point. Then follow the specific branch for your situation.
Condition A: You Live in Zone 8 or Warmer — Do You Even Need to Dig?
If you live in USDA Zone 8 or warmer, you might be able to leave your tender bulbs right where they are. That is correct for some, but not all.
In Zone 8, soil temperatures rarely drop below 20°F for long periods. Many tender bulbs survive with a thick layer of mulch applied after the first frost. Dahlia tubers left in the ground with 6-8 inches of straw or shredded leaves often come back fine.
Gladiolus corms are less reliable and likely need lifting.
In Zone 9 and 10, you usually do not need to dig at all. Your ground stays warm enough. The bigger risk is wet soil rotting the bulbs during winter rains.
Good drainage matters more than temperature at that point.
If you decide to leave bulbs in the ground, apply mulch after the foliage dies back. Do not mulch while the leaves are still green. That traps moisture against the stems and invites rot.
Pull the mulch back in early spring when new growth appears.
If you are in a marginal Zone 8 year, say after an unusually cold autumn, it is safer to lift a few bulbs as insurance. You can always compost the extras in spring if they survive in the ground.
Condition B: You Live in Zone 7 or Colder (In-Ground Bulbs) — The Full Workflow
This is where most of the work happens. If you live in Zone 7 or colder and your tender bulbs are in the ground, you need to lift, cure, pack, and store them. Here is the full workflow, broken into clear steps.
When to Dig (and the Frost Signal You Can't Ignore)
Wait for the first light frost to kill the foliage. Do not dig before that. The leaves are still sending energy down to the bulbs.
Cutting them early steals next year's growth.
Wait for the leaves to turn black or limp. That is your signal. Then cut the stems back to 4-6 inches long.
Leave that stub attached. If you cut it flush, you create an open wound that rots fast.
Dig on a dry day if possible. Wet soil clings to bulbs and makes curing harder. Use a garden fork, not a shovel.
A fork slides under the bulbs with less chance of slicing through them.
How to Lift, Clean, and Cure Without Rotting
Gently lift the clump from underneath. Shake off loose soil. Do not wash the bulbs with water.
Washing strips away the natural protective layer and introduces moisture that causes rot.
Trim off any long, stringy roots. Remove broken or damaged sections with a clean knife. If you see soft spots, cut them out completely.
Dust the cut surfaces with sulfur powder or a similar fungicide. This prevents fungal infections during storage.
Cure the bulbs in a single layer on newspaper or a wire rack. Place them in a dry, shaded, well ventilated space. A garage or shed works well.
Let them cure for 1 to 3 days. The cut stems should feel dry and slightly corky before you pack them.
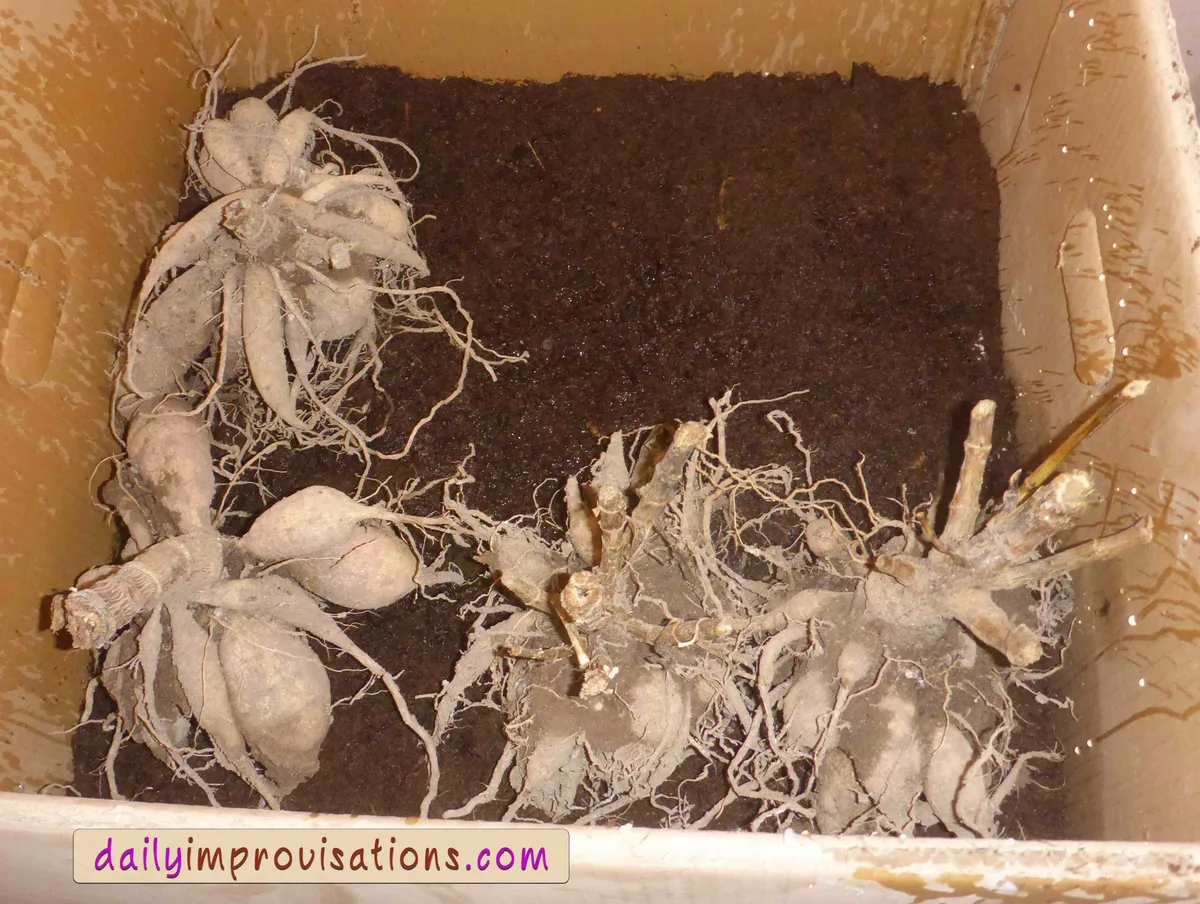
Image source: Web (Bing) / dailyimprovisations.com (Web image (fair-use with source credit))
Packing for Storage: Choosing the Right Medium and Container
Pack bulbs in a container with a dry storage medium that prevents desiccation and absorbs excess humidity. The most common options are peat moss, vermiculite, perlite, shredded newspaper, and dry sand.
Peat moss works well for most bulbs because it holds some moisture without staying wet. Vermiculite is excellent for more delicate bulbs like caladiums. Sand is heavy and rarely needed for home storage.
Use a cardboard box or a plastic bin with ventilation holes. Do not seal the lid tight. Bulbs need airflow.
Pack bulbs in a single layer with storage medium around them. Do not let them touch each other. Label each variety clearly.
Where to Store: Temperature, Humidity, and Airflow
Store the packed container in a cool, dark, frost free location. The sweet spot is 40 to 50°F with moderate humidity. A basement is often perfect.
An unheated garage works if it does not drop below 35°F.
Check the temperature once a week with a simple thermometer. If the room gets too warm, bulbs may sprout early. If it gets too cold, they freeze.
Adjust the location as the season changes.
Condition C: You Have Container-Grown Tender Bulbs — The Easier Path
Container grown tender bulbs are the easiest to overwinter. You do not need to dig, cure, or pack them. You just move the entire pot.
After the first frost kills the foliage, cut back the stems to a few inches. Then move the pot into a cool, dark, frost free location. A basement, garage, or crawl space works perfectly.
Water the pot very lightly once a month. The goal is to keep the soil barely moist, not wet. Overwatering rots the roots.
Underwatering dries the bulbs completely.
If you do not have space for large pots, you can dig the bulbs out of the container and store them bare root using the same process as in ground bulbs. That takes more work but uses less space.
Container storage works for dahlias, cannas, elephant ears, and most other tender bulbs. Just make sure the pot has drainage holes. Standing water in the pot over winter is a death sentence.
Common Mistakes That Ruin Stored Bulbs (and How to Catch Them Early)
Most storage failures follow a predictable pattern. You can catch almost all of them before they wipe out a season if you inspect your bulbs monthly.
Rot is the number one killer. It starts as a soft, discolored spot that spreads fast. Check each bulb and squeeze gently.
Any that feel mushy should be removed immediately. One rotting bulb can spoil every bulb it touches.
Shriveling is the opposite problem. Bulbs stored somewhere too warm or too dry lose moisture and turn into hard, wrinkled husks. They will not grow in spring.
If your storage medium is bone dry, add a very light mist of water and mix it through.
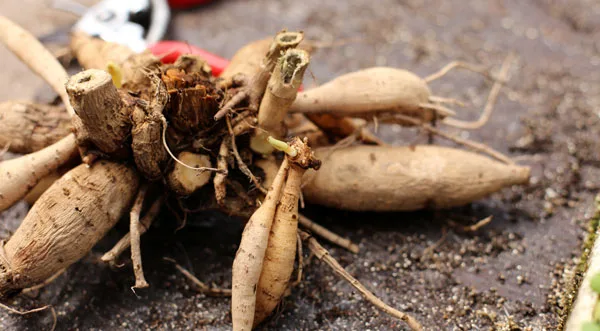
Image source: Bing (Web (fair-use with source credit))
Mold also sneaks in during humid winters. A thin, gray fuzz on the exterior is normal and harmless. Thick, black or green fuzz in clusters means the storage medium is too wet.
Here is a quick troubleshooting reference:
| Problem | Visual Cue | Immediate Fix |
|---|---|---|
| Rot | Soft brown spots, mushy texture | Remove the bulb; check neighbors |
| Shriveling | Wrinkled skin, light weight | Mist the storage medium lightly |
| Mold | Green or black fuzzy patches | Increase airflow; reduce humidity |
| Early sprouting | Pale white shoots emerging | Move to a colder location |
| Pest damage | Tiny holes, fine dust, chew marks | Discard affected bulbs; clean container |
Your Quick Decision Guide by Bulb Type
Different bulb types want slightly different treatment. Here is the short version of what to do with the most common tender bulbs.
Dahlias prefer a cool, dry spot around 40 to 45°F. Store them in slightly damp peat moss or vermiculite. Caladiums need a warmer spot, never below 55°F, and they tolerate higher humidity.
Gladiolus corms store best in a cool, dry place without any medium at all.
Cannas are more forgiving. They store well in a cool basement, packed loosely in a cardboard box. Elephant ears need moderate humidity to avoid shriveling.
Tuberous begonias must stay in their original pot, nearly dry, in a cool dark room.
| Bulb Type | Storage Medium | Best Temperature | Special Notes |
|---|---|---|---|
| Dahlias | Slightly damp peat moss | 40-45°F | Dust cuts with sulfur powder |
| Gladiolus | Dry, none needed | 40-50°F | Keep in mesh bags or trays |
| Cannas | Dry cardboard box | 40-50°F | Store as whole clumps |
| Caladiums | Damp vermiculite | 55-65°F | Do not let them freeze |
| Elephant ears | Moist sand or peat | 50-60°F | Check monthly for shriveling |
| Begonias | In original pot | 40-50°F | Keep barely moist |
Once you know your bulb type, storage becomes simple. Pick the right medium, find the right spot, and check once a month.
Frequently Asked Questions
Can I leave tender bulbs in the ground over winter?
Yes, but only in USDA Zones 8 and warmer. A thick layer of mulch helps protect them from occasional cold snaps. For Zones 7 and colder, digging is the safer choice.
A hard freeze below 28°F can damage most tender bulbs left in the soil.
When should I dig up my tender bulbs?
Dig after the first light frost kills the foliage but before a hard freeze. For most gardeners, that is mid to late autumn. The foliage signals readiness.
It should look blackened and limp. Digging too early means less stored energy for spring growth.
How do I store bulbs without peat moss?
Shredded newspaper, vermiculite, or dry sand all work well. Newspaper is inexpensive and easy to find. Vermiculite holds humidity more evenly.
Just avoid plastic bags sealed tight, they trap moisture and cause rot. Cardboard boxes with ventilation holes are always a good choice.
When should I take bulbs out of storage?
Start about 4 to 6 weeks before your last expected frost date. Remove them from the storage medium and pot them in fresh, moist soil. Place them in a warm spot with bright light.
Move them outside only after soil temperatures reach 60°F and all frost risk has passed.