
Imagine stepping into your garden at night and being greeted by a beautifully illuminated pathway, where soft lights accentuate the lush greenery and create a magical ambiance. It sounds enchanting, doesn’t it?
Installing low voltage garden lights can transform your outdoor space into a stunning evening retreat, making every night feel like a special occasion. But how do you get started with this dazzling transformation? If you’re worried about complicated installations or high energy bills, rest assured that low voltage garden lights are both easy to install and energy-efficient.
In this guide, we’ll walk you through the simple steps to illuminate your garden, ensuring you can enjoy your outdoor oasis long after the sun sets. Discover how you can effortlessly enhance your garden’s beauty and functionality. Ready to light up your nights? Let’s get started!

Credit: wirefyshop.com
Choosing The Right Garden Lights
Select low voltage lights for easy installation. Connect lights to a transformer and run cables underground. Ensure all connections are secure for safety.
Choosing the right garden lights can transform your outdoor space. Low voltage lights are energy-efficient and easy to install. They provide subtle illumination, enhancing your garden’s beauty. Selecting the perfect lights involves understanding different types and considering key factors.Types Of Low Voltage Lights
Low voltage lights come in various styles. Path lights guide visitors along walkways. Spotlights highlight specific plants or garden features. Floodlights provide broad illumination for larger areas. Deck lights are perfect for patios or stairways. Each type serves a unique purpose in your garden design.Factors To Consider
Consider the light’s purpose before making a choice. Think about the garden’s layout and the areas you want to illuminate. Choose lights that match your garden’s theme and style. Weather resistance is important for durability. Look for lights with quality materials like stainless steel or aluminum. Energy efficiency can save costs in the long run. LED lights are popular for their low energy consumption. Check the voltage compatibility with your existing setup. Ensure the lights have easy installation features. Safety is crucial, especially in areas with children or pets.Essential Tools And Materials
Installing low voltage garden lights can transform your outdoor space into a magical retreat. Before diving into the installation process, it’s important to gather all the essential tools and materials. Having everything ready not only streamlines the process but also ensures you can focus on the fun part—lighting up your garden! Let’s look at what you’ll need to get started.
Tools You’ll Need
- Screwdriver:A basic tool, but crucial for securing connectors and fixtures.
- Wire Stripper:This tool helps in stripping the insulation off the wires, ensuring a clean connection.
- Shovel or Trowel:Handy for digging shallow trenches for the wiring.
- Voltage Tester:Ensures everything is safe and functioning correctly once installed.
- Measuring Tape:Essential for spacing out your lights evenly.
Have you ever tried using a rusty screwdriver? It’s frustrating and can even strip the screws. Investing in a good set of tools can save you from such headaches.
Materials Checklist
- Low Voltage Lights:Choose a design that complements your garden’s aesthetic.
- Low Voltage Transformer:Converts your regular household current to a safe level for outdoor lighting.
- Landscape Wire:The lifeline of your lighting system, connecting all the fixtures.
- Connectors:Use waterproof connectors to ensure durability and safety.
- Mounting Stakes:These keep your lights upright and secure in the ground.
Imagine setting up your garden lights only to find out you’ve run out of connectors. It’s like baking a cake and forgetting the sugar. A thorough checklist prevents such scenarios.
Are you ready to light up your garden? Ensuring you have the right tools and materials at hand is the first step towards a successful installation. What are you waiting for? Start gathering your supplies today!
Planning Your Layout
Planning your layout is crucial for garden lighting. It ensures effective illumination and beautiful aesthetics. Thoughtful planning avoids common issues. Let’s explore how to create a functional and visually appealing lighting plan.
Designing The Lighting Scheme
Begin by identifying key areas to light. Paths, patios, and plants often need lighting. Focus on these spots first. Think about the mood you want. Warm light creates a cozy atmosphere. Bright light enhances security. Choose fixtures that match your garden style.
Consider different light types. Spotlights highlight specific features. String lights add charm to trees or fences. Mixing light types creates depth and interest. Ensure your design flows well with your garden’s natural features.
Mapping Out The Installation
Draw a map of your garden. Mark where each light will go. Consider power source locations. Measure distances to ensure cable reach. Avoid placing lights too close. It can lead to harsh shadows or glare.
Include pathways for cables in your map. Keep them out of sight. Check for obstacles like rocks or roots. This avoids damage during installation. Plan for future garden changes. This ensures flexibility in your lighting design.
Preparing The Site
Clear the area for installation by removing debris and obstacles. Ensure the ground is level for easy placement. Check the soil for proper drainage to prevent waterlogging around the lights.
Preparing the site for installing low voltage garden lights is crucial. This step ensures your lights function optimally and look great. A well-prepared site prevents future issues and enhances your garden’s beauty.Clearing The Area
Start by removing any debris. This includes rocks, leaves, and branches. A clean area makes installation easier. It also helps lights sit properly. Trim overgrown plants and bushes. This ensures they don’t block the light. A clear area maximizes light spread and ensures your garden shines.Ensuring Safety
Safety is important when working with electricity. Identify any underground cables or pipes. This prevents accidental damage during installation. Use a voltage detector if unsure. Wear safety gloves while working. Gloves protect your hands from sharp objects and electrical hazards. Keep children and pets away from the installation site. This prevents any accidents and ensures a safe working environment.Installing The Transformer
Secure the transformer near a power outlet. Attach wires from the lights to the transformer’s terminals. Ensure all connections are tight and insulated.
Installing a transformer is a critical step in setting up your low voltage garden lights. It might seem daunting, but with a bit of guidance, you can easily manage this task. Think of the transformer as the heart of your lighting system, converting high voltage power into the low voltage needed to safely illuminate your garden.Choosing The Transformer Location
Selecting the right spot for your transformer is crucial. Ideally, it should be near a power outlet and protected from harsh weather conditions. A covered porch or garage wall can be perfect choices. Make sure it’s close enough to your light fixtures to minimize power loss over long cable runs. Consider the aesthetic aspect as well. You wouldn’t want the transformer to be an eyesore in your beautifully curated garden. Try to choose a location that keeps it out of sight but still accessible for maintenance.Mounting The Transformer
Once you’ve picked the location, it’s time to mount the transformer. Use a sturdy bracket to secure it to the wall. Ensure it’s mounted at least 12 inches above the ground to prevent water exposure. Double-check that it’s level and firmly attached. A wobbling transformer can lead to loose connections and potential hazards. After mounting, connect the transformer to the power source. Always follow the manufacturer’s instructions for safe installation. Remember, safety first—turn off the power before handling any electrical components. Isn’t it satisfying to see the progress you’re making? With the transformer in place, you’re one step closer to a beautifully illuminated garden.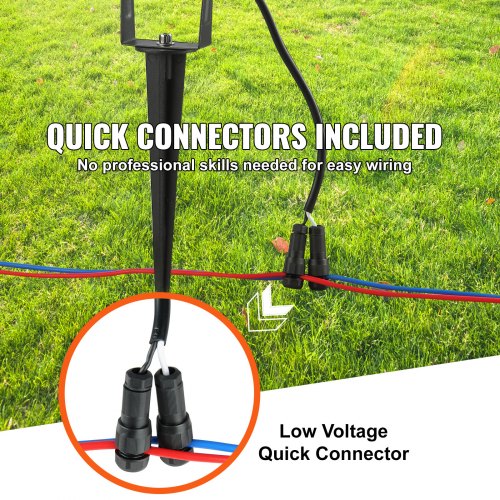
Credit: www.vevor.com
Laying The Cable
Laying the cable correctly ensures efficient lighting for your garden. Begin by planning the path for the cables. Use a spade to create shallow trenches, then place the cables securely, allowing enough slack for adjustments.
Laying the cable for low voltage garden lights is crucial. Proper installation ensures reliable performance. The process involves several steps. Each step requires attention to detail. Begin by understanding your garden’s layout. This helps in measuring the cable length accurately.Measuring And Cutting The Cable
Measure the distance between lights and the power source. Use a tape measure for accuracy. Keep the cable path straight and clear. Avoid obstacles like rocks or roots. Once measured, cut the cable to fit. Use wire cutters for a clean cut. Double-check the measurements before cutting.Burying The Cable Safely
Burying the cable protects it from damage. Dig a shallow trench along the measured path. The trench should be 3 inches deep. Lay the cable inside the trench. Ensure it sits flat without twists. Cover the cable with soil gently. Pat the soil to secure the cable. Avoid placing heavy objects on top. This prevents cable damage and ensures safety.Connecting The Lights
Discover the simplicity of installing low voltage garden lights. Begin by planning the layout and preparing the electrical cables. Connect fixtures securely to the power source, ensuring all connections are waterproof. Enjoy a beautifully lit garden without the hassle of high-voltage systems.
Connecting the lights in your garden can transform your outdoor space. Low voltage lighting is ideal for achieving a warm and inviting atmosphere. Ensuring proper connections is crucial for functionality and safety. Let’s explore how to connect these lights effectively.Attaching Lights To The Cable
Start by laying out the low voltage cable. Measure the path you want the cable to follow. Cut the cable to the desired length using a wire cutter. Place the lights where you want them along the cable. Each light will have a connector; attach these to the cable. Ensure the connectors pierce through the cable insulation. This allows electricity to flow to the light. Press firmly to secure the connection between the cable and the light.Securing Connections
It’s vital to secure all connections to avoid issues. Use waterproof connectors for added protection. These keep moisture out and ensure durability. Check that each connection is tight and secure. Loose connections can affect the light’s performance. Test each light after securing connections. This ensures every light works properly before finishing the installation. Consider using electrical tape for added safety. Wrap the tape around exposed areas to prevent accidental contact. Follow these steps to connect your garden lights safely and effectively.
Credit: www.amazon.com
Testing The System
Testing the system ensures your low voltage garden lights work flawlessly. Connect the lights and power supply. Check each light for proper illumination to confirm correct installation.
Testing the system is an essential step after installing low voltage garden lights. It ensures everything functions smoothly and provides the desired ambiance. This phase involves a few key steps to confirm the lights work correctly. Follow this guide to troubleshoot and verify your garden lighting system.Powering On
Begin by connecting the transformer to the power source. Ensure all cables are securely attached. Turn on the transformer switch. Observe if the lights illuminate as expected. If they do, you’re on the right track. A consistent glow across all fixtures indicates a successful installation.Troubleshooting Common Issues
Sometimes, lights may not function as planned. Check for loose connections in the wiring. Inspect the bulbs to ensure they are not burnt out. Verify that the transformer is set to the correct voltage. Use a voltage tester to check for power in the cables. If a section remains dark, it might indicate a wiring issue. Re-examine those parts for any visible damage. If these steps don’t resolve the problem, consult the light manufacturer’s manual. It may offer specific troubleshooting tips for your lighting model.Final Adjustments And Maintenance
After installing your low voltage garden lights, it’s time for some final touches. These adjustments ensure your lights shine perfectly and remain in top condition. Proper maintenance will extend their life and keep your garden beautiful.
Adjusting Light Angles
Adjust each light to highlight your garden’s best features. Aim the lights to accentuate paths, trees, or flower beds. Use a gentle tilt for soft, ambient lighting. Avoid direct light into windows or neighboring yards. A well-angled light enhances beauty and provides safety.
Regular Maintenance Tips
Inspect your garden lights regularly to keep them working well. Check for dirt or debris on the fixtures. Clean with a soft cloth to maintain brightness. Ensure all connections remain tight and secure. Loose connections can cause lights to flicker or fail.
Trim any plants or grass around the lights. This prevents shadows and ensures even lighting. Replace burnt-out bulbs promptly to avoid uneven lighting. Use bulbs with the same wattage for consistent brightness.
Consider seasonal changes in your maintenance routine. During winter, protect lights from snow or ice buildup. In summer, check for overheating or sun damage. Regular care keeps your garden lights shining beautifully year-round.
Frequently Asked Questions
Can You Install Low Voltage Lighting Yourself?
Yes, you can install low voltage lighting yourself. It’s generally safe and easy for DIY enthusiasts. Ensure you follow the manufacturer’s instructions and local regulations for a successful installation. Always prioritize safety and use appropriate tools.
How To Connect Low Voltage Garden Lights?
Connect low voltage garden lights by attaching them to a transformer. Lay out the cable, then connect lights. Ensure connections are secure and weatherproof. Test the system before finalizing.
How Deep Does Low Voltage Lighting Need To Be Buried?
Low voltage lighting cables should be buried at least 6 inches deep. This depth protects them from damage. Ensure the trench is clear of sharp objects. Use conduit for additional protection. Always check local codes and regulations before installation.
Do I Have To Have A Transformer For Low Voltage Landscape Lights?
Yes, a transformer is necessary for low voltage landscape lights. It reduces standard electrical voltage to a safer level. This ensures efficient lighting and prevents electrical hazards. Choosing the right transformer size is essential for optimal performance and safety. Install it according to manufacturer guidelines for best results.
Conclusion
Installing low voltage garden lights is simple and rewarding. These lights enhance your garden’s beauty and safety. Start by planning your layout. Choose suitable lights for your garden’s style. Connect your lights with the correct wire. Ensure everything is secure and weatherproof.
Test your lights to see them glow beautifully. Regular maintenance keeps them shining brightly. Enjoy the peaceful ambiance they create. Your garden becomes a magical space at night. With a little effort, your garden transforms beautifully. Light up your evenings with ease and elegance.
Feel proud of your handiwork. Enjoy every moment in your glowing garden retreat.


