A leaky or kinked garden hose can quickly turn your peaceful gardening session into a frustrating ordeal. Imagine the scene: you’re ready to water your plants, but instead of a smooth flow, you’re met with unexpected drips or a tangled mess.
It’s enough to make anyone want to toss their hose aside. But wait—before you consider buying a new one, there’s good news. You can easily fix your garden hose with just a few simple steps. In this guide, you’ll discover how to tackle common hose problems with ease.
Whether it’s patching up leaks or straightening out stubborn kinks, you’ll soon have your trusty garden tool back in top shape. Let’s turn your gardening woes into a rewarding DIY victory. Ready to get started?

Credit: www.familyhandyman.com
Common Garden Hose Issues
Leaky connections and cracks in the hose can disrupt garden chores. Fix these issues by replacing faulty washers or using repair kits. Regular checks and maintenance can prevent most garden hose problems.
Garden hoses are essential tools for maintaining a vibrant garden. Yet, they often suffer wear and tear, leading to common issues. Identifying these problems early can save time and prevent further damage. Here, we delve into some frequent garden hose troubles.
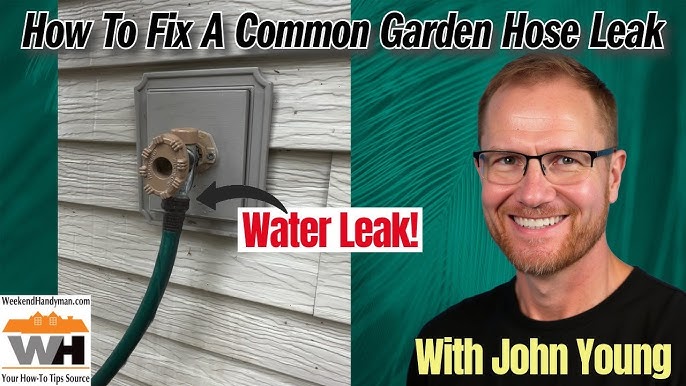
Leaks And Holes
Leaks often occur due to punctures or cracks. A small hole can waste water and reduce pressure. To fix this, clean the affected area and dry it. Use waterproof tape or a hose repair kit for sealing. Ensure the patch is tight and covers the hole completely. Regular checks can prevent unnoticed leaks.
Kinks And Twists
Kinks reduce water flow and can damage the hose. Straighten the hose completely to remove twists. Avoid dragging it around sharp corners. Store the hose on a reel when not in use. This helps maintain its shape. Consider hoses with kink-resistant materials for long-term solutions.
Connector Problems
Connectors can loosen or corrode, leading to leaks. Inspect the connectors regularly for wear. Tighten loose fittings using pliers if necessary. Replace damaged washers to ensure a snug fit. Use thread seal tape for better grip. Choosing quality connectors can enhance durability.
Credit: www.tiktok.com
Tools And Materials Needed
When you’re dealing with a leaky or damaged garden hose, having the right tools and materials on hand can make the repair process quick and easy. Whether you’re fixing a small puncture or replacing a worn-out connector, knowing what you’ll need ahead of time is crucial. Let’s delve into the essential components for a successful repair.
Essential Tools
Having a toolkit specifically for your garden hose repair can save you time and frustration. You’ll need basic items like pliers and a screwdriver. Pliers are great for gripping and tightening hose connectors, while a screwdriver can help with loosening stubborn clamps. A utility knife can be handy for cutting the hose cleanly if you need to replace a section. Always keep these tools in a dry, accessible place so you’re ready for any hose mishap.
Repair Kits
Repair kits are a lifesaver when you need a quick fix. They often include connectors, washers, and clamps that fit various hose sizes. A simple hose connector can restore your hose’s functionality in minutes. Look for kits that match your hose type — whether it’s rubber or vinyl — as this ensures a better fit. Investing in a high-quality kit can be a smart move if you frequently use your garden hose.
Safety Equipment
Safety should always be your priority. Gloves protect your hands from sharp edges and any chemicals you might use during the repair. Goggles can shield your eyes, especially if you’re working with pressurized systems. It’s easy to overlook safety when you’re eager to get the job done, but taking precautions can prevent accidents. Are you prepared to handle repairs safely?
By keeping these tools and materials ready, you’re setting yourself up for a smooth repair experience. Next time your hose springs a leak, you’ll be equipped to tackle it head-on without unnecessary trips to the store.
Fixing Leaks And Holes
A garden hose with leaks can be frustrating. Fixing those leaks and holes is essential to maintain its functionality. Without proper care, water wastage can occur, affecting your gardening efforts.
Locating The Leak
To fix a hose, first find the leak. Fill the hose with water, then inspect it closely. Look for wet spots or bubbles forming along the hose. Once identified, mark the spot for easy repair.
Using Hose Repair Tape
Repair tape is useful for minor leaks. Wrap the tape tightly around the leak. Ensure the tape overlaps to create a strong seal. This method is quick and can temporarily fix small holes.
Replacing Damaged Sections
For larger holes, replacing the section might be necessary. Cut out the damaged part using a knife. Attach a hose connector to both ends of the cut section. This creates a seamless join, restoring the hose’s function.

Credit: www.youtube.com
Resolving Kinks And Twists
Resolving kinks and twists in a garden hose can be simple. Stretch the hose fully to remove bends. Straighten it under the sun to loosen tight spots.
Dealing with kinks and twists in a garden hose can be incredibly frustrating, especially when you’re in the middle of watering your garden. These annoying bends not only disrupt water flow but can also damage the hose over time. Fortunately, there are practical solutions to resolve these issues and ensure your hose remains in top condition.
Preventing Kinks
Kinks often occur when a hose is twisted or stored improperly. To prevent kinks, always unroll the hose completely before turning on the water. This helps maintain a smooth flow and minimizes stress on the hose material. Consider using a hose reel to keep the hose straight and untangled. A reel not only prevents kinks but also extends the lifespan of the hose by storing it correctly. What steps can you take today to ensure your garden hose is kink-free?
Straightening Techniques
If your hose is already kinked, straightening it is essential. Start by laying the hose out in the sun for a while. The heat makes the hose more pliable, allowing you to work out the kinks more easily. Once warm, gently stretch and roll the hose on a flat surface. Use your hands to smooth out any remaining twists. Repeat this process as needed, and your hose will be ready for use again.
Storing The Hose Properly
Proper storage is crucial in preventing future kinks and twists. After each use, drain all the water from the hose and coil it loosely. A loose coil ensures the hose doesn’t develop memory bends. Hang the hose on a large hook or store it in a hose pot. This prevents unnecessary pressure on any one part of the hose. How often do you consider the impact of proper storage on the longevity of your tools? By taking these simple steps, you can enjoy a hassle-free gardening experience with a fully functional hose.
Repairing Connector Issues
Fixing a garden hose involves checking for damaged connectors. Replace worn-out washers or tighten loose fittings. A simple fix can improve water flow and hose longevity.
Garden hoses are essential for any gardener. But, connector issues can disrupt your gardening. Fixing these problems can save money and time. Let’s explore how to repair connector issues effectively.
Inspecting The Connectors
Start by checking your hose connectors. Look for cracks or leaks. A damaged connector might be the problem. Ensure the washers inside are intact. Damaged washers cause leaks. Check for rust or debris. These can block the flow.
Replacing Worn Connectors
Worn connectors need replacing. First, remove the old connector. Use a pair of pliers if it’s stuck. Choose a new connector that fits your hose size. Attach it securely. Twist it clockwise until it is tight. This ensures a proper fit.
Ensuring A Tight Seal
A tight seal prevents leaks. Use plumber’s tape for extra security. Wrap the tape around the hose end. This adds grip and seals gaps. Test the hose by turning on the water. Check for drips or leaks. Tighten further if necessary.
Preventive Maintenance Tips
Fixing a garden hose involves simple steps like checking for leaks and twists. Regularly inspect for cracks or holes. Tighten loose fittings and replace damaged parts to ensure a smooth water flow.
Preventive maintenance keeps your garden hose in top shape. Simple habits can extend its lifespan. Regular checks, storage, and seasonal care are crucial. These tips prevent damage and ensure smooth watering.
Regular Inspections
Check your hose for leaks and cracks. Look for worn-out areas. Ensure fittings are tight and secure. Inspect every month or after heavy use. Early detection avoids costly repairs.
Proper Storage
Store your hose in a cool, dry place. Avoid direct sunlight. Coil it neatly to prevent kinks. Use a hose reel for easy handling. This prevents tangles and prolongs its life.
Seasonal Care
Drain your hose before winter. Freezing water can cause cracks. In summer, keep it shaded to avoid heat damage. Regular seasonal care ensures it stays functional year-round.
When To Replace The Hose
Inspect your garden hose for leaks, cracks, or stiffness. Persistent issues may mean replacement is necessary. Consider replacing when repair attempts fail to restore functionality.
When to Replace the Hose A garden hose is essential for watering plants. Over time, hoses can wear out. Knowing when to replace a hose saves money and effort. It ensures your garden stays healthy.
Assessing Damage
Look for cracks or holes in the hose. Small leaks can be patched. Large cracks may mean the hose needs replacing. Check the connections. Loose fittings can cause leaks. If cleaning doesn’t help, consider replacement.
Cost Vs. Benefit
Buying a new hose can be expensive. Repairs are often cheaper. Compare repair costs to buying new. A well-maintained hose lasts longer. Sometimes, buying new is more economical. Think about how much you use the hose.
Signs Of Irreparable Damage
Some damage can’t be fixed. If the hose is brittle, it’s time for a new one. Persistent kinks can block water flow. If the hose repeatedly kinks, consider a replacement. A hose with multiple leaks is difficult to fix. Choose a durable option next time.
Frequently Asked Questions
What Is The Best Way To Repair A Garden Hose?
Use a hose repair kit to fix garden hose leaks. Cut out damaged section, insert connector, and secure clamps. Ensure the hose is dry before starting. This method is quick and cost-effective, restoring full functionality. Regularly check for new leaks to maintain hose performance.
How To Replace The End Of A Garden Hose?
Cut the damaged hose end with scissors. Attach a new coupling by sliding it inside the hose. Secure tightly using a clamp. Test for leaks by running water through the hose. Ensure the connection is tight for optimal performance. Choose durable, weather-resistant fittings for longevity.
How To Repair A Split In A Garden Hose?
Cut out the damaged section of the hose. Insert a hose repair coupling into both ends. Secure tightly with clamps. Test the hose by turning on the water to ensure no leaks.
How To Fix A Pinhole In A Garden Hose?
Find the pinhole and dry the area thoroughly. Wrap waterproof tape tightly around the hole. Ensure the tape overlaps for a firm seal. Test the hose by turning the water on. Replace the hose if the leak persists. Regular maintenance prevents future leaks.
Conclusion
Fixing a garden hose can be simple. Follow the steps carefully. Check for leaks and secure connections tightly. Replace damaged parts promptly. Use tape or sealant for quick fixes. Store your hose properly to avoid future damage. Regular maintenance keeps your garden hose in good shape.
Enjoy a smooth watering experience without interruptions. A well-maintained hose saves time and effort. So, take care of it today. Your garden will thank you. Happy gardening!


