Ever found yourself in the middle of watering your garden only to realize you need just a bit more reach? It’s a common frustration, but the solution is simple: connect two garden hoses.
This small, yet powerful trick can save you time and effort, transforming your gardening routine into a seamless experience. Imagine the ease of watering distant plants or washing your car without constantly relocating your faucet. By learning how to connect two garden hoses, you’re not just extending your reach; you’re enhancing your garden’s potential.
Stay with us to discover the straightforward steps that will make your gardening life easier and more efficient.

Credit: www.amazon.com
Tools And Materials Needed
Connecting two garden hoses might seem straightforward, but having the right tools and materials can make the process smooth and efficient. Whether you’re extending your reach in the garden or trying to cover more ground with your watering system, the right setup can save you time and frustration. Let’s dive into the essential tools and materials you’ll need to ensure a secure and leak-free connection.
Garden Hose Connector
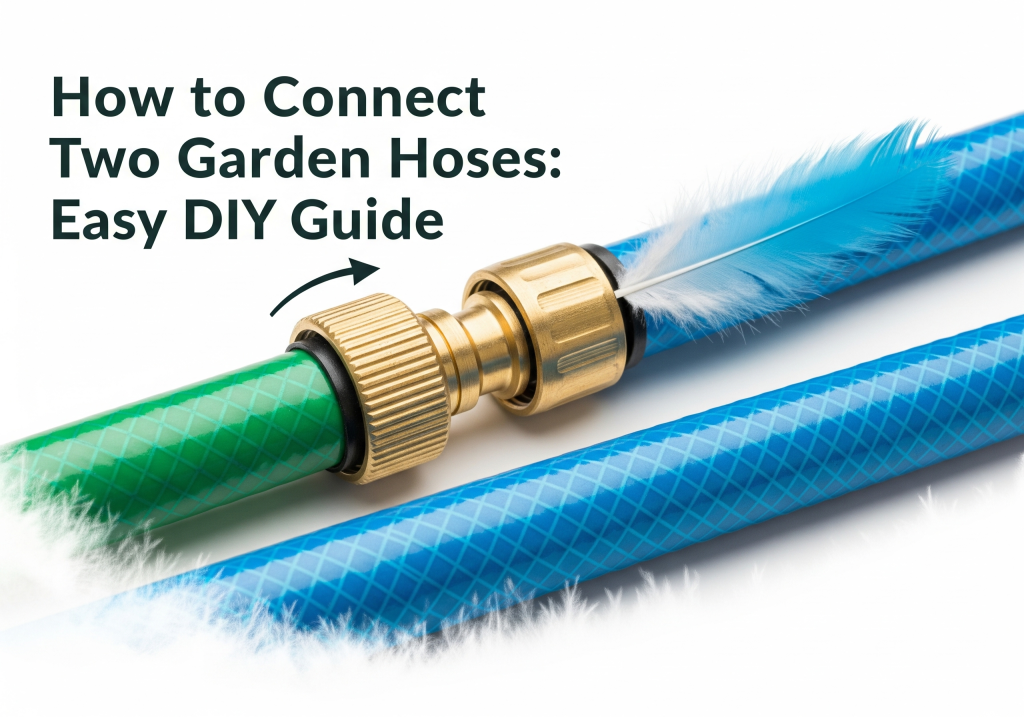
A garden hose connector is your best friend for linking hoses. These connectors come in various types, such as quick-connect or threaded versions. Quick-connectors are ideal for those who frequently change hose configurations. Threaded connectors provide a more permanent solution. Choosing the right one depends on how often you plan to connect and disconnect your hoses.
Rubber Washers
Rubber washers are small but mighty. They ensure a tight seal between hoses, preventing water leaks. Always inspect your washers for wear and tear, as old or damaged washers can lead to frustrating drips. Keeping a few spare washers handy is always a smart move.
Wrench
A wrench may be needed for securing threaded connectors tightly. While hand-tightening might suffice for some connections, using a wrench ensures they are snug and secure. Be careful not to overtighten, which can damage the hose threads.
Teflon Tape
Teflon tape is your go-to for an extra layer of leak protection. Wrapping the threads of your connectors with Teflon tape can prevent leaks and ensure a watertight seal. It’s particularly useful if you notice any signs of water escaping from the connection points.
Bucket
A bucket might not be the first tool that comes to mind, but it can be incredibly useful. Use it to catch water when testing your hose connection for leaks. It’s a simple way to see if your setup is working as expected without wasting water on the ground.
Having these tools and materials ready will make the process of connecting garden hoses much simpler. Have you ever found yourself in the midst of watering your garden only to realize your hoses aren’t long enough? Preparing with the right equipment can prevent such hiccups. What other tools do you find indispensable in your gardening toolkit?
Choosing The Right Hose Connector
Selecting the right hose connector ensures smooth linking between two garden hoses. Opt for a sturdy connector that fits snugly. This choice helps maintain steady water flow without leaks.
Choosing the right hose connector is crucial for ensuring a seamless water flow between two garden hoses. It may seem like a small detail, but the connector you choose can significantly affect the efficiency of your garden setup. Whether you’re watering a vegetable patch or filling a pool, the right connector can save you time and prevent frustrating leaks.Types Of Hose Connectors
Understanding the various types of hose connectors can help you make an informed decision.- Quick-Connect Couplings:These are great for those who frequently change hoses. They allow you to snap hoses together without twisting.
- Threaded Connectors:Ideal for permanent connections, these require screwing the hoses together, ensuring a tight seal.
- Y-Connectors:Perfect if you want to split the water flow into two directions. Useful for multitasking in large gardens.
Materials And Durability
The material of your hose connector impacts both durability and performance.- Plastic Connectors:Lightweight and affordable, but may not withstand high pressure or extreme weather.
- Brass Connectors:Known for durability and resistance to rust. They can handle heavy-duty use and extreme temperatures.
- Aluminum Connectors:A middle ground option, offering decent durability without the weight of brass.
Preparing The Hoses
Preparing the Hoses Ensure both hoses are clean and free of debris. Check for any damage or leaks. Secure the connectors tightly to prevent water loss.
Preparing the hoses is a crucial step when you’re looking to connect two garden hoses seamlessly. Taking a few moments to ensure your hoses are in optimal condition can save you from leaks, water wastage, and unnecessary trips to the hardware store. Here, we’ll walk you through some essential steps to make sure your garden hoses are ready to be connected, ensuring a hassle-free watering experience.Inspecting For Damage
Before connecting your hoses, inspect them for any signs of wear and tear. Look out for cracks, splits, or any visible damage on the hose surface. Small defects might not seem like a big deal, but they can lead to leaks or even cause the hose to burst under pressure. Feeling the hose for soft spots can also reveal hidden weaknesses. If you find any damage, consider using a hose repair kit or, if the damage is extensive, replacing the hose altogether. Investing in a quality hose can save you money and time in the long run.Cleaning Hose Ends
Cleaning the hose ends is an often overlooked but vital step. Dirt and debris can accumulate inside the connectors, leading to poor connections or blockages. Use a damp cloth to wipe away any grime from the hose ends. A small brush can also help dislodge stubborn dirt particles. Ensuring that the connectors are clean will facilitate a tighter, more secure fit when joining the hoses. Additionally, this simple step can prevent contaminants from entering your water supply, ensuring that your plants receive clean water.Attaching The Connector
Attaching the connector is simple. Ensure both hose ends are clean and dry. Twist the connector tightly onto each hose end to form a secure seal.
Attaching the connector between two garden hoses might seem like a simple task, but doing it right ensures a leak-free experience. Have you ever found yourself drenched because your garden hose connection wasn’t tight? You’re not alone! A secure connection not only saves water but also ensures a smooth gardening experience. Let’s dive into the steps to attach the connector properly.Aligning The Hoses
Before you attach the connector, ensure both hose ends are clean and free from debris. Dirt or leaves can cause the connector to not seal properly, leading to leaks. Align the hose ends so they face each other directly. This alignment is crucial to ensure the connector can be attached smoothly without any twists or bends.Securing The Connection
Once aligned, slide the connector over the hose ends. Use your hands to twist the connector clockwise until it feels tight. Ensure both hoses are pushed as far into the connector as they can go. A snug fit prevents water from escaping. After the connector is secure, turn on the water to check for leaks. If you notice any water escaping, tighten the connector further. A little extra effort in securing the connection can save you from unexpected water showers and wasted water.Testing The Connection
Testing the Connection Securely attach the male end of one hose to the female end of the other. Tighten the connections to prevent leaks. Run water through to ensure a solid connection and smooth flow.
Testing the connection between two garden hoses is a crucial step to ensure they function properly together. After putting in the effort to connect them, you certainly want to confirm that everything is working seamlessly. This process isn’t just about turning on the tap; it involves a careful check to make sure there are no leaks and that water flows smoothly through the hoses.Checking For Leaks
Begin by slowly turning on the water. Watch closely where the hoses are connected. If you notice any water dripping or spraying, your connection is not tight enough. Use a wrench to gently tighten the connectors if needed. Be cautious not to over-tighten, as this could damage the connectors. Consider using plumber’s tape around the threads of the connectors for a more secure fit. This simple trick can often prevent leaks effectively.Ensuring Proper Water Flow
Once you’re confident there are no leaks, observe the water flow. Is it consistent and strong? This indicates a good connection. If the flow seems weak, check for kinks along the length of the hoses. Straightening out any bends can often restore proper water pressure. Test different spray settings on your nozzle. This ensures that the water pressure is sufficient for various gardening tasks. Testing the connection might seem like a small step, but it guarantees you won’t face unexpected surprises while watering your garden. Have you ever had a hose burst open while you were watering? Ensuring a proper connection prevents such mishaps, saving you time and water.Troubleshooting Common Issues
Connecting two garden hoses might seem straightforward, but sometimes, unexpected issues can arise. Whether it’s a stubborn leak or a connection that just won’t stay tight, troubleshooting these common problems ensures your garden stays lush and your water flow uninterrupted. Let’s dive into some practical solutions.
Fixing Leaks
Leaks can be frustrating, but they are usually easy to fix. Check if the washers are intact; a missing or damaged washer can cause leaks. Replace them as needed. You might be surprised at how such a small piece can make a big difference!
Another culprit could be dirt or debris caught in the connector threads. Clean the threads thoroughly and try reconnecting the hoses. A simple clean can often resolve pesky leaks.
Are you using the right connector? Sometimes, using a connector that doesn’t fit snugly can lead to leaks. Ensure that your connector is compatible with both hoses.
Adjusting Tightness
If your hoses disconnect too easily, adjust the tightness of the connection. Ensure you’re twisting the connector firmly but not excessively. Over-tightening might damage the threads or the hoses themselves.
Using a wrench can help achieve the perfect tightness. However, be careful not to overtighten, as it can lead to wear over time. It’s about finding that sweet spot.
Consider how often you need to adjust the tightness. If it’s frequent, inspect the threads for wear. Sometimes, worn threads prevent a secure connection. Would replacing them bring you closer to a hassle-free watering routine?
Remember, maintaining your garden hoses is as important as nurturing your plants. With a few adjustments, you can keep your garden flourishing without hiccups!
Maintaining Your Garden Hose Connection
Connecting two garden hoses can be achieved with a simple connector. First, ensure both hose ends are clean. Attach a hose connector to one end, then screw the other hose into the opposite side of the connector. This provides an extended reach for watering tasks.
Maintaining your garden hose connection is essential for efficient watering. A secure connection prevents leaks and ensures water reaches your plants. Regular care helps extend the hose’s lifespan.Regular Checks
Inspect the hose connection frequently. Look for any leaks or cracks. Ensure washers are intact and in place. These tiny rubber rings help seal the connection. Replace them if worn out. Tighten the coupling securely. Loose fittings may cause water wastage. Check both ends of the hose regularly. Ensure no dirt or debris is clogging the connection.Proper Storage
Store hoses correctly to maintain their condition. Roll them neatly to avoid kinks or twists. Use a hose reel or hanger for organization. Keep hoses in a shaded area. Direct sunlight can damage the rubber. Avoid leaving them in extreme temperatures. Cold weather may stiffen the material, making it prone to cracks. Store hoses indoors during winter months. This prevents any weather-related damage.
Credit: shopjoe.com

Credit: www.eleyhosereels.com
Frequently Asked Questions
Is There A Way To Connect Two Garden Hoses Together?
Yes, you can connect two garden hoses using a hose connector or coupling. Simply attach the connector to the ends of both hoses. Ensure both hoses are compatible in size for a secure fit. This method extends the hose length, making it easier to reach distant areas in your garden.
How Do You Extend A Garden Hose?
Connect a hose connector to each hose end. Attach the connectors together securely. Ensure there are no leaks. Use a hose extension if needed for additional length. Adjust the water flow as required.
How To Connect Two Sprinkler Hoses Together?
Use a hose connector to join two sprinkler hoses. Ensure both hose ends are clean and dry. Attach the connector securely to each hose end. Tighten the connector to prevent leaks. Test the connection by running water through the hoses.
How To Connect Female To Female Hose?
Use a double-ended hose connector to join two female hose ends. Ensure it’s tightly secured to avoid leaks.
Conclusion
Connecting garden hoses can simplify watering tasks. It’s easy with the right steps. Start by checking hose ends for compatibility. Use a connector for a tight fit. Screw it firmly to avoid leaks. Double-check the connection before use. Enjoy extended reach in your garden.
It’s about efficiency and convenience. Proper connections save time and effort. Your garden will thank you for the extra care. Remember, regular checks prevent issues. Happy gardening and smoother watering with your connected hoses!


