You've got a sage plant growing strong, and now you're wondering when and how to actually pick the leaves without hurting it. That's the thing about harvesting sage, it looks simple, but one wrong cut can stunt your plant for the whole season. Whether you're after fresh leaves for tonight's dinner or a big batch to dry for winter, the method changes based on your goal.
In our research across university extension services and master gardener programs, the single most important rule is this: never remove more than a third of the plant at once. As of 2026, that guideline hasn't changed, it's the difference between a plant that keeps producing and one that struggles to recover. So let's walk through exactly what to do based on your situation.
Quick Answer
Harvest sage by cutting stems above a leaf node. Take no more than one-third of the plant. Harvest in the morning after dew dries.
Cut before flowers form for best flavor. For established plants, you get two to three harvests per season. First-year plants need a lighter touch, just a few stems.
Why When and How You Cut Matters More Than You Think
Most people grab a handful of leaves and yank. That's a problem. Sage, like many woody herbs, stores its essential oils in the leaves, and the oil concentration shifts throughout the growing season.
Cut too late, after the flower stalks appear, and those leaves turn bitter. Cut too early, and you're getting weak flavor from immature growth.
The timing revolves around the plant's growth cycle. Common sage (Salvia officinalis) is a perennial woody herb that sends up new growth from the crown each spring. By late spring, those stems are leafy and tender.
By early summer, the plant starts forming flower buds at the tips. That pre-flowering window, usually a two to three week stretch, is when the essential oil content peaks.
University extension research shows that leaf oil concentration can drop by as much as 40 percent once the plant shifts energy into flowering. So if you're after the most aromatic leaves for cooking or drying, you need to time your harvest before those buds open.
But here's the nuance: if you cut at the wrong spot, say, right at the soil line or through the woody base, you risk damaging the node structure that triggers regrowth. Sage doesn't grow back from bare wood the same way basil does. It needs those green growth nodes left intact.
The Two Big Decisions That Guide Your Harvest
Your approach to harvesting sage depends on two factors: the age of your plant and what you plan to do with the leaves. Let's break each one down.
Decision 1: How Old Is Your Plant?
If this is your sage's first year in the ground, it's still building its root system. That changes everything. First-year plants can handle only a light harvest, think of it as taking a few leaves here and there rather than cutting whole stems.
The goal is to let the plant grow strong before you ask it to regrow from a hard cut.
For established plants in their second year or beyond, you can take full stems. These plants have developed woody bases and deep root systems. They can handle multiple harvests per season.
Just keep that one-third rule in mind.
Decision 2: Fresh or Dried?
This is the fork in the road. If you're using sage fresh within a few days, the exact harvest method matters less. You can pick individual leaves as needed.
But if you're drying sage for storage, you want whole stems. Drying whole stems preserves the oils better than individual leaves, and stripping them after they're dry is easier.
Here's a simple if/then to guide you:
- If you want fresh leaves for immediate cooking → Pinch off individual leaves from the top half of the stem. Leave the lower leaves to keep the plant photosynthesizing.
- If you want to dry a batch for winter → Cut entire stems 4 to 6 inches long. Bundle them. Dry them. Strip the leaves after they're crisp.
- If your plant is in its first year → Take individual leaves only. No full stem cuts until year two.
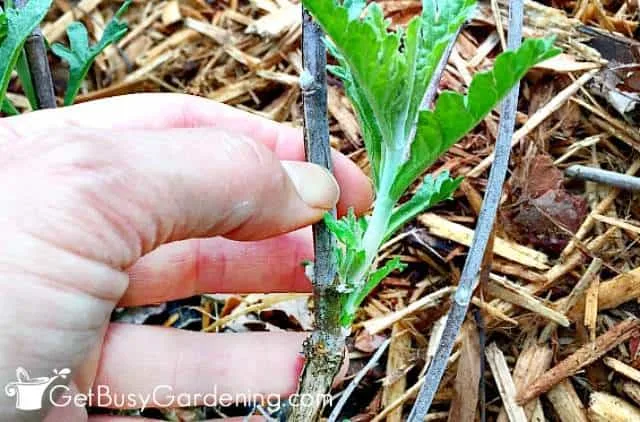
Image source: Web (Bing) / getbusygardening.com (Web image (fair-use with source credit))
How to Harvest Sage the Right Way, Step by Step
Let's get into the actual cutting. Here's the workflow our research recommends, whether you're harvesting from a garden bed or a container plant.
Step 1: Choose Your Tools
You need clean, sharp pruning shears or scissors. Dull blades crush the stem rather than cutting cleanly, which slows healing and invites disease. Sanitize the blades with rubbing alcohol or a 10 percent bleach solution before you start, especially if you've been cutting other plants.
Step 2: Pick the Right Time of Day
Harvest in the morning after the dew has evaporated but before the afternoon heat. That's when the essential oil concentration in the leaves is highest. Wet leaves invite mold during storage, so make sure they're dry to the touch.
Step 3: Find the Growth Node
Look for a leaf node, the point where two leaves branch off the stem. You want to cut about a quarter inch above that node. Why?
Because the node is where new growth will emerge. Cut too far above it and you leave a bare stub that dies back. Cut below it and you remove the growth point entirely.
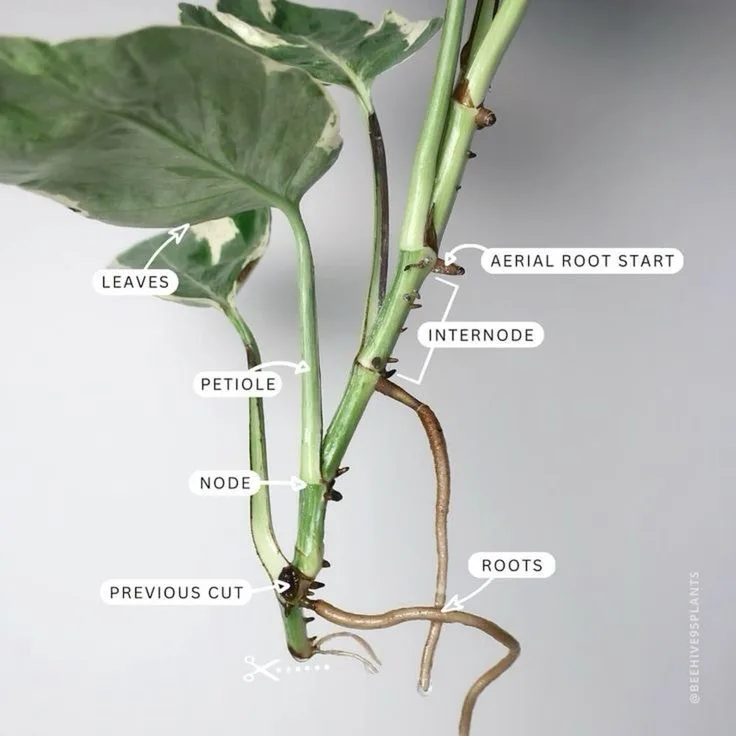
Image source: Web (Bing) / ph.pinterest.com (Web image (fair-use with source credit))
Step 4: Make the Cut
For whole stem harvesting, cut at a slight angle about a quarter inch above the node. Take stems from different parts of the plant rather than clearing one side. This keeps the plant balanced and encourages bushy growth rather than lopsided regrowth.
For individual leaf harvesting, pinch the leaf stem where it meets the main stem. A clean pinch is better than a tear.
Step 5: Leave Enough Behind
This is the step most people mess up. Count the number of stems on your plant. You can take no more than one-third of them.
For a plant with twelve stems, that means four stems per harvest. Wait three to four weeks before taking another round.
The Most Common Harvesting Mistakes (And How to Avoid Them)
After reviewing feedback from home gardeners and cooperative extension resources, these are the mistakes that show up again and again.
Mistake 1: Overharvesting First-Year Plants
It's tempting to take a big harvest from a young plant. Don't. First-year sage needs every leaf it has to build root mass.
Taking more than a few leaves stunts growth and can even kill the plant over winter. Wait until year two for serious harvesting.
Mistake 2: Cutting Through Woody Stems
Sage stems get woody at the base as the plant matures. If you're cutting into brown, bark-like material, you're cutting too low. New growth won't emerge from that spot.
Always cut above the green, tender part of the stem.
Mistake 3: Harvesting in Wet Weather
Cutting sage when the leaves are wet, from rain, dew, or overhead watering, introduces moisture into the cut wound. That invites fungal infections. It also makes drying harder because the leaves start to rot before they fully dry.
Wait for a dry day.
Mistake 4: Harvesting After the Flowers Open
Once those purple flower stalks appear, the leaves' flavor profile changes. They become thinner, less aromatic, and slightly bitter. You can still eat them, but they won't taste like the sage you're used to.
If you see flower buds forming, harvest immediately before they open.
Mistake 5: Cutting Too Many Stems From One Side
Sage grows bushier when you harvest evenly around the plant. Taking all your stems from one side leaves the plant lopsided and stresses that side's root connection. Rotate your cuts around the plant.
| Mistake | Why It's Bad | The Fix |
|---|---|---|
| Overharvesting young plants | Stunts root growth | Take only a few leaves in year one |
| Cutting through woody stems | No regrowth possible | Cut above green, tender sections |
| Harvesting in wet weather | Invites mold and rot | Only cut when leaves are dry |
| Waiting until after flowering | Leaves turn bitter and thin | Harvest before flower buds open |
| One-sided cutting | Makes plant lopsided | Rotate cuts evenly around the plant |
What to Do With Your Harvest: Drying, Freezing, or Fresh
You've cut your sage stems. Now what? How you handle the leaves in the first few hours determines how well they keep.
Fresh sage lasts about a week in the fridge. Dried sage stays potent for a year or more. Frozen sage holds its color and flavor for six to eight months.
Choose based on how you cook.
For Fresh Use
Rinse the stems gently under cool water. Pat them completely dry with a towel. Any moisture left on the leaves speeds up wilting.
Wrap the stems loosely in a damp paper towel and place them in a zip-top bag in the fridge. They'll stay usable for five to seven days. Don't seal the bag airtight, a little airflow prevents slime.
For Drying
Drying concentrates the flavor and makes the leaves shelf-stable. The best method for home growers is air drying. Bundle four to six stems together with a rubber band or twine.
Hang each bundle upside down in a dark, dry, well-ventilated spot. A pantry or closet works well. Avoid direct sunlight, it degrades the volatile oils.
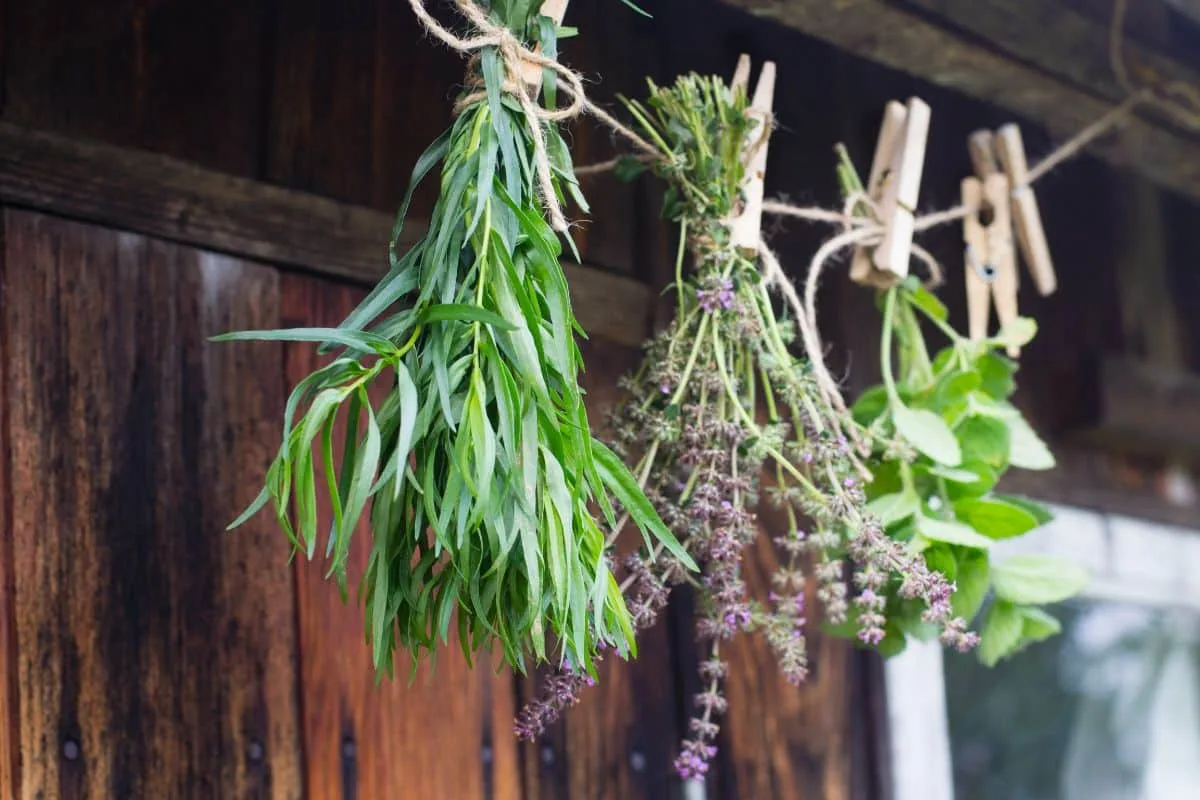
Image source: Bing (Web (fair-use with source credit))
Leaves are fully dry when they crumble between your fingers, usually in one to two weeks. Once dry, strip the leaves from the stems and store them in an airtight glass jar. Keep the jar in a dark cabinet.
Crush or grind the leaves just before cooking for the strongest aroma.
For Freezing
Freezing is faster than drying and preserves more of the fresh flavor. Rinse and dry the leaves thoroughly. Remove them from the stems.
Arrange the leaves in a single layer on a baking sheet and freeze for two hours. Transfer the frozen leaves to a freezer bag, pressing out as much air as possible. Use them straight from the freezer, no need to thaw.
They work best in cooked dishes rather than as a garnish.
Which Method Wins?
- Fresh is best for recipes within a week.
- Dried is best for long-term storage and intense flavor in slow-cooked dishes.
- Frozen is best for preserving fresh taste and color, especially if you use sage often.
| Method | Shelf Life | Flavor Intensity | Best For |
|---|---|---|---|
| Fresh (fridge) | 5–7 days | Bright and aromatic | Immediate use, garnishes |
| Air dried | 12–18 months | Concentrated, earthy | Soups, stews, rubs |
| Frozen | 6–8 months | Nearly fresh | Sauces, sautés, stuffing |
Frequently Asked Questions About Harvesting Sage
When is the best time of day to harvest sage?
Harvest in the morning after the dew dries but before the heat sets in. That's when the essential oil content is highest. Wet leaves invite mold, so make sure they're dry to the touch.
Can I harvest sage after it flowers?
Yes, but the leaves will taste thinner and slightly bitter. The plant puts energy into flowers, not leaf oils. For the best flavor, harvest just before the flower buds open.
How much can I harvest from a first-year sage plant?
Take only a few individual leaves from a first-year plant. Don't cut whole stems. The plant needs every leaf to develop a strong root system.
Heavy harvesting can kill it over winter.
How long does dried sage last?
Properly dried and stored in an airtight jar in a dark cupboard, dried sage keeps its best flavor for 12 to 18 months. After that, it slowly fades. Crush leaves just before using for maximum aroma.
Should I wash sage before drying?
Rinse the stems briefly in cool water and pat them dry. Let them air dry for an hour before bundling. Any moisture left on the leaves can cause mold during the drying process.



