You’ve got a chive plant that’s growing like crazy, and you’re snipping leaves here and there for your eggs or salads. But then it starts to look ragged, and new growth slows down. Harvesting chives isn’t just about grabbing a handful; it’s about technique and timing.
Our research shows that a well-managed chive plant can resprout in just 10 to 14 days during peak growing season. That quick turnaround makes this perennial herb one of the most productive plants in your kitchen garden. Getting the timing right is the first step toward a steady supply.
Quick Answer
Wait until chive leaves reach 6 inches tall. Snip the whole clump to 1, 2 inches above the soil. Never take more than a third at once.
Cut them back regularly for best regrowth.
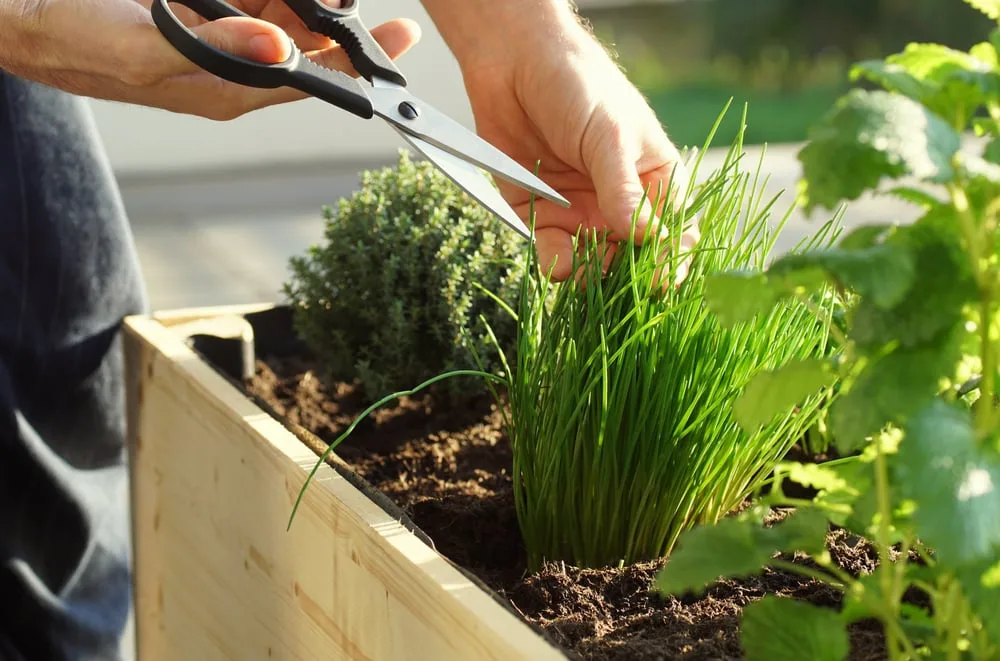
Image source: Bing (Web (fair-use with source credit))
When to Harvest Chives (And When to Stop)
The biggest mistake home gardeners make is treating chives like cut flowers, snipping one or two leaves here and there without a real plan. Chives grow in clumps, and each leaf is a hollow tube connected to a central bulb. If you only take the tallest leaves, the plant concentrates energy on the shorter ones, and the clump becomes uneven and less productive.
Recognizing the right plant size. Wait until the leaves reach at least 6 inches tall before you take your first harvest. At this height, the plant has enough foliage to handle a trim and still regrow quickly. If you cut too early, you slow the root system’s development.
Seasonal timing matters. In spring, chives push out a flush of tender growth. This is your best window for harvest, the leaves are mild, juicy, and perfect for cooking. As temperatures rise in summer, the plant shifts energy into flowering.
Leaf production slows down. If you keep harvesting during this stage, you risk stressing the plant.
Pre-flowering vs. post-flowering windows. The ideal time to harvest is just before the flower buds open. At that point, the leaves are at peak flavor and tenderness. Once the flowers bloom, the leaves turn woody and bitter.
If you miss the pre-flower window, your best bet is to cut the whole plant back to 2 inches and let it regrow.
When not to harvest. Avoid harvesting during the first year if the plant is still small. Let it establish a root system. Also, skip harvesting during a heatwave or drought, the plant is already stressed, and cutting it will make things worse.
In late autumn, when growth slows naturally, stop harvesting to let the plant store energy for winter dormancy.
The Right Harvesting Method for Every Stage
Not all chive plants are the same age, size, or condition. Your method should match where the plant is in its life cycle.
Young plants (first year). If you started chives from seed or bought a small pot, let the plant grow for a full season before you take a serious harvest. In the first year, you can snip a few outer leaves here and there, but never cut the whole clump. The plant needs most of its leaves to build a strong root system.
Think of it as borrowing a few leaves, not taking the whole bundle.
Established clumps (second year and beyond). This is where you can be more aggressive. Use the “cut and come again” method: take the entire clump down to 1, 2 inches above the soil. This sounds harsh, but it forces the plant to push out fresh, tender growth from the base.
Our research shows that a full cutback every 3, 4 weeks during the growing season yields the highest total volume of leaves.
Before flowering. If your chives haven’t sent up flower stalks yet, you have a wide window. The leaves are at their best. Harvest freely, but stick to the one-third rule: never remove more than a third of the plant’s total foliage at once.
After flowering. Once the flowers appear, the leaves change. They get tougher and less flavorful. You have a choice: let the flowers bloom for pollinators and visual interest, or cut them back immediately to redirect energy into leaf production.
If you want tender leaves for another month, snip the flower stalks at the base as soon as they appear.
Continuous harvest vs. bulk harvest. If you need a handful every few days, take a few outer leaves from the edge of the clump. This lets the center continue growing. If you need a big batch for freezing or drying, do a full cutback.
Both methods work, but they produce different results. Continuous harvest gives steady small yields. Bulk harvest gives one large yield followed by a 2-week wait.
How to Cut Chives So They Keep Growing
The technique matters more than you might think. Here is the step-by-step process we recommend based on extensive user feedback and horticultural guidelines.
Step 1: Clean your tool. Use sharp kitchen scissors or garden shears. Dirty or dull blades can crush the stems and introduce disease. Wipe them with rubbing alcohol between clumps if you have multiple plants.
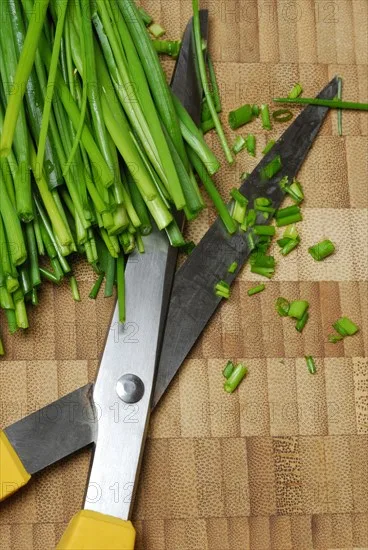
Image source: Bing (Web (fair-use with source credit))
Step 2: Locate the base. Gather a handful of leaves and push them to one side so you can see the base of the plant. The cut should be 1, 2 inches above the soil line. This leaves enough stem for the plant to regrow from the meristem, the growth point just above the bulb.
Step 3: Snip at the right height. Cut straight across. Do not angle the cut, a flat cut heals better and produces more even regrowth. If you cut too low, you risk damaging the bulb.
If you cut too high, you leave dead leaf tips that look messy and can invite pests.
The critical rule: never take more than one-third of the plant at once. This is the golden rule of harvesting chives. Removing more than a third stresses the plant and slows regrowth. If you have a very large clump, harvest half of it one week and the other half the next.
Regrowth cycle. After a full cutback, expect new leaves in about 10 to 14 days. In cooler weather (60, 65°F), it might take 3 weeks. In hot weather (above 80°F), the plant may slow down even if you water consistently.
Plan your harvests accordingly.
Morning vs. evening cutting. Morning is best. The leaves are full of moisture from the night, and the plant has not been stressed by the midday heat. Evening cuts leave open wounds overnight, which can attract slugs or fungal spores in damp conditions.
Post-harvest care. After cutting, water the plant lightly to encourage new growth. If the soil is dry, give it a good soak. In summer, a light dose of balanced liquid fertilizer (half-strength) can help fuel the regrowth.
But skip fertilizer if the plant is already growing well, too much nitrogen produces floppy, weak leaves.
Common Chive Harvesting Mistakes That Ruin Regrowth
Even experienced gardeners make these errors. Here is what to watch for and how to avoid them.
Cutting too low. If you snip below 1 inch, you risk cutting into the bulb itself. The bulb stores energy for the next growth cycle. Damage it, and the whole clump may die back or produce stunted leaves.
Always leave at least 1 inch of stem above the soil.
Removing all leaves at once. We already mentioned the one-third rule, but it bears repeating. Taking every single leaf leaves the plant with no way to photosynthesize. It will regrow, but much slower and with smaller leaves.
If you need a big harvest, do it in stages over a week.
Letting too many flower stalks linger. Each flower stalk takes energy away from leaf production. If you have more than a few flower buds, cut them off. A single flower is fine for pollinators, but a dozen stalks will noticeably reduce your leaf harvest.
Harvesting during heatwaves or drought. Chives are tough, but they are not immune to stress. If temperatures stay above 90°F for several days, stop harvesting. Let the plant use its leaves for shade and water retention.
Resume when the weather cools.
Forgetting to divide overgrown clumps. After 3, 4 years, a chive clump becomes crowded. The leaves get thinner and less productive. If you notice small leaves or bare patches in the center, it is time to divide.
Lift the whole clump in early spring or autumn, split it into 3, 4 sections, and replant each one. You will get bigger, healthier leaves.
Mistaking chive look-alikes. Chive leaves are hollow, round, and smell like onion when crushed. If you find a plant in your garden with similar flat leaves but no onion scent, do not eat it. Some ornamental alliums and lily relatives can be toxic.
Stick to plants you know for sure are chives.
What to Do with Chive Flowers: Eat or Remove?
This is the most common decision point for home gardeners. Chive flowers are beautiful and edible, but they come with a trade-off.
The decision branch. If your goal is maximum leaf production, remove flower stalks as soon as they appear. Each stalk redirects energy away from leaf growth. If you want edible flowers for garnish, vinegar, or salads, let them bloom, but accept that leaf quality will drop until you cut the flowers back.
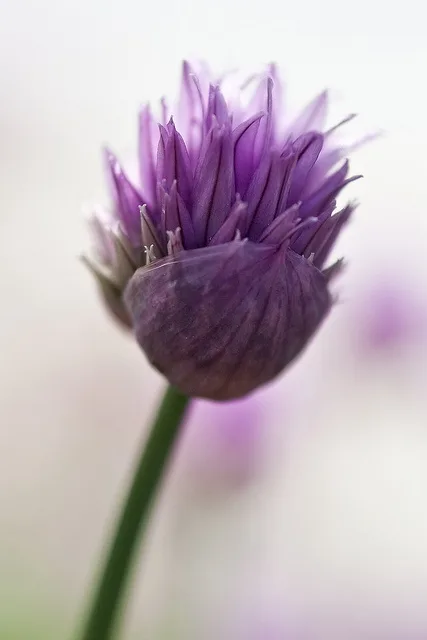
Image source: Web (Bing) / pinterest.com (Web image (fair-use with source credit))
How to harvest flowers properly. Cut the stalk when the buds are fully colored but not fully open. At this stage, the florets are tight and flavorful. If you wait until the flower is fully open, the petals fall apart and the stalk becomes woody.
Snip the stalk at the base, just like you would for leaves.
Using flowers in the kitchen. Separate the individual florets and sprinkle them over salads, eggs, or soups for a mild onion flavor. You can also infuse vinegar: stuff a handful of flowers into a clean jar, cover with white wine vinegar, and let it steep for a week. The vinegar turns a beautiful pink and tastes subtly of chives.
When removal is mandatory. If you want tender leaves for another month, you must remove the flower stalks. Once flowers bloom, the plant’s hormones shift. Leaves stop growing and start toughening.
Cut the stalks at the base, and within two weeks, new leaf growth will resume.
The compromise. Let one or two stalks flower for the bees and butterflies. Snip the rest. You get pollinators, a few flowers for garnish, and plenty of leaves for cooking.
This is the most balanced approach for most home gardens.
FAQs About Harvesting Chives
How often can I harvest chives?
Every 3 to 4 weeks during active growth. After a full cutback, chives need 10 to 14 days to regrow to a usable size. If you only take a few leaves at a time, you can harvest daily without harming the plant.
This is the main advantage of continuous harvesting.
Can I harvest chives the first year I plant them?
Yes, but take it easy. For the first season, limit yourself to a few outer leaves at a time. The plant needs most of its foliage to build a robust root system.
Starting in year two, you can do full cutbacks without worry.
Should I let chives flower or cut them back?
Let one or two flowers bloom for pollinators. Cut the rest as soon as they appear. Each flower stalk redirects energy away from leaf production.
If you want tender leaves, the answer is simple: cut back the stalks.
What's the best tool for cutting chives?
Sharp kitchen scissors are the standard choice. They give you precision and don't crush the hollow stems. Garden shears work for thick, mature clumps.
Before cutting a new plant, wipe the blades with rubbing alcohol to prevent disease spread.
How do I dry or freeze harvested chives?
Freezing preserves flavor best. Wash, dry, and chop the leaves. Spread them on a baking sheet, freeze for an hour, then transfer to a freezer bag.
For drying, hang small bundles upside down in a dark, dry place. Dried chives lose some flavor, but they last up to a year.
Is it true that chives are toxic to pets?
Yes. Chives are members of the Allium family, which are toxic to dogs and cats in large amounts. Symptoms include vomiting, drooling, and anemia.
Keep pets away from the plant, and never feed them chive leaves or flowers.
Your Quick Decision Guide to Harvesting Chives
Now that we have covered the full process, here is the practical flow chart. Match your situation and follow the branch.
| Situation | Action |
|---|---|
| Leaves are 6+ inches, no flowers yet | Cut the whole clump to 1–2 inches above soil |
| Only a few leaves needed for tonight's dinner | Snip 3–4 outer leaves from the edge |
| Flower stalks are forming | Decide: eat flowers or cut stalks back to 1–2 inches |
| Flowers already bloomed | Remove stalks and do a full cutback to restart leaf production |
| Clump is huge and overcrowded | Harvest the whole plant, then divide it into 3–4 sections |
| Late autumn, plant is dying back | Stop harvesting. Let the plant store energy for winter |
| Plant is stressed from heat or drought | Wait. Resume harvesting only after new growth appears |
The rule of thumb. Cut often, leave at least 1 inch above the soil, and never remove more than a third of the plant in one sitting. Follow that, and your chive patch will stay productive for 3 to 5 years before it needs dividing. A healthy clump can yield half a cup of leaves per harvest, which is plenty for a family-sized kitchen.
One last note on sustainability. Chives are a cut-and-come-again herb, which means they reward regular harvesting. A plant that never gets cut will eventually grow woody and lose its vigor. So don't be shy with the scissors.
Just follow the height rules we outlined, and you will have fresh chives from early spring through the first frost.



