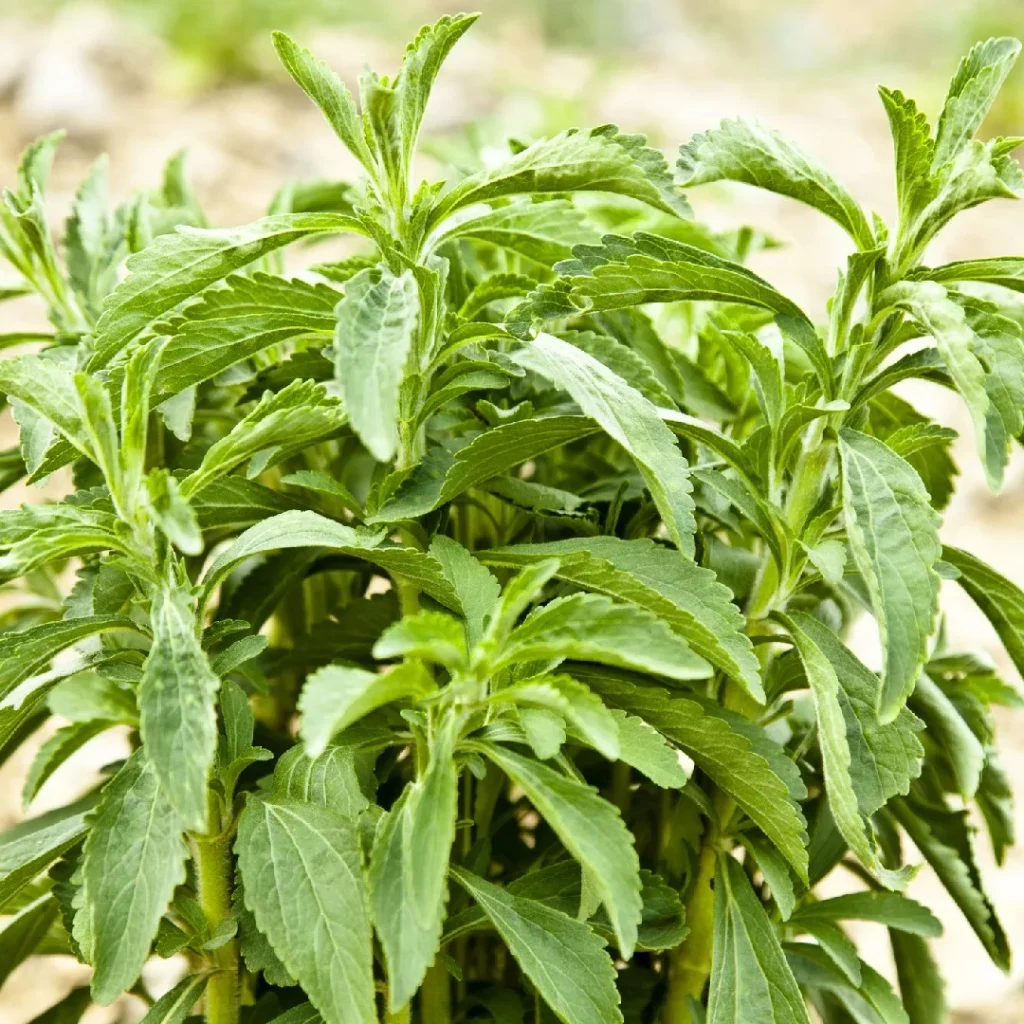
Maybe you've tried growing stevia before and ended up with a handful of bitter, tiny leaves instead of the sweet harvest you expected. Or maybe you're just getting started and keep hearing conflicting advice about whether to use seeds, cuttings, or transplants. That confusion is the real bottleneck here.
Our research shows that stevia seeds germinate at a rate of just 20 to 40 percent, even when they're fresh. Compare that to basil or mint, which sprout at 80 percent or higher, and you start to see why so many home growers get discouraged early on. The key is matching your method to your specific climate, setup, and patience level.
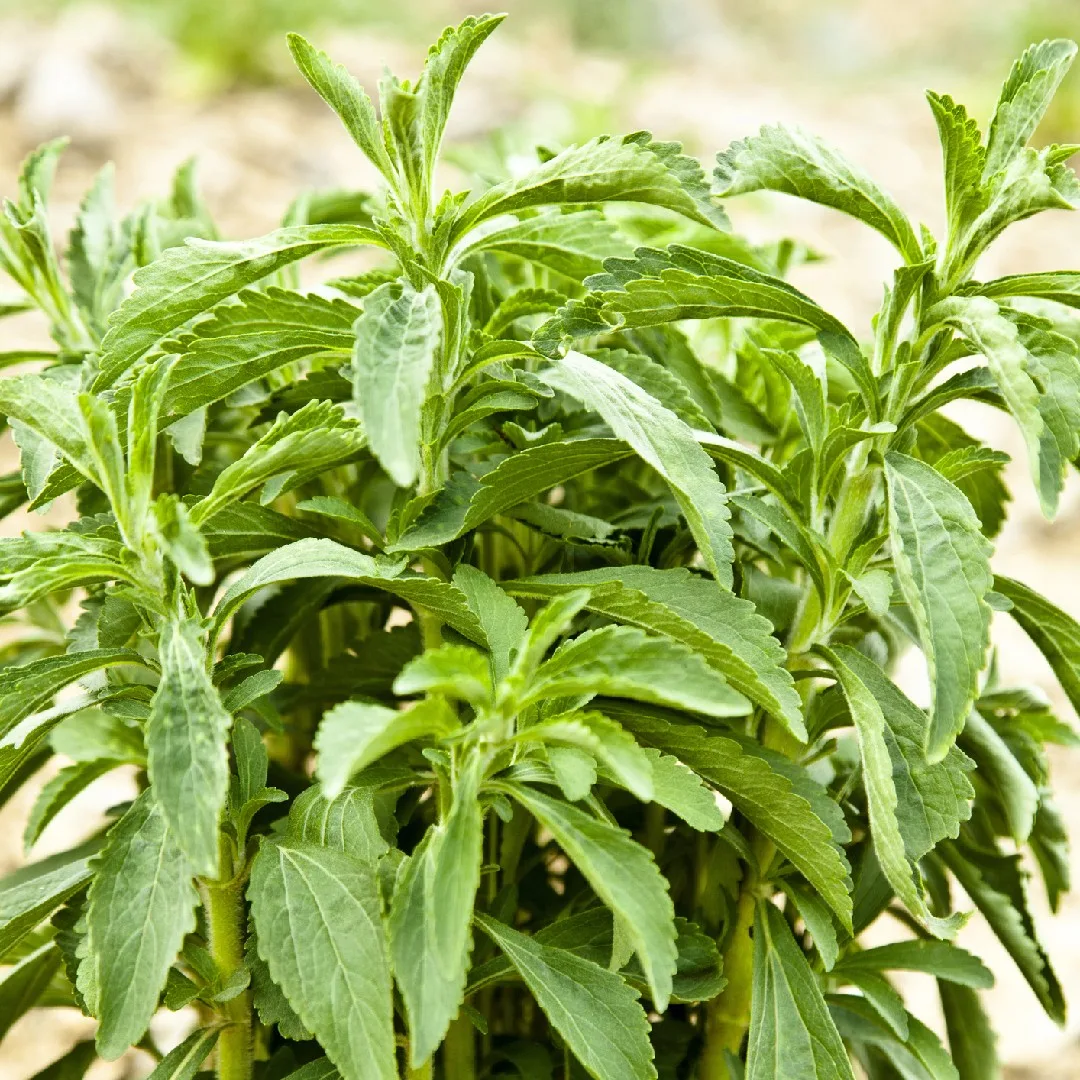
Image source: Web (Bing) / ar.inspiredpencil.com (Web image (fair-use with source credit))
Quick Answer
Grow stevia from rooted cuttings for the most reliable results. Seeds are slow and finicky. Transplants work well but cost more.
Pick your method based on your climate and available time.
Should You Start Stevia from Seed, Cuttings, or Transplants?
This is the first fork in the road. If you pick the wrong starting method for your situation, the rest of the season gets frustrating fast. Let's break down each option.
Seeds: Cheap but Unpredictable
Stevia seeds are tiny, and they don't store well. Manufacturer specifications indicate that germination rates drop sharply after the first year. If you decide to start from seed, buy fresh stock from a supplier with high turnover.
Who should choose seeds? Gardeners who plan to start seedlings indoors under lights and are comfortable with a 40 percent success rate. You'll need to sow 8 to 10 weeks before your last frost date.
Keep soil temperatures between 70 and 75 degrees Fahrenheit. Use a humidity dome to lock in moisture.
Cuttings: Reliable and Fast
Rooted cuttings give you a genetic clone of the parent plant. Aggregate reviews from home growers consistently show close to 100 percent success with this method. Take a 4-inch cutting from a healthy plant, strip the lower leaves, and set it in damp potting mix or plain water.
Who should choose cuttings? Anyone with access to an existing stevia plant. This is the best route if you want predictable sweetness and strong growth.
Transplants: Convenient but Pricier
Nursery transplants are seedlings that are already 6 to 8 weeks old. You skip the germination hassle entirely. The trade-off is cost, a single transplant often costs three to four times what a packet of seeds would set you back.
Who should choose transplants? Beginners who want a single plant for patio growing or anyone who missed the indoor seed-starting window.
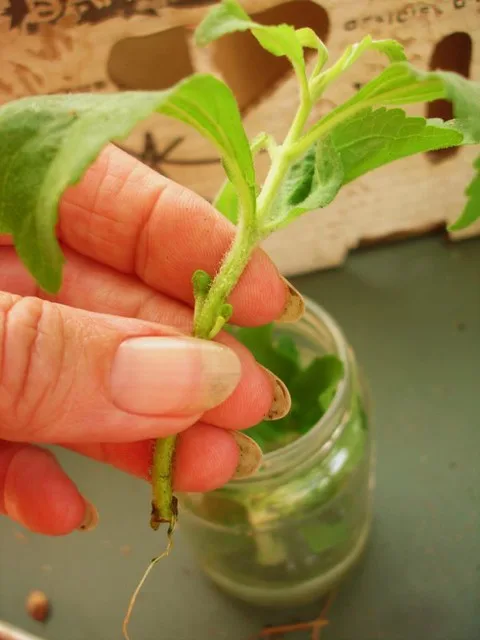
Image source: Web (Bing) / flickr.com (Web image (fair-use with source credit))
How to Choose the Right Spot: In-Ground vs. Containers vs. Indoors
Your local climate and available space determine where stevia will thrive. Here's how to decide.
In-Ground Beds: Best for Warm Climates
Stevia is a perennial in USDA hardiness zones 9 through 11. If you live in Florida, California, the Gulf Coast, or similar regions, plant it directly in the ground after the last spring frost. Space plants 18 to 24 inches apart.
The soil should drain well, stevia roots rot quickly in standing water.
If you live in a zone colder than 9, treat stevia as an annual. Plant in spring, harvest by late summer, and accept that the first hard freeze will kill it.
Containers: Ideal for Cool Climates and Flexibility
Containers solve the frost problem. Use a pot at least 12 inches wide with drainage holes. Fill it with a well-draining potting mix, not garden soil.
Stevia has a shallow root system, so a wide pot works better than a deep narrow one.
Move the container indoors whenever temperatures drop below 40 degrees Fahrenheit. This gives you a movable plant that can follow the sun.
Indoors Year-Round: Works but Needs Strong Light
You can grow stevia indoors through the winter. The catch is light. A sunny windowsill usually isn't enough.
You'll need grow lights running 12 to 14 hours per day. Keep the plant away from drafty windows and heating vents.
Our research confirms that indoor stevia tends to produce smaller leaves and less overall sweetness than outdoor plants. It's a solid way to keep a starter plant alive, but don't expect a bumper crop.
Step-by-Step Workflow for Each Growing Method
Once you've picked your method and spot, the real work starts. Here's the process for each path.
If You Chose Seeds
- Sow seeds on top of moist seed-starting mix. Do not cover them, they need light to germinate.
- Place the tray under a humidity dome or plastic wrap.
- Keep the soil temperature between 70 and 75 degrees Fahrenheit.
- Expect sprouts in 7 to 14 days. Remove the dome as soon as you see green.
- Thin seedlings to one per cell after the second set of true leaves appears.
- Harden off for a week before transplanting outdoors.
If You Chose Cuttings
- Take 4-inch cuttings from the tip of a healthy stevia stem.
- Remove the lower half of the leaves.
- Stick the bare stem into moist potting mix or place it in a glass of water.
- Keep the cutting in bright, indirect light for 10 to 14 days.
- Once roots reach about an inch long, transplant into a 4-inch pot or directly into the garden.
If You Chose Transplants
- Water the transplant thoroughly before removing it from its nursery pot.
- Dig a hole twice as wide as the root ball but no deeper.
- Gently loosen any circling roots and place the plant at the same depth it was growing.
- Backfill with soil and water deeply.
- Mulch around the base to retain moisture and suppress weeds.
All three methods benefit from pinching the growing tips once the plant reaches 6 inches tall. This encourages bushier growth and more leaves.
Common Pitfalls That Kill Stevia Plants (and How to Avoid Them)
Even experienced growers run into trouble. Here are the most frequent issues we see.
Low Germination and Leggy Seedlings
If your seeds don't sprout, the temperature is usually the culprit. Stevia seeds germinate poorly below 68 degrees. If they sprout but grow tall and thin, they aren't getting enough light.
Move them closer to the light source or add a second grow light.
Overwatering and Root Rot
Stevia hates soggy soil. Yellowing lower leaves and a droopy appearance are the first signs. Let the top inch of soil dry out before watering again.
In containers, ensure drainage holes aren't clogged.
Bitter Leaves After Flowering
Here's the one that frustrates most home growers. Once stevia flowers, the leaves turn bitter. The sweetness compounds called steviol glycosides drop sharply after bloom.
Harvest before you see flower buds open. Keep the plant pinched back to delay flowering as long as possible.
Frost Damage
A single night below 30 degrees will kill stevia to the ground. Watch the weather forecast. Bring containers inside before the first frost.
For in-ground plants, harvest everything before the freeze hits.
Pest Problems
Whiteflies and aphids sometimes settle on stevia leaves. A strong spray of water from the hose knocks most of them off. If they keep coming back, insecticidal soap applied in the evening works well.
Avoid harsh chemical sprays on leaves you plan to eat.
When to Harvest and How to Store Leaves for Maximum Sweetness
Timing matters more than any other factor when it comes to stevia's sweetness. Get this wrong and you'll be chewing on bitter leaves that taste nothing like the sweetener you were hoping for.
Harvest Before Flowers Open
The sweet spot is right before the plant forms flower buds. Once you see tiny white buds starting to cluster at the tips of the stems, you have about a week at most. After the flowers open, the steviol glycoside levels in the leaves drop fast.
Pinch the growing tips regularly throughout the season. This delays flowering and forces the plant to branch out, producing more leaves overall. Our research shows that a well-pinched plant can yield up to 50 percent more harvestable foliage.
How to Harvest
Pick leaves in the morning after the dew dries but before the afternoon heat sets in. The sugar content is highest then. Use clean scissors or just your fingers to strip leaves from the stems.
Leave at least a third of the foliage on the plant so it can keep growing for another round.
You can harvest the whole plant at once if a frost is coming. Cut the stems at the base, strip the leaves, and compost the stalks. For a continuous harvest, take only the lower leaves and let the top continue growing.
Drying and Storing
Fresh stevia leaves taste sweetest right off the plant, but they wilt within hours. For long-term storage, drying is the way to go.
You have three good options:
- Air drying: Bundle small stems together and hang them upside down in a warm, dark, well-ventilated spot. Leaves are fully dry in 5 to 10 days depending on humidity.
- Dehydrator: Set it to the lowest setting, around 95 to 105 degrees Fahrenheit. Spread leaves in a single layer and check after 2 to 4 hours.
- Oven drying: Use the lowest setting possible, around 170 degrees or lower. Prop the door open slightly. Leaves should feel crisp and crumble easily between your fingers after 1 to 2 hours.
Store dried leaves whole in an airtight glass jar. Keep it in a dark, cool cupboard. Crush or grind leaves only right before you use them, whole leaves hold their sweetness longer than powder.
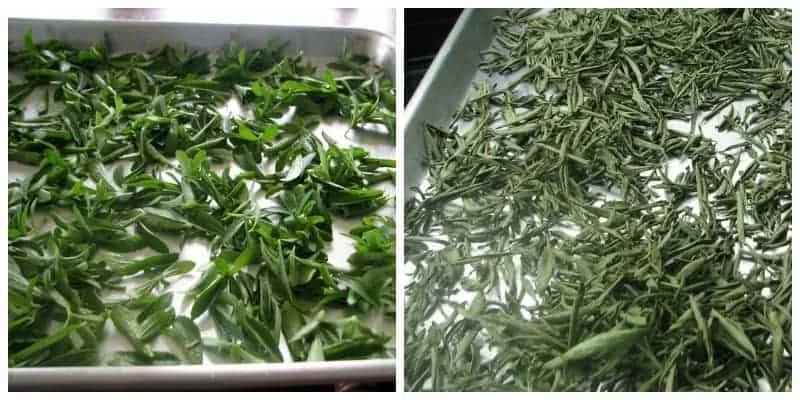
Image source: Bing (Web (fair-use with source credit))
Overwintering Stevia: Dig It Up or Keep It Inside?
Stevia is a tropical perennial, which means it wants to live through the winter. The problem is that a hard freeze kills it dead. You have two paths forward depending on where you live and how much space you have indoors.
Path One: Dig and Pot
If your stevia is in the ground, dig up the root ball before the first hard freeze. Cut the stems back to about 4 inches tall. Pot the root ball in a container with fresh potting mix.
Water it lightly and place it in a cool, bright spot indoors. A basement with a south-facing window works well. Keep the soil barely moist through the winter, too much water invites rot.
In early spring, harden the plant off and move it back outside after the last frost. This method works best for established plants with a strong root system.
Path Two: Bring the Whole Container Inside
If your stevia is already in a pot, the job is simpler. Before temperatures drop below 40 degrees Fahrenheit, bring the whole container inside. Place it near a bright window or under a grow light.
Cut back on watering but don't let the soil go bone dry.
This approach is less stressful for the plant. It will drop some leaves at first, but new growth should appear within a few weeks.
Path Three: Take Cuttings
This is the low-space option. Take several 4-inch cuttings from your healthiest stems before the first frost. Root them in water or damp potting mix.
Keep the rooted cuttings in small pots on a windowsill through winter. By spring, you'll have a handful of baby plants ready to go outside.
This method also gives you a genetic backup in case the mother plant doesn't make it through winter.
What Not to Do
Do not leave stevia in the ground if you live in a zone colder than 9. Do not keep indoor plants right next to a radiator or heating vent, the dry air will kill them fast. Do not fertilize during the winter months.
Stevia needs rest in low light, not new growth.
Frequently Asked Questions About Growing Stevia
Can I grow stevia from store-bought stevia powder?
No. Store-bought stevia powder is highly processed and contains no viable seeds or plant material. You need actual stevia seeds, live cuttings, or nursery transplants to grow the plant.
How long does it take for stevia to reach full size?
From a rooted cutting or transplant, expect about 60 to 90 days until the plant reaches a harvestable size of 12 to 24 inches tall. Seeds add another 8 to 10 weeks for indoor starting.
Why do my stevia leaves taste bitter?
Bitter leaves usually mean one of two things. Either the plant has already flowered and the sweetness has faded, or it was stressed by drought, high heat, or poor soil. Harvest before flowering and keep the soil consistently moist.
Can I grow stevia in a small apartment?
Yes, with the right setup. Use a 12-inch pot, quality potting mix, and a strong grow light running 12 to 14 hours per day. The yield will be smaller than an outdoor plant, but you can keep a healthy stevia plant going year-round.
Is stevia safe for pets?
Stevia leaves are not toxic to dogs or cats. Some animals experience mild digestive upset if they eat a lot of fresh leaves. The bigger concern is that many pets simply don't like the taste, so they usually leave the plant alone.
How many stevia plants do I need?
One mature plant produces roughly one to two pounds of fresh leaves per season. That's enough to keep a single person in sweetener for several months if you dry and store the leaves properly. For a family that uses stevia daily, three to four plants provide a reliable supply.
Overwintering Stevia: Dig It Up or Keep It Inside?
Stevia is a tropical perennial at heart. It wants to live year after year. The problem is that a hard freeze kills it to the ground.
You have three solid options for getting your plant through winter. The right choice depends on your climate and how much indoor space you have.
Option One: Dig and Pot
If your stevia is in the ground, dig up the root ball before the first hard freeze. Cut the stems back to about 4 inches tall. Pot the root ball in a container with fresh, well-draining mix.
Water it lightly and place it in a cool, bright spot indoors.
Keep the soil barely moist through winter. Too much water invites root rot. In early spring, harden the plant off and move it back outside after the last frost.
Option Two: Bring the Whole Container Inside
If your stevia lives in a pot, this is the simplest route. Before temperatures drop below 40 degrees Fahrenheit, move the entire container indoors. Place it near a bright window or under a grow light.
Cut back on watering but don't let the soil go bone dry. The plant will drop some leaves at first. New growth should appear within a few weeks.
Option Three: Take Cuttings
This is the low-space option. Before the first frost, take several 4-inch cuttings from your healthiest stems. Root them in water or damp potting mix.
Keep the rooted cuttings in small pots on a windowsill through winter.
By spring, you'll have a handful of baby plants ready for the garden. This method also gives you a genetic backup if the mother plant doesn't survive.
What to Avoid
Do not leave stevia in the ground if you live in a zone colder than 9. Do not keep indoor plants right next to a heating vent. The dry air kills them fast.
And do not fertilize during winter. Stevia needs rest, not new growth.
Frequently Asked Questions About Growing Stevia
Can I grow stevia from store-bought stevia powder?
No. Store-bought stevia powder is highly processed. It contains no viable seeds or plant material.
You need actual stevia seeds, live cuttings, or nursery transplants.
How long does it take stevia to reach full size?
From a rooted cutting or transplant, expect about 60 to 90 days to reach a harvestable size of 12 to 24 inches tall. Seeds add another 8 to 10 weeks for indoor starting before transplant.
Why do my stevia leaves taste bitter?
Two main reasons. Either the plant has already flowered and the sweetness faded, or it was stressed by drought or poor soil. Harvest before flowering.
Keep the soil consistently moist.
Can I grow stevia in a small apartment?
Yes, with the right setup. Use a 12-inch pot with drainage holes. Add a strong grow light running 12 to 14 hours per day.
Yield will be smaller than outdoor plants, but you can keep it going year-round.
How many stevia plants do I need?
One mature plant produces roughly one to two pounds of fresh leaves per season. That's enough for a single person for several months if you dry and store them properly. Three to four plants supply a family.



