Growing garlic looks simple on paper. Plant a clove, wait eight months, dig up a bulb. But if you've ended up with tiny heads or rotted cloves, you know the details make or break the harvest.
The real work happens before the clove goes in the ground.
Getting those calls right matters more than most gardeners realize. Hardneck garlic needs 4 to 8 weeks of soil temperatures below 50°F to trigger bulb formation. Variety choice and planting time are the two levers that control the outcome.
Get those right, and the rest of the season runs smoothly.
Quick Answer
Plant garlic cloves pointy-end up, 2 inches deep, spaced 6 inches apart in full sun. Hardneck suits cold climates. Softneck suits mild climates.
Plant in fall before the ground freezes. Harvest when lower leaves brown, then cure for 2 to 4 weeks.
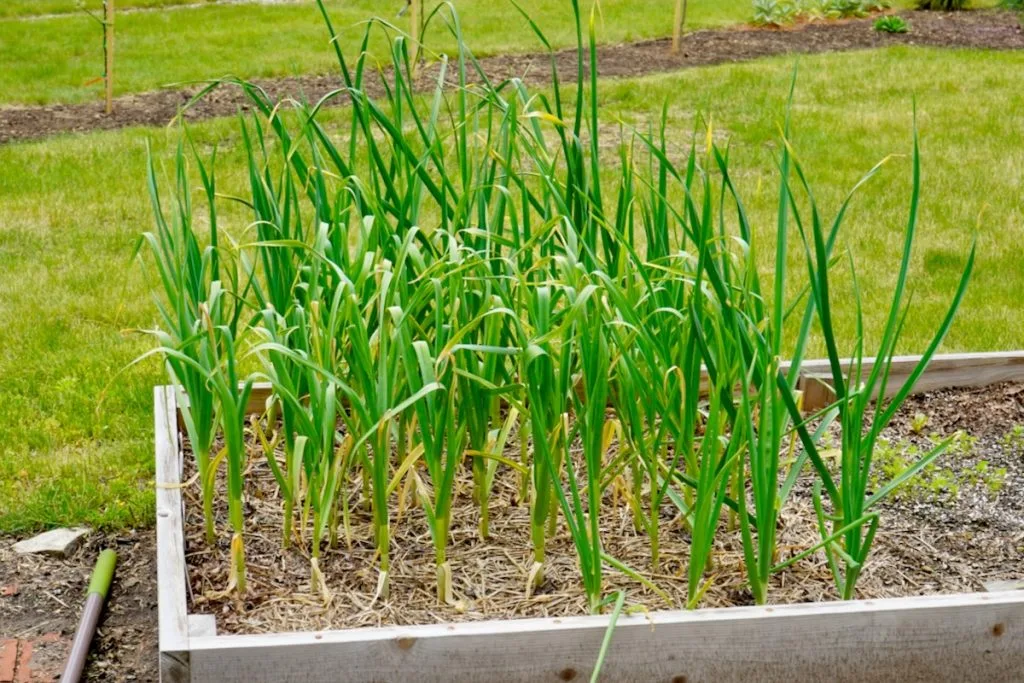
Image source: Web (Bing) / geekygreenhouse.com (Web image (fair-use with source credit))
Start Here: The Two Decisions That Shape Your Garlic Outcome
Before you order a single clove, answer two questions. What kind of garlic matches your growing zone? When does your planting window close?
Those decisions branch into everything else. They determine which varieties to buy, how deep to plant, how much mulch to use, and when to harvest.
Here's how the decision tree opens.
If you live in Zone 5 or colder, you need hardneck garlic. It survives deep freezes and delivers the bold flavors home growers love. Porcelain and Rocambole types are the most reliable in this range.
If you're in Zone 8 or warmer, softneck garlic is your safer bet. It shrugs off mild winters and stores for months. Silverskin and Artichoke types handle warm fall weather much better than hardnecks.
In Zones 6 and 7, you can grow both. Your pick comes down to flavor preference and storage needs. Hardneck gives you scapes in June.
Softneck gives you longer storage.
That one decision narrows your variety list from hundreds to a shortlist. Match it with the right planting date, and you've cracked the two hardest parts of growing garlic.
Hardneck vs Softneck: Pick the Right Garlic for Your Climate and Kitchen
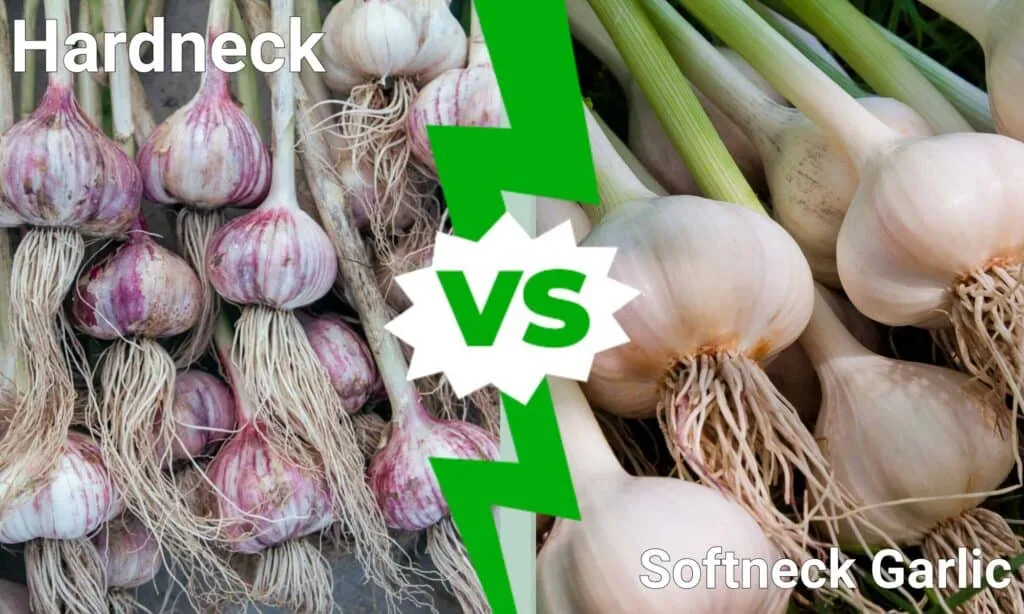
Image source: Web (Bing) / a-z-animals.com (Web image (fair-use with source credit))
Hardneck and softneck are the two main branches of the garlic family. They're both Allium sativum, but they behave differently in the ground, in the kitchen, and in storage.
Hardneck garlic is the star of northern farmers' markets. It sends up a curling flower stalk called a scape, which you snap off in early summer. It produces fewer, larger cloves per bulb, and the flavor is bolder and spicier.
The tradeoff is storage life, which runs 3 to 6 months.
Softneck garlic is the classic supermarket type. It rarely makes scapes, produces more cloves per bulb, and stores for 6 to 10 months. The flavor is milder and more buttery, which makes it a daily kitchen workhorse.
It also handles warm winters far better than hardneck.
Here's the quick comparison.
| Feature | Hardneck | Softneck |
|---|---|---|
| Cold hardiness | Down to -40°F | Down to -20°F |
| Flavor | Complex, spicy | Mild, buttery |
| Storage life | 3 to 6 months | 6 to 10 months |
| Cloves per bulb | 4 to 12 | 10 to 20 |
| Scapes | Yes, snap off in June | Rarely appear |
| Best for | Cold climates, fresh eating | Mild climates, storage |
Choose hardneck if you want maximum flavor and live in a region with real winter. Choose softneck if you store garlic for months or garden in a warm climate. And if you want to braid garlic for the pantry, softneck is the only type that braids properly.
When to Plant Garlic: A Zone-by-Zone Planting Window
Garlic is a fall crop for most growers. The goal is to get roots established before the ground freezes, but not so early that green shoots push up in fall. A good rule of thumb is to plant 2 to 4 weeks before the first hard frost.
Here's how that breaks down by zone, based on the USDA Plant Hardiness Zone Map.
| USDA Zone | Planting Window |
|---|---|
| Zones 3 to 5 | Late September to early October |
| Zones 6 to 7 | Mid-October to mid-November |
| Zones 8 to 9 | Late November to December |
These windows hold true as of 2026. In our research across university extension programs, we found the same pattern: count back three weeks from your average first frost date. Your local university extension office publishes county-specific dates.
In Zones 9 and 10, winter rarely brings enough cold for proper bulb formation. Softneck varieties can work if planted in December or January, but hardneck usually won't form solid heads. Some gardeners in these regions grow garlic as green shoots instead.
If you miss the fall window, don't grab supermarket cloves in spring. Many are treated with sprout inhibitors. Plant garlic greens from untreated seed garlic instead.
You'll be harvesting mild garlic leaves in about 8 weeks.
Planting Garlic Step by Step: Soil, Spacing, Depth, and Mulch
The planting process takes about an hour for a 50-clove bed. Follow these five steps.
Step 1: Prepare the bed. Garlic needs loose, well-drained soil with a pH between 6.0 and 7.5. Heavy clay is the number one cause of rotten cloves. Mix in 2 to 4 inches of compost before planting.
If your soil stays soggy, build a raised bed.
Step 2: Break bulbs into cloves. Do this right before planting, not days ahead. Keep the papery skin on each clove. Pick the largest cloves for planting and save the small ones for the kitchen.
Small cloves produce small bulbs.
Step 3: Plant pointy-end up. Place each clove with the flat root plate down and the pointed tip up. Cover so the tip sits 2 inches below the surface. Shallow planting leads to frost heave in cold zones.
Step 4: Space for growth. Keep cloves 6 to 8 inches apart in rows 12 to 18 inches apart. Packing them tighter gives you smaller bulbs. If you want garlic greens instead, plant 1 to 2 inches apart and shear like chives.
Step 5: Water and mulch. Water thoroughly after planting. Then spread 3 to 4 inches of straw or shredded leaves over the bed. The mulch steadies soil temperature, smothers winter weeds, and keeps moisture even.
Caring for Garlic All Season: Watering, Fertilizing, and Scape Removal
For the first few weeks, keep the soil moist while roots establish. Once winter hits, the mulch does the work. In early spring, garlic wakes up and your season starts.
Watering. Give garlic about 1 inch of water per week from spring growth until 3 weeks before harvest. Stop watering in the final weeks. Wet soil at the end causes storage rot.
Fertilizing. Side-dress with nitrogen when shoots reach about 6 inches tall. Compost or a balanced organic fertilizer works well. One or two feedings make a measurable difference in bulb size.
Weeding. Garlic doesn't compete with weeds. Keep the bed clean for the first 6 to 8 weeks of spring growth. Fall mulch already suppresses most of it, but stay on top of what pokes through.
Scape removal. Hardneck garlic sends up a flower stalk called a scape in late spring. When it curls into a loop, snap it off at the base. Left alone, the plant pours energy into seeds instead of bulb growth.
Scapes taste like mild garlic, so saute them or blitz them into pesto.
Watch for trouble. Yellowing leaves point to water stress or low nitrogen. Soft cloves at harvest mean you watered too late in the season. In our research across extension bulletins, the top cause of bulb rot is wet soil during the final month before harvest.
Harvesting, Curing, and Storing Garlic (Plus Saving Seed Cloves)
Timing the harvest is the trickiest part. You want the bulb to be fully formed but still wrapped in tight skins. Dig too soon and the bulb is small.
Dig too late and the cloves burst out of their wrappers.
When to harvest. Watch the leaves. When the bottom 3 to 4 leaves have turned brown but the top leaves are still green, it's go time. That's roughly mid-June through July for most hardnecks, and a few weeks later for softnecks.
How to harvest. Loosen the soil with a garden fork at least six inches away from the stalk. Pull by the stalk base. Brush off loose soil, but never wash garlic.
Water trapped in the wrappers causes mold in the first week of storage.
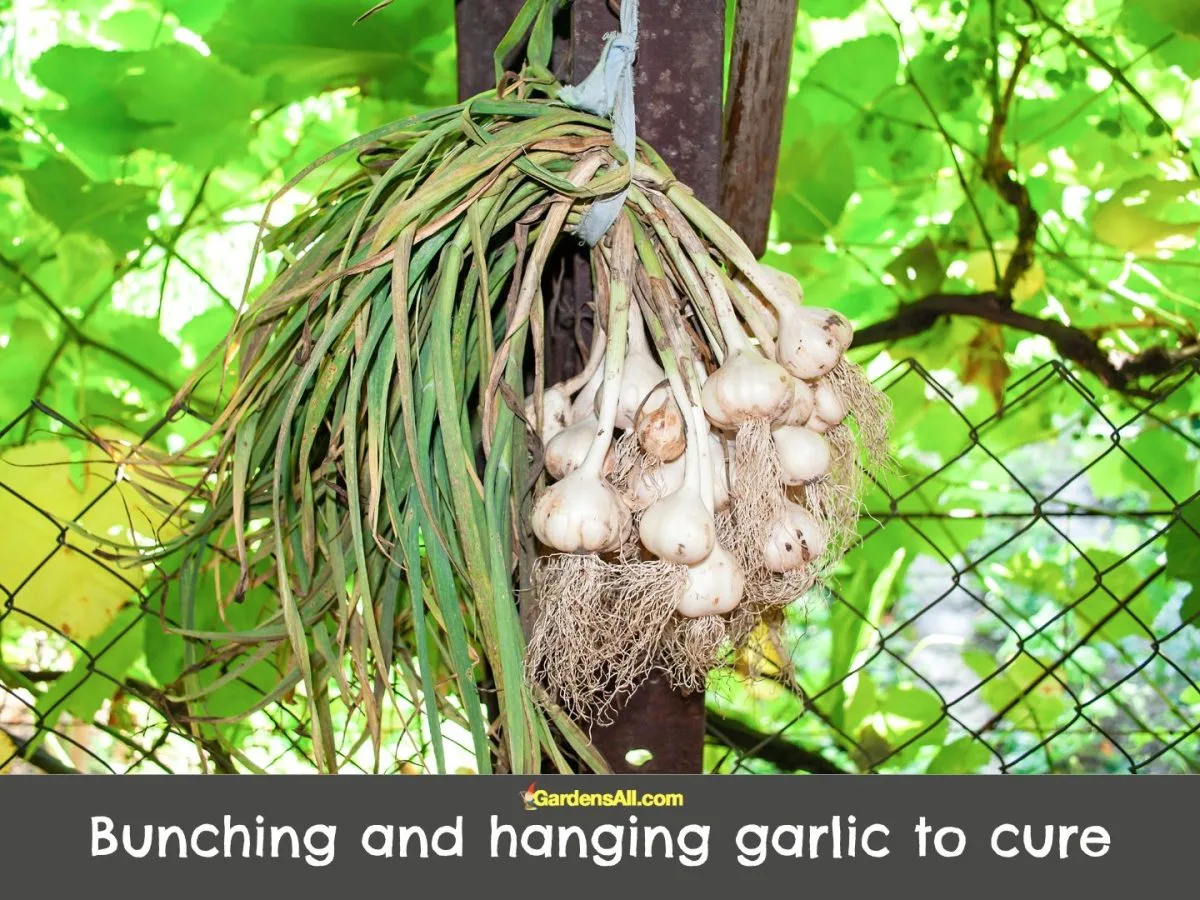
Image source: Bing (Web (fair-use with source credit))
Curing process. Bunch the plants by three or four and hang them in a dark, airy spot. A shed or covered porch works well. Cut off the roots before hanging.
Cure for 2 to 4 weeks until the skins are dry and the neck is tight enough to squeeze without feeling spongy.
Storing cured garlic. Trim the stalks to one inch and brush off loose dirt. Store in a mesh bag or open basket at 32 to 40°F with moderate humidity. Never store in the fridge, which triggers sprouting.
A dark basement or garage works perfectly for most homes.
Saving seed cloves. Set aside the biggest, most perfect bulbs before you cook with them. Replant those the following fall. Each year you select for size, your seed stock improves.
Rotate the planting spot, never set garlic in the same bed twice in three years to avoid soil-borne disease.
7 Garlic-Growing Mistakes That Cost You Your Crop
Our aggregate review of home grower failures and extension research points to seven errors that repeat season after season. Here's the list with the fix for each.
1. Planting supermarket garlic. Those bulbs may carry white rot or be treated with sprout inhibitors. Buy seed garlic from a reputable supplier for your region.
2. Planting too early or late. Early planting pushes green shoots up before winter. Late planting means weak roots.
Stick to the zone windows we covered, give or take a week.
3. Choosing the wrong type for your climate. Softneck in Zone 4 rarely forms good bulbs. Hardneck in Zone 9 rarely vernalizes.
Pick the branch that suits your weather.
4. Skimping on spacing. Crowded cloves produce golf-ball sized bulbs. Give them 6 inches minimum.
The space pays off in larger heads.
5. Skipping mulch in cold zones. Bare soil freezes and heaves cloves out of the ground. Three inches of straw prevents heaving and smothers weeds.
6. Harvesting too early or late. Early harvest = tiny bulbs. Late harvest = split wrappers and poor storage.
Watch the bottom 3 to 4 leaves for the brown signal.
7. Watering during the final two weeks. Wet soil at the end rots cloves. Stop watering completely once you see the lower leaves browning.
Frequently Asked Questions
Why are my garlic bulbs so small?
The top three causes are overcrowding, planting small cloves, and low nitrogen in spring. Space cloves 6 inches apart, select only the largest cloves for planting, and side-dress with compost or organic fertilizer when shoots hit 6 inches tall.
Do I need to remove garlic scapes?
Yes, if you want larger bulbs. The plant diverts energy to the flower stalk at the expense of bulb growth. Snap scapes off when they curl into a loop in late spring.
They make excellent pesto.
Can I grow garlic in pots?
Yes, but use a container at least 8 inches deep with drainage holes. Grow one or two types only and water consistently. Pots freeze faster than the ground in cold zones.
Move them against a foundation wall or insulate with bubble wrap in winter.
How long does garlic take to grow from clove to full bulb?
About 8 to 10 months depending on your variety and zone. Hardneck types run 180 to 210 days from planting to harvest. Softnecks run 150 to 180 days.
What happens if I plant garlic in spring?
You'll get garlic greens or very small bulbs. Most hardneck varieties need a cold period to form bulbs. Spring planting skips the vernalization window entirely.
If you have to plant in spring, use softneck and accept smaller yields.



