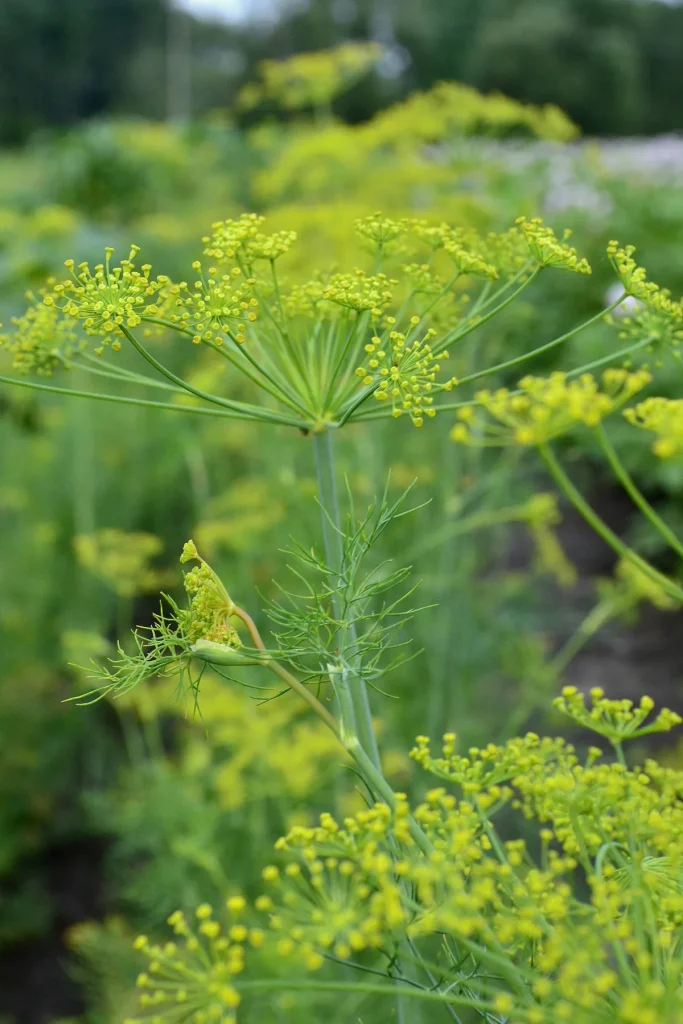
If you've ever stood over a patch of herbs wondering why your dill suddenly looks like a lacy yellow umbrella instead of the bushy green plant on the seed packet, you're not alone. Growing dill is simple in theory, but it throws a lot of visual curveballs that text-only guides never prepare you for. The good news?
Every problem dill faces shows up in plain sight, if you know what to look for.
In our research, the key milestones matter more than the daily care. Dill goes from seed to bolting in roughly 70 to 90 days depending on the variety, and once it flowers, leaf production drops fast. But catching that shift early is a visual skill, not a guessing game.
Let's walk through exactly what to look for at each stage.
Quick Answer
Dill grows best from direct-sown seeds in full sun with well-draining soil. Plant seeds ¼ inch deep and keep them moist until germination in 7, 14 days. Thin seedlings to 6, 12 inches apart.
Harvest leaves before flowering for the best flavor.
Why Dill Is a "See It, Grow It" Herb
Dill rewards observation. The plant changes dramatically week to week, and those changes tell you exactly what to do next. Miss the cues, and you'll wonder why your dill tastes bitter or why it shot up and stopped producing leaves.
The three visual checkpoints that guarantee success are seedling thinness, leaf color, and flower bud formation. Seedlings that grow tall and pale are starving for light. Leaves that turn yellow signal stress, usually from inconsistent water.
And the moment you spot a tiny cluster of flower buds forming at the top, you've got a short window to harvest leaves before flavor drops.
What the Seed Packet Doesn't Tell You
Seed packets give you spacing, depth, and days to maturity. They don't show you what healthy growth actually looks like. In our research, first-time growers consistently misread the visual signals.
They see a tall, spindly seedling and think it's thriving. They see the first flower bud and assume the plant is still good for leaf harvest for weeks.
Neither is true.
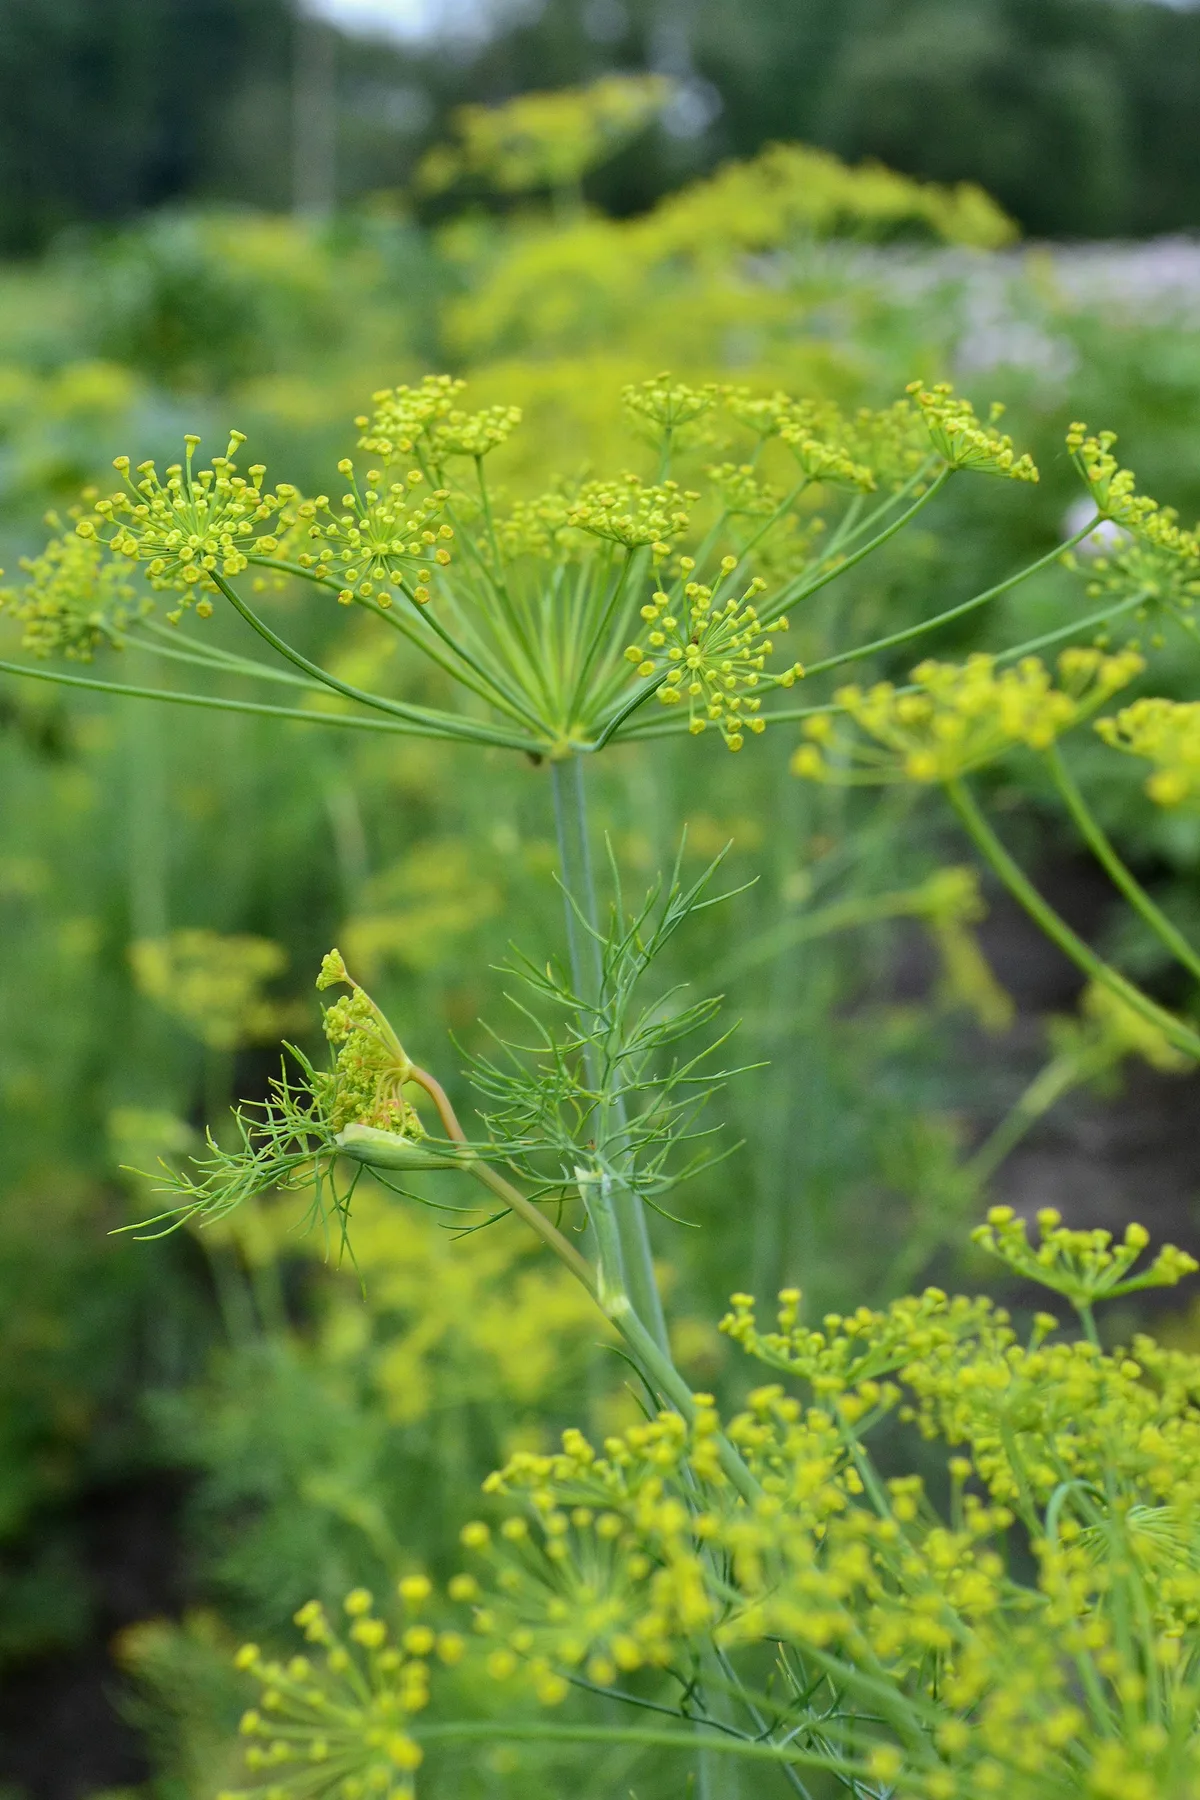
Image source: Web (Bing) / dengarden.com (Web image (fair-use with source credit))
The Growth Stage Timeline
Dill hits its visual milestones fast. Here's what you should see, and when:
| Stage | Timeline | Visual Cue |
|---|---|---|
| Germination | 7–14 days | Tiny green loops emerging from soil |
| First true leaves | 10–14 days after sprout | Feathery, branched leaves appear |
| Full leaf growth | 40–60 days | Dense, blue-green foliage, 12–18 inches tall |
| Flower bud formation | 55–75 days | Small green cluster at stem tip |
| Full bloom | 70–90 days | Yellow umbel opens, leaves become sparse |
The Bolting Dilemma
Bolting is dill's biggest frustration. It happens when the plant shifts from leaf production to seed production. Heat above 85°F, transplant shock, or simply hitting the end of its natural cycle triggers it.
Once bolting starts, you can't stop it. You can only delay it by snipping off the buds early. But here's the honest part: after 60 days, most dill varieties want to flower.
That's not a failure. It's the plant's natural next step.
How to Plant Dill: Direct Sowing vs. Transplanting (and What It Looks Like)
Dill hates being moved. Its long taproot is delicate, and transplanting almost always triggers premature bolting. If you can, direct sow.
That single choice saves you more headaches than any other tip in this guide.
Manufacturer specifications from seed companies like Burpee and Johnny's Selected Seeds all agree on this: direct sowing is the preferred method for dill. The roots grow undisturbed, the plant stays stable, and you don't risk the shock that comes with a transplant.
The ¼-Inch Rule
Seeds go ¼ inch deep. That's about the length of your fingernail. Press them lightly into the soil, then cover with a thin layer of fine soil or compost.
Water gently so you don't wash them away. Seeds that sit too deep will either rot or struggle to reach the surface.
In our research, the most common germination failure comes from planting too deep. The seed has limited energy stored. If it has to push through too much soil, it simply gives up.
Shallow sowing is the difference between a full patch of dill and a few weak stragglers.
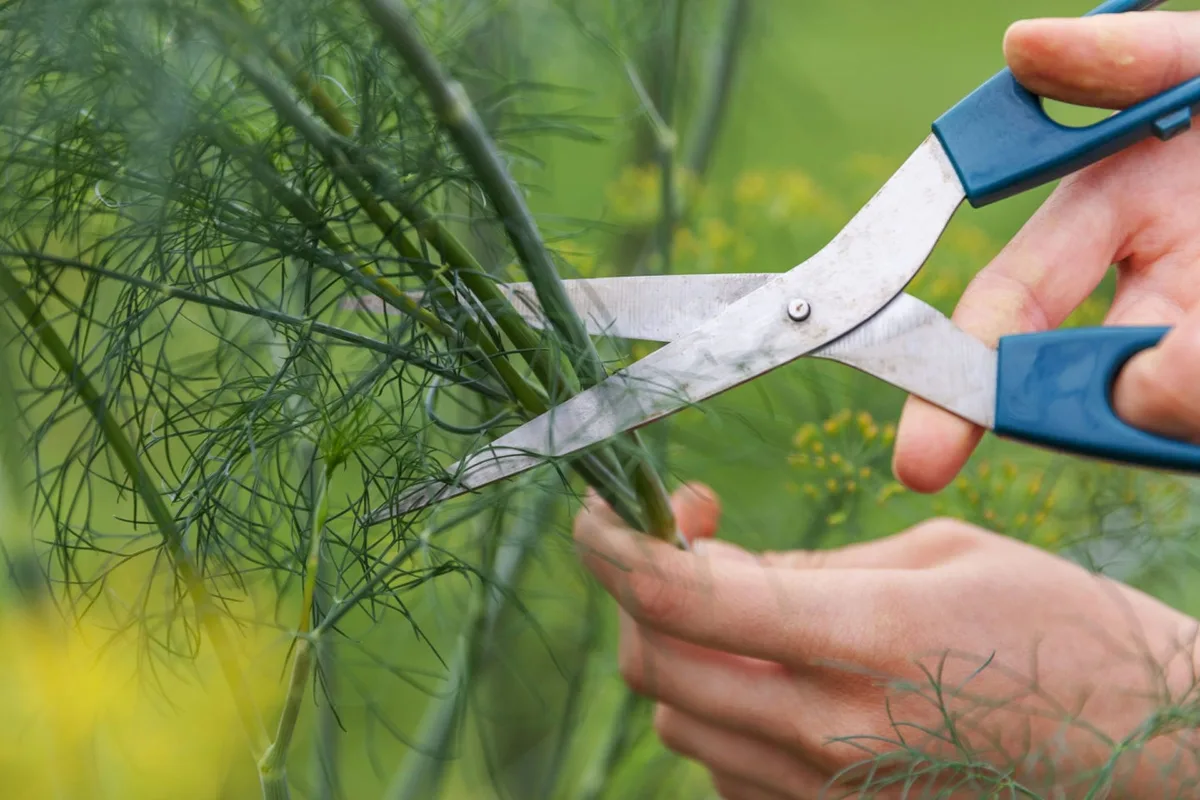
Image source: Web (Bing) / tastylicious.com (Web image (fair-use with source credit))
Thinning: Why You Snip Instead of Pull
When seedlings reach 2, 3 inches tall, thin them to 6 inches apart for dwarf varieties and 12 inches for taller types. It feels brutal, but it's necessary. Crowded dill grows weak, leggy, and prone to powdery mildew.
Here's the visual part that matters: use scissors to snip the unwanted seedlings at soil level. Don't pull them. Pulling disturbs the roots of nearby seedlings, and for dill, root disturbance is a direct ticket to bolting.
Signs of Transplant Shock
If you must transplant, look for these signs within 48 hours:
- Wilting leaves that don't recover by evening
- A stem that bends or flops over
- Yellowing lower leaves
- Flower buds appearing within 7 days
That last one is the real tell. A stressed dill plant bolts immediately. It panics and tries to reproduce before it dies.
If you see buds show up right after transplanting, you've lost the leaf harvest, but you can still save seeds.
The Visual Growth Stages: Seedlings, Feathery Leaves, and Bolting
Dill moves through four distinct looks, and each one changes how you care for the plant. Get familiar with these stages and you'll always know what to do next.
Stage 1: The Sprout
The first thing you'll see is a tiny loop of green pushing through the soil. Within a day or two, it straightens into a thin stem with two small, rounded cotyledon leaves. These aren't true leaves yet.
They're the seed's built-in food supply.
Leggy seedlings show up right here. If the stem stretches tall and pale, reaching for light, the plant is telling you it's not getting enough sun. Healthy dill at this stage stays short, stocky, and vibrant green.
A photo diagram would show the difference clearly: squat and sturdy versus tall and spindly.
Stage 2: Feathery Foliage
As true leaves emerge, you'll see the classic dill silhouette. The leaves are compound and feathery, branching into thin, thread-like segments. The color should be a deep blue-green.
Pale green or yellow leaves indicate nitrogen deficiency or overwatering.
This is the stage where you can start harvesting. The plant should be at least 8, 12 inches tall with several sets of branches. Take outer stems first, cutting close to the base.
This encourages the plant to bush out rather than reaching straight up.
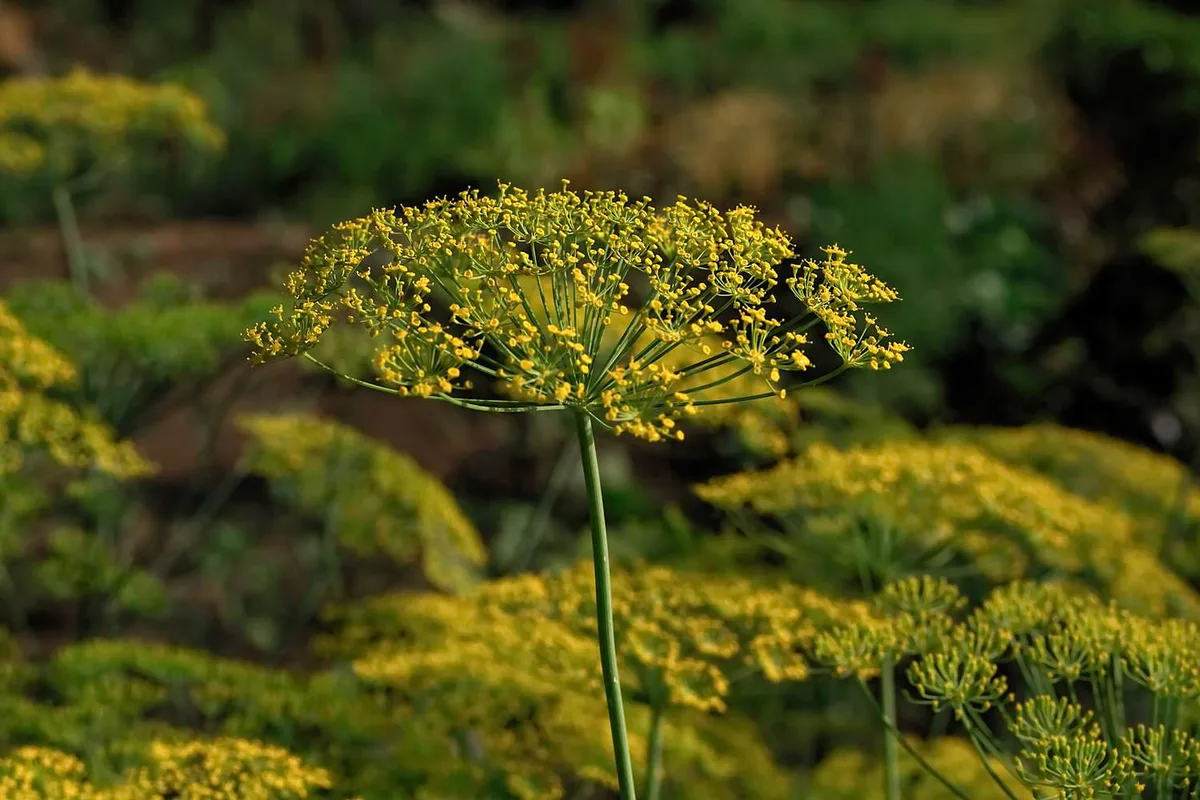
Image source: Web (Bing) / treehugger.com (Web image (fair-use with source credit))
Stage 3: Flower Bud Formation
This is the moment most gardeners miss. At the very top of the plant, you'll see a tight cluster of tiny green buds. It looks almost like a miniature broccoli crown.
That's the future flower umbel.
Once you see this, you have one to two weeks of quality leaf harvest left. After the buds open into the yellow umbrella-like flower, the leaves become thinner, tougher, and less flavorful. The plant's energy has shifted to seed production.
Stage 4: Full Bloom and Seed Set
The yellow umbel is beautiful, and it's a magnet for pollinators and beneficial insects. Ladybugs, hoverflies, and parasitic wasps all visit dill flowers. If you're growing dill for pickling, the green seed heads at this stage are exactly what you want.
As the flowers fade, seeds form and ripen. They start green, then turn brown and dry. If you leave them, the plant drops them, and they self-sow for next season.
That's why dill often comes back on its own.
What's Going Wrong? Visual Troubleshooting for Leggy, Yellow, or Buggy Plants
Dill problems are rarely invisible. The plant practically points at its own issues. Here's how to read the signs.
Leggy Stems: A Light Problem Written All Over the Plant
If your dill looks like it's trying to climb out of the soil, it needs more light. Dill wants full sun, at least six hours of direct light per day. In partial shade, it stretches.
The stems get thin, the leaves get sparse, and the whole plant looks tired.
The fix is prevention. Choose a sunny spot from the start. If you're growing indoors, you'll need strong grow lights running 12, 16 hours a day.
A sunny windowsill rarely cuts it.
Powdery Mildew: White Powder, Easy Fix, but Act Fast
Powdery mildew shows up as white, dusty spots on the leaves. It thrives in humid conditions with poor air circulation. Crowded planting makes it worse.
Cut back affected leaves, thin the plant for better airflow, and water at the base rather than overhead. Severe cases can be treated with a diluted milk spray or sulfur-based fungicide. In our research, most home growers catch it early because the white powder is so visible.
Aphid Clusters and Swallowtail Caterpillars: Look, Don't Panic
Aphids are tiny, soft-bodied insects that cluster on new growth and flower heads. You'll notice them as a sticky residue or curling leaves before you spot the insects themselves. A strong blast of water knocks most of them off.
Swallowtail caterpillars are a different story. They're big, striped, and they'll munch through your dill leaves with enthusiasm. They also turn into beautiful butterflies.
Most gardeners tolerate a little damage in exchange for hosting black swallowtails. If you can't share your dill with them, pick them off by hand and relocate them to a sacrificial plant.
Floppy Stems: When Your Dill Outgrows Its Own Roots
Tall varieties like Long Island Mammoth can reach 3, 4 feet. That's a lot of top weight for a taproot to anchor, especially in loose soil or wind. If you see your dill leaning, stake it early.
A simple bamboo stake and a loose tie will keep it upright.
Yellow Leaves: The Watering Goldilocks Zone
Yellow lower leaves usually mean overwatering. Dill prefers soil that's moist but not soggy. If the top inch feels dry, water.
If it's damp, wait. Underwatering shows up as wilting leaves that perk up after a drink. The visual difference matters.
Harvesting by Eye: Fresh Leaves, Pickling Heads, and Seed Saving
Harvesting dill isn't a one-time event. It's a season-long process of reading the plant and picking the right part at the right time.
Cutting Outer Stems for Fresh Leaves
Once the plant reaches about 8 inches tall, you can start harvesting. Cut the outer stems at the base, near the soil line. The inner stems continue growing, and the plant stays productive for weeks.
Don't take more than a third of the plant at once. That gives it enough foliage to keep photosynthesizing. Fresh leaves store in a damp paper towel in the refrigerator for about a week.
For longer storage, chop and freeze in olive oil or dry them.
Pickling Heads: The Right Color and Shape
Pickling requires the green seed heads, called umbels. Harvest them when the seeds are fully formed but still green and tender. The flavor is bright, fresh, and perfect for cucumber brine.
If you wait too long, the seeds turn brown and hard, and you've missed the pickling window.
The key visual cue is color. Green heads with soft seeds are ready. Brown heads with hard seeds are past their prime.
Seed Heads: Turning Brown, Bagging Before the Shatter
If you're saving seeds, wait until the heads turn tan or light brown. But don't wait until they fully dry on the plant. They'll shatter and scatter everywhere.
Cut the entire head with a few inches of stem. Put it upside down in a paper bag and hang it in a dry, dark place. After a week or two, the seeds fall out on their own.
Store them in an airtight container, and they'll stay viable for three to five years.
What to Do with Bolted Plants
If your dill has bolted and you've already harvested the leaves, let it go. The flowers bring beneficial insects to your garden. The seeds feed birds, and the self-sowing means you'll likely have volunteer dill next year.
If you don't want it spreading, cut the heads off before the seeds turn brown. Compost the rest of the plant. Either way, a bolted dill plant isn't a garden failure.
It's a plant that completed its life cycle successfully.
Dill Varieties vs. Your Growing Conditions (Bouquet, Fernleaf, Dukat)
Not every dill grows the same way. The variety you choose changes how fast it bolts, how tall it gets, and where it fits best. Seed company specs from Johnny's and Burgee agree on these differences.
| Variety | Best For | Height | Days to Leaf Harvest | Key Visual Trait |
|---|---|---|---|---|
| Bouquet | Heavy leaf production, compact gardens | 18–24 in | 50–60 | Slower to bolt, dense blue-green foliage |
| Fernleaf | Containers, small spaces | 12–18 in | 55–65 | Very slow to bolt, narrow delicate leaves |
| Dukat | Fresh cutting, high yield | 20–30 in | 45–55 | Fine, abundant leaves, heavy producer |
| Long Island Mammoth | Pickling heads, tall gardens | 30–48 in | 55–70 | Large seed umbels, vigorous grower |
If you're growing in a pot on a patio, Fernleaf is the smart pick. Its slow bolting habit gives you more leaf harvest time. For pickling, Long Island Mammoth is the standard.
Bouquet and Dukat sit in the middle, good for kitchen gardens where you want a steady supply of leaves. In our research, planting one fast and one slow bolter gives you dill across the longest window.
Smart Spots for Dill: Companion Planting and Container Use
Dill pulls double duty in the garden. It attracts beneficial insects like ladybugs and hoverflies. Those predators keep aphid populations down on nearby plants.
Good companions include cabbage, onions, lettuce, cucumbers, and asparagus. Bad companions include fennel and caraway because the roots can cross-inhibit each other. Keep cilantro separate too if you're saving seed, since they flower at the same time.
Container Growing: The 12-Inch Rule
Dill's taproot runs deep. A pot less than 12 inches deep will stunt the plant and trigger early bolting. Use a well-draining potting mix.
Water when the top inch of soil feels dry to the touch. Stick to Fernleaf or Bouquet for containers. Tall varieties easily tip over in pots.
Frequently Asked Questions
Can I grow dill indoors?
Yes, but only with strong artificial light. Dill needs at least 6 hours of direct sun or 12 to 16 hours under grow lights. A sunny windowsill rarely provides enough for bushy, healthy growth.
Indoor dill often turns leggy and weak.
How long does it take to grow dill?
Seeds germinate in 7 to 14 days at 60 to 70 degrees Fahrenheit. Leaves are ready to harvest in 40 to 60 days. Seed heads for pickling come at 70 to 90 days.
The visual signature is the feathery leaves in the first month and flower buds soon after.
Does dill come back every year?
Yes, if you let it go to seed. Dill is an annual, but it self-sows freely. Leave a few flower heads on the plant until they turn brown and drop seeds.
You'll see volunteer dill popping up the next spring in the same spot.
Why does my dill bolt so fast?
Heat above 85 degrees Fahrenheit, transplant shock, or a fast-bolting variety cause early flowering. Check your variety. Fernleaf and Bouquet hold longer than Long Island Mammoth.
Direct sowing instead of transplanting also delays bolting significantly.
What is the best dill variety for containers?
Fernleaf is the top choice for containers. It stays compact at 12 to 18 inches and bolts much slower than other types. Use a pot at least 12 inches deep with drainage holes.
Plant one seed per pot and thin to the strongest seedling.



