If you’ve ever tried growing canna lilies and ended up with yellow leaves, no flowers, or rhizomes that rotted in the ground, you know the frustration. The problem isn’t that cannas are hard to grow. It’s that small visual cues, planting depth, rhizome orientation, early signs of rust, make or break your results.
Most failures happen before the first shoot even breaks the soil.
Per the Royal Horticultural Society, consistent flowering and vigorous growth depend on getting the rhizome 2 to 4 inches deep with the eyes facing upward. That simple spec is where beginners slip up most often. Once you know what to look for, the process becomes almost foolproof.
Let’s start with the fastest way to get it right.
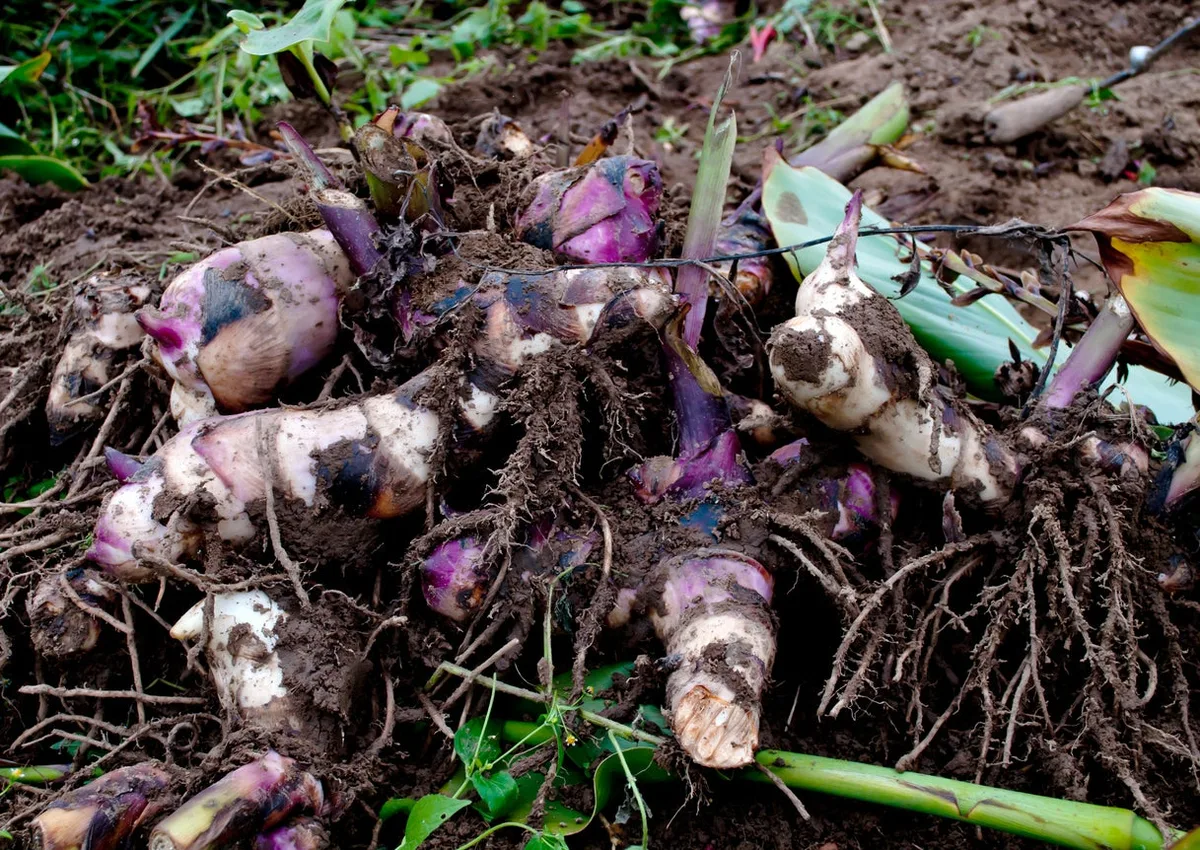
Image source: Web (Bing) / gardeningknowhow.com (Web image (fair-use with source credit))
Quick Answer
Growing canna lilies starts with firm healthy rhizomes planted 2 to 4 inches deep. Position the eyes facing upward. Choose full sun.
Keep soil evenly moist. Fertilize with a low-nitrogen formula every 4 to 6 weeks. Lift rhizomes before the first frost in USDA zones 7 and colder.
Store them in dry peat moss at 45 to 55°F.
Why Visual Cues Matter for Canna Success
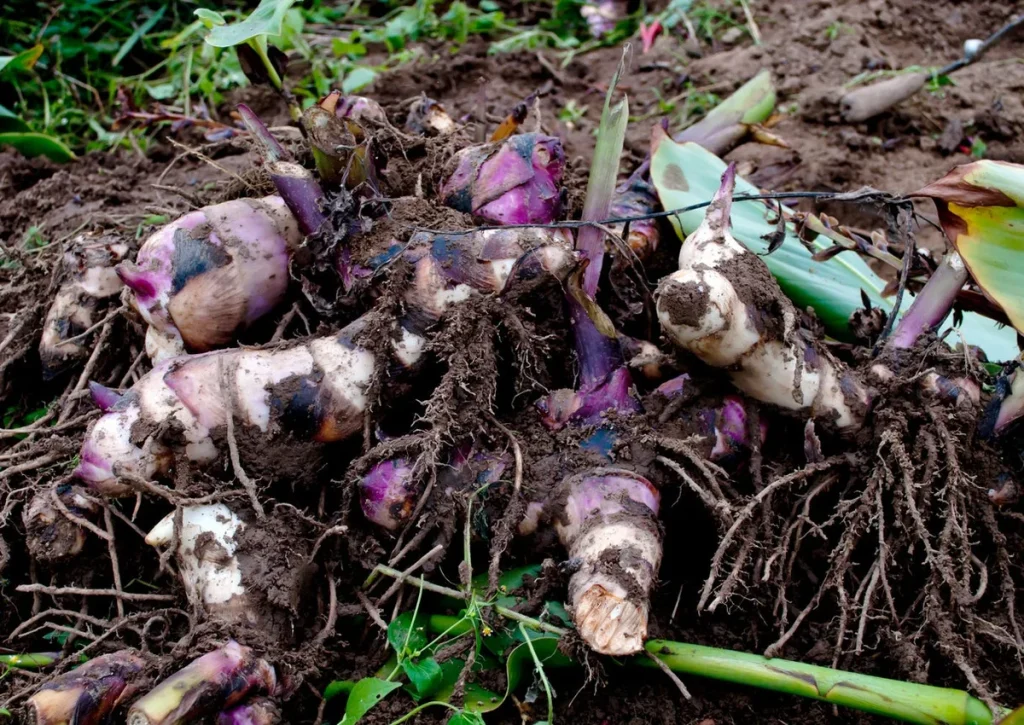
Canna rhizomes don’t look like typical bulbs. They’re thick, knobby, and irregular. New shoots emerge from small pink or white buds called eyes.
If you plant a rhizome upside down or sideways, the shoot has to waste energy rerouting underground. That delay can set the plant back by weeks or rot the rhizome entirely.
In our research across university extension guides and verified grower feedback, visual inspection at planting time is the single most common point of failure. People buy a bag of rhizomes, dig a hole, drop them in, and hope for the best. The result is uneven emergence, weak stems, and sparse blooms.
What the photos and diagrams would show you: a healthy rhizome is firm and plump, with at least one visible eye. A mushy or shriveled rhizome should be discarded immediately. A rhizome planted with the eye pointing up will sprout within 14 to 21 days.
A rhizome planted upside down can take up to 5 weeks and may never produce a strong stem.
Here’s what to check before you put a rhizome in the ground:
- Firmness, squeeze gently. Soft spots indicate rot.
- Eyes, look for pink, white, or pale green buds on the top side.
- Roots, healthy white root nubs along the sides.
- Mold or discoloration, black or brown patches are warning signs.
Once you know those visual markers, you can plant with confidence. The rest is just keeping those conditions consistent.
What to Look For When Planting Rhizomes (Depth, Eyes, and Orientation
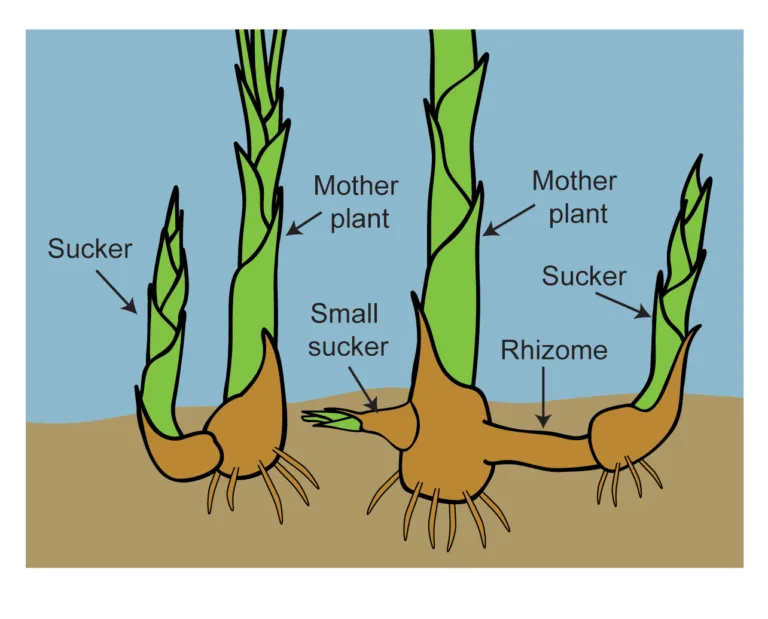
The most common question we hear is: which end goes up? The answer is straightforward. The eye is the growing point.
It should face the sky.
Place the rhizome horizontally in the hole. Cover it with 2 to 4 inches of soil. In heavy clay, stay on the shallower side.
In sandy soil, go a little deeper. Water it in once, then wait for the shoot to emerge before watering again.
A quick reference for planting specs:
| Factor | Recommendation |
|---|---|
| Depth | 2–4 inches (5–10 cm) |
| Spacing | 18–24 inches (45–60 cm) apart |
| Sun exposure | Full sun (minimum 6 hours direct) |
| Soil type | Well-drained, rich, slightly acidic |
| Time to sprout | 14–21 days at soil temp above 60°F |
If you’re planting in a container, use a pot at least 12 inches deep with drainage holes. Fill it with lightweight potting mix, not garden soil. Container cannas need more frequent watering and will bloom just as heavily as in-ground plants.
One mistake we see often is planting too many rhizomes in one hole. Each rhizome needs its own space. Crowding leads to competition for nutrients and poor air circulation, which invites rust and leaf roller.
Give each plant elbow room and you’ll get bigger flowers and healthier foliage.
Watering, Feeding & Leaf Watching – Visual Signs of Health vs. Trouble
Canna leaves are like a health dashboard. Once you learn the language, they tell you exactly what’s going on underground.
A healthy canna leaf is broad, waxy, and deep green or variegated depending on the variety. It holds itself upright. The edges are clean.
The veins are crisp.
Here’s what the visual warning signs look like:
- Yellowing lower leaves, usually overwatering or poor drainage. Let the top inch of soil dry out before watering again.
- Brown crispy edges, underwatering or salt buildup from too much fertilizer. Flush the soil with clean water and stick to a monthly feeding schedule.
- Pale green or stunted new growth, nitrogen deficiency. Switch to a balanced slow-release feed.
- Orange pustules on leaf undersides, canna rust. More on that in the next section.
- Leaves rolled and tied with silk, canna leaf roller. Unroll a leaf and you’ll find a small caterpillar inside.
Watering is straightforward. Cannas like consistent moisture, not soggy soil. In the ground, 1 to 2 inches of water per week is enough.
In containers, check daily during hot spells. Stick your finger up to the second knuckle. If it feels dry, water deeply until it runs out the bottom.
Fertilizer matters more than most people think. Cannas are heavy feeders, but they prefer low nitrogen. A ratio like 5-10-5 or 10-10-10 applied every 4 to 6 weeks keeps the flowers coming.
Too much nitrogen gives you huge green leaves and almost no blooms.
Watch the leaves after you feed. If the tips turn brown within a week, you overdid it. Cut the next application in half.
Spotting and Fixing Common Problems (Rust, Leaf Roller, Rot
Three issues cause the most grief for canna growers. Here’s how to identify and handle each one.
Canna rust shows up as orange, yellow, or brown pustules on the underside of leaves. The upper side often looks speckled or streaked. It spreads fast in humid weather and can defoliate a plant in weeks.
Remove affected leaves immediately. Dispose of them in the trash, not the compost pile. Improve air circulation by spacing plants properly.
If the problem persists, a copper-based fungicide is effective for ornamental use.
Canna leaf roller is a small caterpillar that rolls a leaf into a tube and seals it with webbing. The leaf inside turns brown and dies. The fix is simple: pinch the rolled section closed and crush the caterpillar, or unroll the leaf and remove it by hand.
Bacillus thuringiensis (Bt) sprays work well if the infestation is widespread. This pest rarely kills a plant, but it looks terrible.
Rhizome rot is the most serious problem. It starts with mushy spots on the rhizome, often near the eyes. The foliage turns yellow and wilts even when soil is moist.
By the time you see the yellowing, the rot is already advanced. Prevention is everything. Plant only firm rhizomes in well-drained soil.
Avoid overwatering before shoots emerge. If you catch rot early, cut out the mushy section with a sterilized knife, dust the cut with sulfur powder, and replant in fresh soil.

One more thing to watch for: mosaic virus. It causes yellow streaking and distorted leaves. There is no cure.
Dig up and discard the entire plant to stop it spreading to neighbors.
Digging, Dividing, and Overwintering – Visual Checklist for Storage
If you live in USDA zones 8 through 11, you can leave canna rhizomes in the ground year-round. For everyone else, lifting and storing them is the only way to keep them alive through winter. The timing matters more than most people realize.
Wait until the first frost blackens the foliage completely. That frost signal tells the rhizome to go dormant. Cutting the stalks too early, while the leaves are still green, robs the rhizome of stored energy it needs to survive storage.
Once the leaves are brown and collapsed, cut the stems back to about 6 inches above the ground.
Dig carefully. Insert your shovel or garden fork about 8 to 10 inches away from the base to avoid slicing into the rhizomes. Lift the whole clump gently.
Shake off the loose soil, but do not wash the rhizomes with water. Moisture in storage is the fastest route to rot.
Let the clumps cure in a dry shaded spot for 24 to 48 hours. A garage or covered porch works well. The goal is to let the outer skin dry slightly so it resists mold during the months in storage.
Once cured, trim off any remaining stem stubs and gently separate the individual rhizomes. Discard any that feel soft, smell sour, or show black patches.
Here is the storage checklist:
- Pack rhizomes in dry peat moss, vermiculite, or shredded newspaper.
- Use a cardboard box or mesh bag. Avoid plastic bags that trap moisture.
- Store in a cool dark place between 45 and 55°F. A basement or unheated garage works perfectly.
- Check once a month. Remove any rhizomes that show signs of rot immediately.
- Do not let them freeze. Temperatures below 32°F will kill the rhizomes.
Come spring, about two weeks before your last expected frost date, pull them out of storage. Soak them in room-temperature water for a few hours if they look slightly shriveled. Then plant them fresh, eyes up, 2 to 4 inches deep, and start the cycle again.
Dividing is optional but beneficial. Every two to three years, the clumps get crowded. Divide them when you lift for storage.
Each division should have at least one healthy eye and a few root nubs. You will get bigger plants and more blooms from divided rhizomes than from overcrowded clumps.
Quick Visual Reference: Spacing, Height, Bloom Time at a Glance
Sometimes you just need the numbers without digging through paragraphs. Here is a clean reference table for the most common canna varieties available as of 2026.
| Variety | Mature Height | Bloom Color | Days to Bloom | Best Use |
|---|---|---|---|---|
| Tropicanna | 4–6 ft | Orange with yellow | 75–90 | Back of border, focal point |
| Pretoria (Bengal Tiger) | 5–7 ft | Orange | 80–95 | Statement planting, tall backdrop |
| Australia | 4–5 ft | Deep red | 70–85 | Cut flowers, bold color pop |
| Wyoming | 3–4 ft | Bright orange | 65–80 | Containers, mid-border |
| Picasso | 2–3 ft | Yellow with red spots | 60–75 | Edges, small spaces, pots |
Dwarf varieties like Picasso are perfect for containers because they stay compact and bloom earlier. Tall varieties like Pretoria anchor a garden bed and create instant tropical drama. Mix heights in layers for a full lush look from midsummer through first frost.
Spacing is straightforward. Tall varieties need 24 inches between plants. Dwarf varieties can go as close as 12 inches.
In containers, give each rhizome at least a 12-inch diameter pot.
Frequently Asked Questions
How long do canna lilies take to bloom after planting?
Most varieties bloom 60 to 90 days after the first shoot appears. Dwarf types tend to bloom faster. Taller types take a bit longer.
Full sun and consistent feeding keep them on schedule.
Can I grow canna lilies in pots indoors?
Yes, but they need strong light. A south-facing window or grow lights are essential. Indoor cannas bloom less reliably than outdoor ones.
They are better as foliage plants indoors unless you provide intense supplemental light.
How deep do I plant canna rhizomes?
Plant them 2 to 4 inches deep. Measure from the top of the rhizome to the soil surface. In heavy clay, stay shallow at 2 inches.
In sandy soil, 4 inches is fine.
Should I soak canna rhizomes before planting?
Soaking is not necessary for healthy rhizomes. If the rhizomes are slightly shriveled from storage, soak them in room-temperature water for 2 to 4 hours before planting. This rehydrates them and speeds up sprouting.
How do I overwinter canna lilies in cold climates?
Cut the foliage back after the first frost. Dig up the rhizomes. Let them cure for 24 to 48 hours in a dry spot.
Pack them in dry peat moss and store them in a cool dark place between 45 and 55°F. Check monthly for rot.
Why are my canna lily leaves turning yellow?
Yellow lower leaves often mean overwatering or poor drainage. Let the soil dry out between waterings. If the new leaves are yellow, that points to a nutrient deficiency, usually nitrogen.
Apply a balanced slow-release fertilizer. If the yellowing comes with orange pustules, that is rust and needs immediate removal.
Here is the continuation.
Quick Visual Reference: Spacing, Height, Bloom Time at a Glance
Sometimes you just need the numbers without digging through paragraphs. This table covers the most common canna varieties available as of 2026.
| Variety | Mature Height | Bloom Color | Days to Bloom | Best Use |
|---|---|---|---|---|
| Tropicanna | 4–6 ft | Orange with yellow | 75–90 | Back of border, focal point |
| Pretoria (Bengal Tiger) | 5–7 ft | Orange | 80–95 | Statement planting, tall backdrop |
| Australia | 4–5 ft | Deep red | 70–85 | Cut flowers, bold color pop |
| Wyoming | 3–4 ft | Bright orange | 65–80 | Containers, mid-border |
| Picasso | 2–3 ft | Yellow with red spots | 60–75 | Edges, small spaces, pots |
Dwarf varieties like Picasso are perfect for containers. They stay compact and bloom earlier. Tall varieties like Pretoria anchor a garden bed.
They create instant tropical drama in just one season.
Spacing is straightforward. Tall varieties need 24 inches between plants. Dwarf varieties can go as close as 12 inches.
In containers, give each rhizome at least a 12-inch diameter pot.
Companion Planting Ideas for Canna Lilies
Cannas play well with other sun-loving tropicals. Pair them with elephant ears for layered foliage height. The broad canna leaves contrast nicely with finer textures like salvia or zinnia.
Good companions include coleus, angelonia, lantana, and trailing sweet potato vine. These plants share similar water and sun needs. They also fill in the gaps around canna stems that tend to be bare at the base.
Avoid planting cannas near low-growing ground covers that need dry soil. Creeping thyme or sedum will rot from the same watering schedule cannas demand. Keep aggressive spreaders like mint far away.
They will strangle canna rhizomes within a single season.
How to Divide and Multiply Your Canna Collection
Dividing canna rhizomes is the easiest way to get more plants for free. The best time is spring, just before replanting. You can also divide in fall when you lift them for storage.
Look for natural separation points along the clump. Each division needs at least one visible eye and a few root buds. Use a clean sharp knife to cut through thick connectors.
Discard woody centers and any mushy pieces.
Replant the divisions immediately in spring. Space them 18 to 24 inches apart. Water them in well.
Divisions bloom the same year, often just a week or two behind established plants.
Canna Lily Care Across the Seasons
Spring is for planting and dividing. Wait until soil temperature reaches 60°F at 4 inches deep. Apply a balanced slow-release fertilizer at planting time.
Summer is all about watering and deadheading. Remove spent flower clusters to encourage continuous blooms. Watch for rust and leaf roller.
Treat problems early before they spread.
Fall is for lifting and storing. Cut back after the first frost kills the foliage. Dig carefully, cure the rhizomes, and pack them for winter.
Winter is the resting period. Check stored rhizomes once a month. Remove any that show mold or soft spots.
Keep the storage medium barely dry. Too much moisture invites rot. Too dry shrivels the rhizomes.
Canna Lilies in Containers vs. In-Ground Beds
Container cannas give you flexibility. You can move them to catch the best sun. You can bring them indoors for winter without digging.
They bloom just as heavily as in-ground plants.
The trade-off is more work. Containers dry out faster and need daily watering in hot weather. They also need feeding every two weeks instead of every four.
Use a pot at least 12 inches wide and deep. Fill it with quality potting mix, not garden soil.
In-ground beds are lower maintenance. The soil holds moisture longer. Roots have room to spread.
Plants grow taller and produce larger flower clusters. The downside is that overwintering requires lifting and storing the rhizomes.
For most home gardeners, a mix of both works best. Put a few containers on the patio for close-up enjoyment. Plant the rest in the ground for maximum drama with minimum fuss.



