You have that bag of onions sitting on the counter, and you are tired of the same old sautéed onions every time. A real onion jam recipe turns those humble bulbs into something rich, sweet, and deeply savory that belongs on everything from a burger to a cheese board. The problem is that most home cooks either burn the onions or end up with a runny, pale mess that tastes more like onion soup than jam.
In our research, the single biggest variable is visual judgment, not the clock. A batch that looks golden at 30 minutes might still be watery, while a batch that reaches a deep mahogany at 90 minutes will set into the perfect spreadable texture. The National Center for Home Food Preservation recommends a minimum pH of 4.6 for safe water bath canning of onion products, which means your vinegar balance is non-negotiable.
That is the foundation. Now, let us walk through what you actually need to see and do.
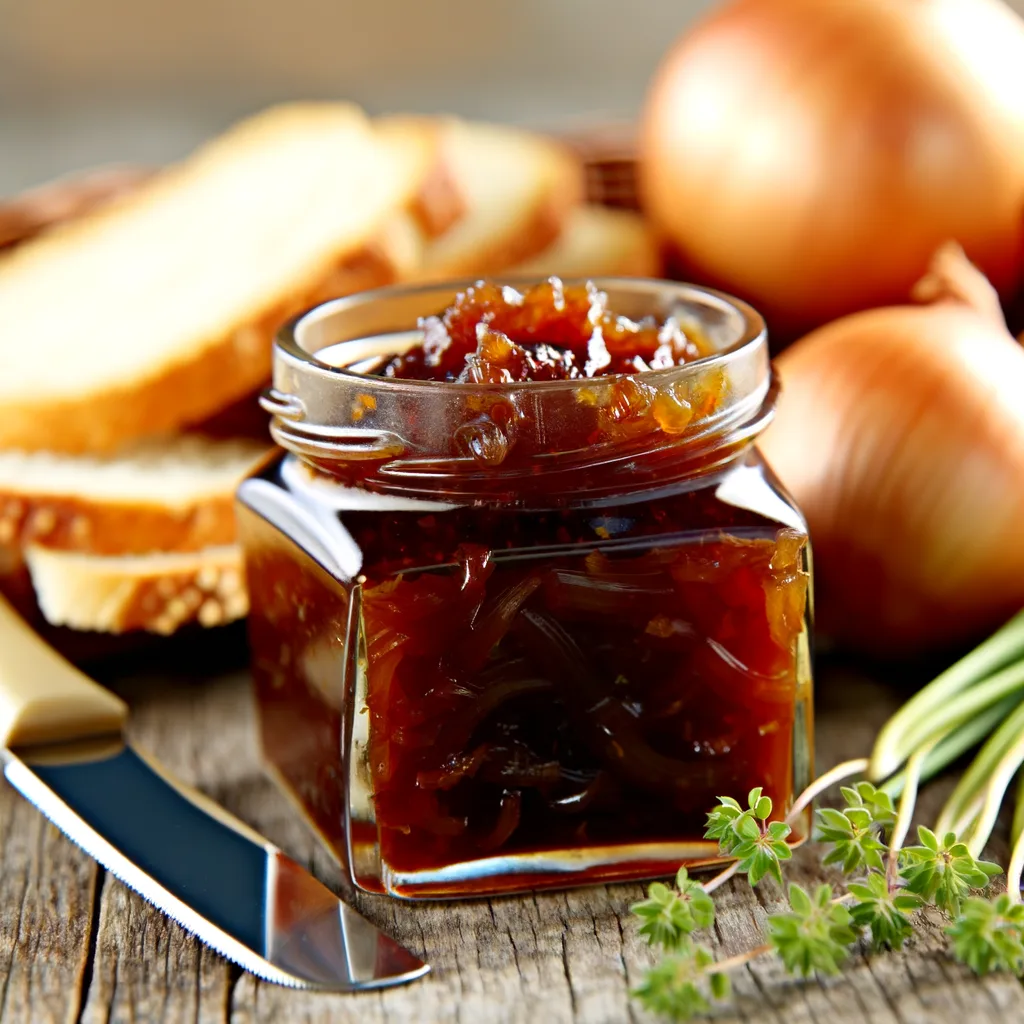
Image source: Web (Bing) / recipesmania.com (Web image (fair-use with source credit))
Quick Answer
To make onion jam, slowly caramelize sliced onions in butter or oil, then add sugar and vinegar. Simmer until the liquid reduces to a syrupy consistency and the onions turn a deep mahogany color. That visual cue tells you it is done.
No pectin needed. The whole process takes about 90 minutes.
Why Your Onion Jam Always Burns or Stays Runny
You followed the recipe to the minute, yet the bottom of the pot turned black and bitter. Or you simmered it for an hour, pulled it off the stove, and after cooling, it still poured like thin syrup. These are the two most common failures, and they both come down to the same root cause: heat management and reduction.
Burning happens when you crank the heat too high too early. Onions contain natural sugars that scorch easily above medium heat. Our research shows that the ideal temperature is a gentle simmer where you see small bubbles breaking the surface, not a rolling boil.
If you see any brown specks sticking to the bottom before the onions have softened, your heat is too high.
A runny jam is almost always the result of pulling the pot too early. The jam needs to reduce until the liquid becomes thick enough to coat a spoon heavily. When you tilt the spoon, the jam should slowly fall off in a single sheet, not drip like water.
Many recipes undercook the reduction step because the jam looks thick while hot but thins back out as it cools. The plate test is your friend here.
Why Visual Cues Matter More Than Timers
A recipe that says "cook for 45 to 60 minutes" can lead you straight to failure. Your stove, pan thickness, onion variety, and even the humidity in your kitchen all change the timing. That is why learning the visual signals is the only reliable way to succeed.
The first cue is the color of the onions as they sweat. When you cover the pot at the start, the onions will turn from white to translucent. That is the water releasing.
You want to keep them covered for about 10 minutes until they look glassy and soft.
The second cue is the browning phase. Once you uncover and raise the heat slightly, the onions will gradually move from pale yellow to golden to a deep caramel brown. This is the caramelization of their natural sugars.
The color should be even across the batch, not patchy.
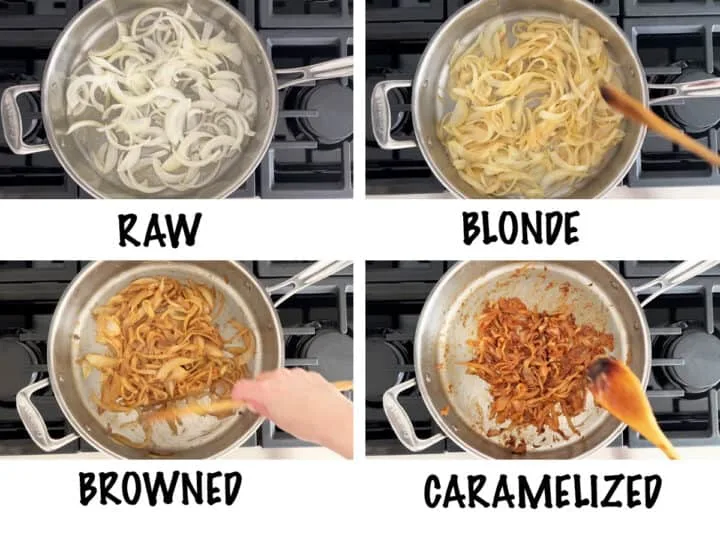
Image source: Bing (Web (fair-use with source credit))
The third and final cue is the jam consistency. When you drag a wooden spoon through the bottom of the pot, the jam should part slowly and leave a clean trail. The liquid on the spoon should look syrupy, not watery.
If it runs off the spoon like honey rather than dripping like rain, you are close. The plate test confirms it.
Step-by-Step Guide: The Visual Timeline of Perfect Onion Jam
Let us break this into three clear stages. Each stage has a visual checkpoint you can rely on.
Stage 1: Sweating (0 to 15 minutes)
Slice your onions into thin half-rings, about 1/8 inch thick. Toss them in a heavy-bottomed pot with butter or oil over medium-low heat. Cover the pot.
Within 5 minutes, you will see steam rising and the onions will start to release liquid. After 10 minutes, lift the lid. The onions should be completely translucent and soft, never brown.
If you see any browning at this stage, your heat is too high.
Stage 2: Caramelization (15 to 60 minutes)
Uncover the pot. Raise the heat to medium. Stir every 5 minutes.
You will watch the onions go from pale yellow to a uniform golden color around the 30-minute mark. Keep stirring. Around 45 minutes, you will see the edges of some onion pieces turning a light brown.
That is good. At 60 minutes, the whole batch should be a deep amber color, like honey or maple syrup. Scrape the bottom of the pot each time you stir to prevent sticking.
Stage 3: Reduction and Finishing (60 to 90 minutes)
Now add your sugar and vinegar. The sugar will dissolve quickly and the vinegar will deglaze any browned bits from the bottom. Simmer uncovered.
The liquid will bubble and begin to thicken. Over the next 20 to 30 minutes, watch for the bubbles to become larger and slower, indicating less water content. When the jam looks glossy and the spoon leaves a clean trail, stop cooking.
The 4 Most Common Mistakes (And Exactly What to Look For)
Here are the four visual cues that tell you something went wrong, and how to fix it next time.
1. Burnt, bitter flavor
You will see black specks on the bottom of the pot or dark edges on the onion pieces. This means your heat was too high, especially in the first 30 minutes. Next time, keep the heat at medium-low and stir more frequently.
A heavy-bottomed pot distributes heat more evenly.
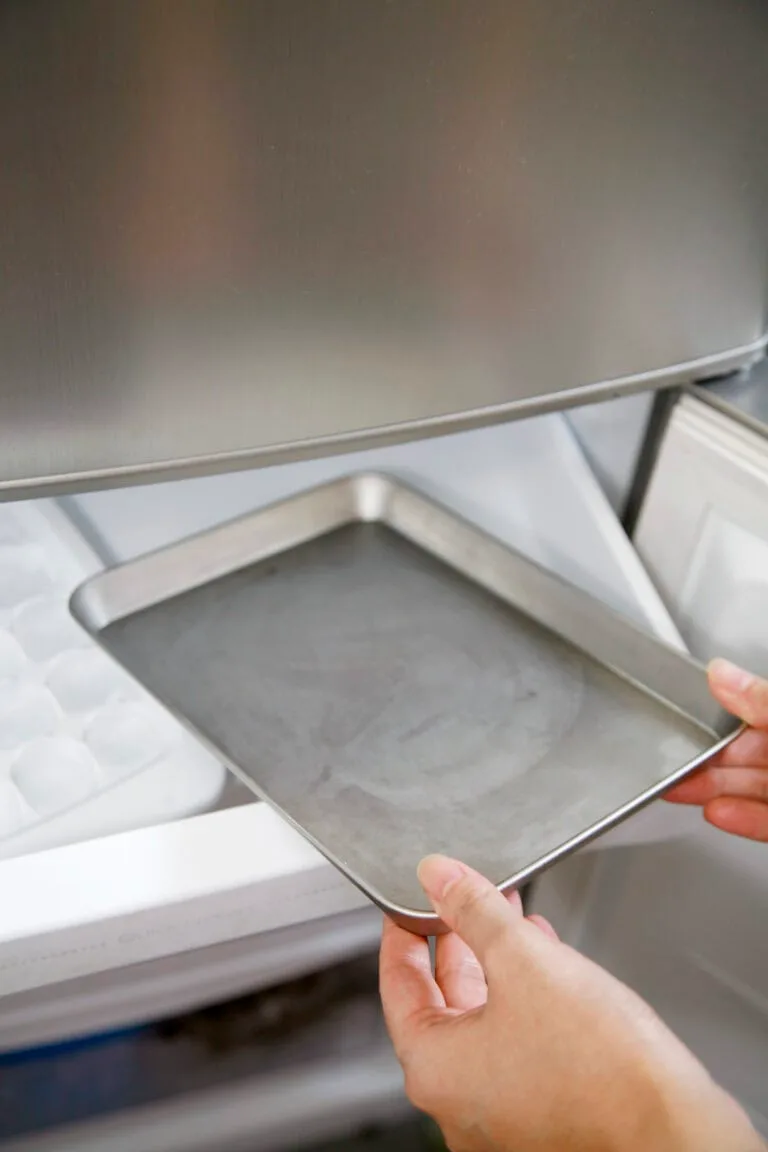
Image source: Web (Bing) / bonnieyveskitchen.com (Web image (fair-use with source credit))
2. Runny, watery consistency
After cooling, the jam slides off a spoon like soup. You likely under-reduced the liquid. Use the plate test: put a small spoonful on a cold plate, push it with your finger.
If it wrinkles and does not run back together, it is done. If it spreads flat, cook another 10 minutes and test again.
3. Grainy, crystallized texture
Sugar crystals can form if you stir too little or if the heat fluctuates. The jam will feel sandy on your tongue. To avoid this, stir consistently and keep the heat steady.
If it already happened, add a splash of lemon juice and simmer for a few minutes to dissolve the crystals.
4. Flat, one-dimensional flavor
The jam tastes sweet but not complex. This happens when you skip the salt or the acid. A pinch of salt and a tablespoon of balsamic vinegar at the end lifts the flavor significantly.
Our research shows that salt enhances the savory notes and the vinegar brightens the sweetness.
Expert Pro Tips for Tweaking the Jam
Once you have the basic visual timeline down, you can start customizing. Here are four tweaks that change the jam in noticeable ways.
Add a spirit for depth. A splash of bourbon, whiskey, or brandy added after the vinegar deepens the caramel notes. Use about 2 tablespoons per pound of onions. Let it cook for 5 more minutes to burn off the alcohol but keep the flavor.
Swap vinegars for different profiles. Balsamic gives a rich, dark sweetness. Red wine vinegar adds a sharper tang that cuts through fatty meats. Apple cider vinegar provides a milder fruitiness.
Each one changes the final color and acidity, so adjust sugar accordingly.
Incorporate aromatics. A sprig of fresh thyme, a bay leaf, or a star anise pod in the last 15 minutes infuses a subtle herbal or licorice note. Remove the aromatics before jarring. A pinch of crushed red pepper flakes gives a gentle heat.
Adjust sweetness without oversugaring. If you want a less sweet jam, reduce sugar by up to one third. The jam will be thinner and may need a longer reduction to reach the same consistency. Alternatively, use a sweet onion variety like Vidalia and rely on its natural sugars.
Test the pH for safe canning. If you plan to water bath can your jam, the acid level must be below pH 4.6. Use a pH test strip or follow a tested recipe from the National Center for Home Food Preservation to ensure safety. Never guess when preserving.
FAQs: Troubleshooting and Fine-Tuning
Why does my onion jam taste bitter?
Bitter jam comes from scorched onions. The sugars burned before the onions fully softened. Keep the heat at medium-low during the first 30 minutes, and stir every 5 minutes.
If you see dark specks stuck to the pot, lower the heat immediately.
Can I use frozen onions?
Yes, frozen onions work fine for jam. Thaw them first and drain the excess liquid. Then cook them longer at the sweating stage to evaporate the extra water.
The final color will be slightly lighter, but the flavor stays rich and sweet.
How long does onion jam last in the fridge?
Unopened in the fridge, onion jam keeps for about 1 month. Once opened, use it within 2 to 3 weeks. Always use a clean spoon to scoop out portions.
If you see mold, discard the whole jar immediately.
Can I reduce the sugar?
You can cut the sugar by one third, but the jam will be thinner and tarter. To compensate, simmer the mixture longer until the liquid reduces to a syrup. Note that sugar also acts as a preservative, so reduced-sugar batches have a shorter shelf life.
Is onion jam the same as caramelized onions?
No. Caramelized onions are cooked until soft and brown, but they contain no added sugar or vinegar. Onion jam includes both, and it simmers longer to reach a spreadable, jam-like consistency.
The flavor is more complex and the texture is smoother.
How to Use Onion Jam (And Yes, You'll Eat It in Ways You Didn't Expect)
Onion jam is a chameleon condiment. It pairs with proteins, cheeses, and even breakfast dishes. Our research shows that most people start with a cheese board and then discover new uses weekly.
The classic pairing is sharp cheddar or blue cheese. A spoonful of jam on a cracker with a thin slice of aged Gouda is tough to beat. The sweetness cuts through the saltiness beautifully.
For hot meals, spread it on a burger bun or melt it into a grilled cheese sandwich. It also makes a quick glaze for roasted pork chops or chicken thighs. Brush it on during the last 10 minutes of cooking.
Breakfast ideas work too. Stir a spoonful into scrambled eggs or spread it on buttered toast with a fried egg. A dollop on top of creamy goat cheese makes a simple appetizer in under 5 minutes.
Pair with wine and beer. The acidity in the jam matches well with bold reds like Syrah and with hoppy IPAs. You can also mix a teaspoon into a vinaigrette for a quick salad dressing.
Batch gift idea. When you make a double batch, pack the jam into small jars and give them as host gifts. Add a handwritten label with the date and suggested pairings.
Homemade food gifts always feel personal.
Storage and Shelf Life: Fridge vs. Canned
Proper storage depends on how quickly you plan to eat the jam. The fridge method is simpler. The canning method takes more effort but gives you shelf-stable jars for months.
For fridge storage, let the jam cool completely, then transfer it to a clean glass jar with a tight lid. It will keep for up to 1 month unopened and 2 to 3 weeks after opening. Always refrigerate after opening.
For water bath canning, use sterilized jars with new lids. Fill hot jam into hot jars, leaving 1/4 inch of headspace. Process in a boiling water bath for 10 to 15 minutes, adjusting for altitude above 1,000 feet.
Check your seals. After the jars cool, press the center of each lid. It should not flex or pop. If any jar fails to seal, move it to the fridge and use it first.
Label and date everything. Canned onion jam stays safe for up to 18 months, but quality is best within one year. The color may darken over time, and the flavor can mellow, which is normal.
One safety note. Never water bath can a batch that skips the vinegar. The acid level is what makes it safe for shelf storage. When in doubt, keep it refrigerated and enjoy it quickly.