Let's be honest. Most orchid care advice online is either too vague to work or so complicated it scares you into doing nothing. You've probably heard "don't overwater" about a hundred times, but nobody ever tells you what that actually looks like when you're holding the pot.
That's the gap we're going to close here. This guide is about orchid plant care that relies on what you can see, not what a calendar tells you.
We've spent hours digging through university extension guidance and aggregate grower reviews to strip this down to what actually matters. The key insight, backed by growing standards, is that Phalaenopsis orchids store water in their roots and leaves. In the wild, they grow on tree bark, not in soil.
That single fact changes every watering decision you'll ever make, so let's start there.
Quick Answer
Orchid plant care starts with the roots. Water only when roots turn silvery-gray and the potting medium feels dry. Use room-temperature water and let it drain completely.
Place your orchid in bright, indirect light. East-facing windows work best for most homes. Fertilize weakly weekly during the growing season.
Repot every one to two years in fresh bark mix.
Watch the leaves for clues. Firm, bright green leaves mean happy roots. Wrinkled or yellow leaves signal trouble.
Why Visual Cues Beat Any Calendar Schedule
Here's the uncomfortable truth. Orchids do not care what day of the week it is. They do not read your planner.
They respond to their environment, so watering on a fixed schedule is a lottery you'll lose more often than you win.
Think about what a calendar approach assumes. It assumes your home temperature stays constant. It assumes humidity never changes.
It assumes your potting mix drains at the same rate in July as it does in January. None of that is true, so why would you anchor care to something arbitrary like "every seven days"?
What actually matters is how fast your orchid dries out. In a warm, dry room that could be five days. In a cool, humid one it might be twelve.
Our research across grower forums and extension publications shows a clear pattern: people who check their plants before watering rarely kill them. People who stick to a schedule? Much shakier results.
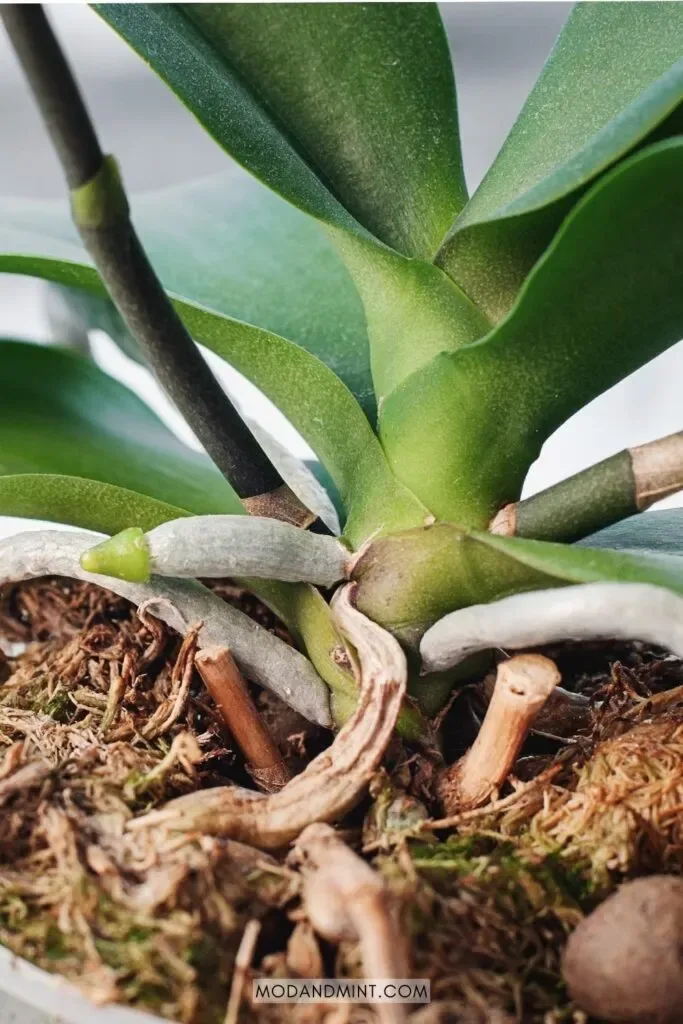
Image source: Bing (Web (fair-use with source credit))
The fix is simple. Turn watering into a response, not a routine. You touch the medium, you look at the roots, and you make a call.
It takes ten seconds once you know what to check. After a couple of weeks you won't even think about it anymore.
Now, the visual cheat sheet. You're looking for four things, and each one changes what you do next.
The Root Test
Healthy roots are firm and either bright green when wet or silvery-gray when dry. That silver color means the plant is thirsty. It's not a defect, not a disease, it's just the orchid saying "I could use a drink."
If the roots look mushy, dark brown, or flat and shriveled, you have rot. This usually comes from sitting in water too long, which we'll talk about in the watering section below.
The Medium Test
Stick a finger about an inch into the potting bark. If it feels damp or cool, wait. If it feels dry and the bark crumbles away easily, it's time to water.
The Leaf Test
Leaves should be firm and upright. If they start feeling soft or look wrinkled, the roots are struggling to deliver water. This can mean you're underwatering, or it can mean the roots are too damaged to drink.
Both look similar from the outside.
The Pot Test
Lift the pot. A dry orchid pot feels noticeably lighter than a freshly watered one. Pick it up, feel the weight, put it down.
After two or three waterings you'll have a built-in scale in your head.
What Your Orchid Is Telling You: Roots, Leaves, and Spikes
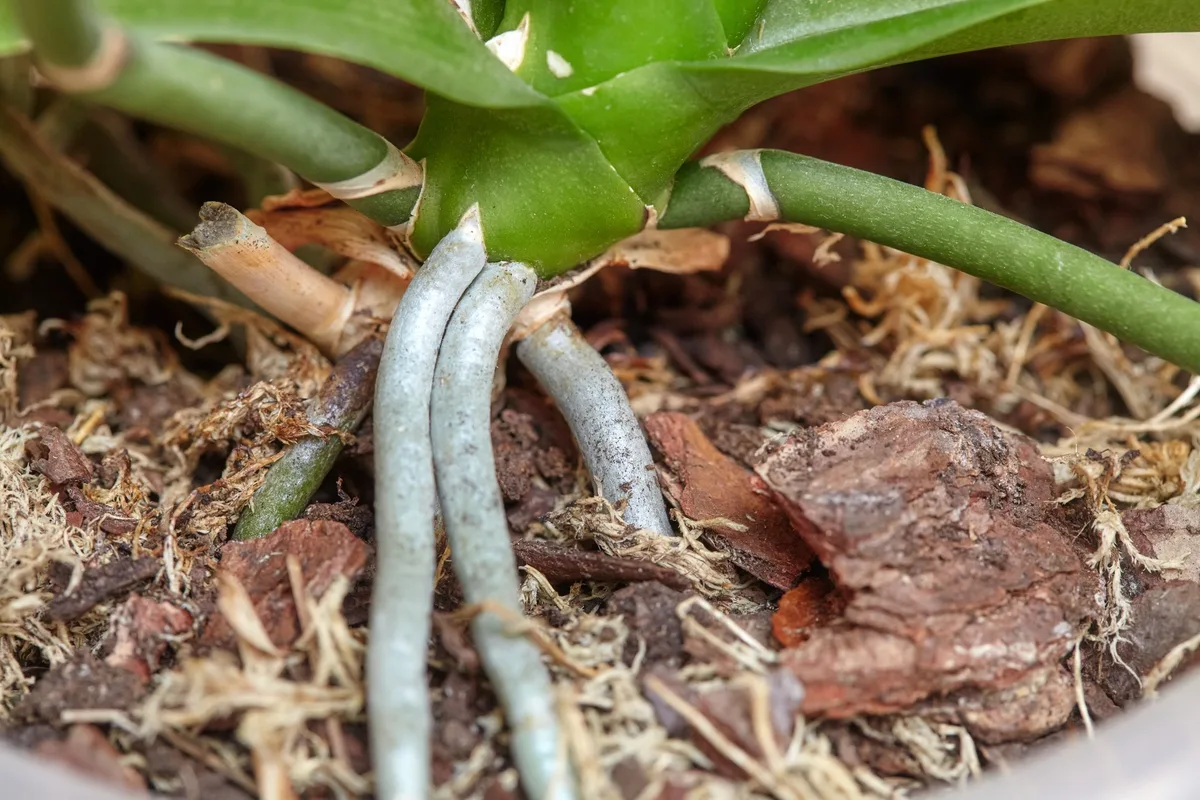
Image source: Web (Bing) / zetanspore.co.uk (Web image (fair-use with source credit))
Let's walk through the visual language of an orchid. Each part of the plant gives you a distinct signal, and once you learn to read them, most guesswork disappears.
Roots: The Truth-Tellers
In our research, the roots are the single most reliable health indicator. That's because they're the first line of contact with water and air. For Phalaenopsis, the most common houseplant orchid, the roots are thick, pale, and slightly flattened.
They're also green inside, which matters because they perform photosynthesis just like leaves do.
When roots are bright green, they've got plenty of water. No action needed. When they turn silvery-gray and the potting medium is dry, that's your green light to water.
If roots turn brown and mushy, that's rot creeping in. If they look dry and papery, they've been dead for a while and you should trim them during repotting.
Aerial roots that grow above the pot are completely normal. Don't cut them off. They're just the plant exploring its environment.
Tucking them into the bark later is fine, but they don't need to be forced.
Leaves: The Slow-Moving Gauge
Leaves respond slower than roots, but they tell a story about long-term health. Bright green, firm leaves mean the plant is getting the right light and water balance. Dark green leaves that feel almost too thick often indicate too little light.
Deep red or purple edges on Phalaenopsis leaves? That's usually a sign of too much light.
Wrinkled leaves deserve special attention. Pliant and soft leaves typically mean the plant is dehydrated, but the cause is everything. It either needs more water, or the roots are too damaged to take water up.
If you're watering regularly and the leaves still look sad, pull the plant out of the pot and check the roots.
Spikes and Buds: The Bloom Timeline
The flower spike is where new buds form. A healthy spike is green and firm. If it starts turning yellow or brown from the top down, the spike is done and you can cut it back.
Bud blast is the frustrating one. That's when buds form, then dry up and fall off before opening. The main culprits are sudden temperature swings, drafts, or moving the plant after buds form.
Avoid relocating your orchid during this phase unless you absolutely have to.
Roots Visual Reference Table
| Root Appearance | Meaning | Action |
|---|---|---|
| Bright green | Hydrated | Wait to water |
| Silvery-gray | Thirsty | Water soon |
| Dark brown, mushy | Rotting | Trim roots, repot |
| Flat, shriveled | Dead | Remove, adjust care |
How to Water the Right Way (Every Time)
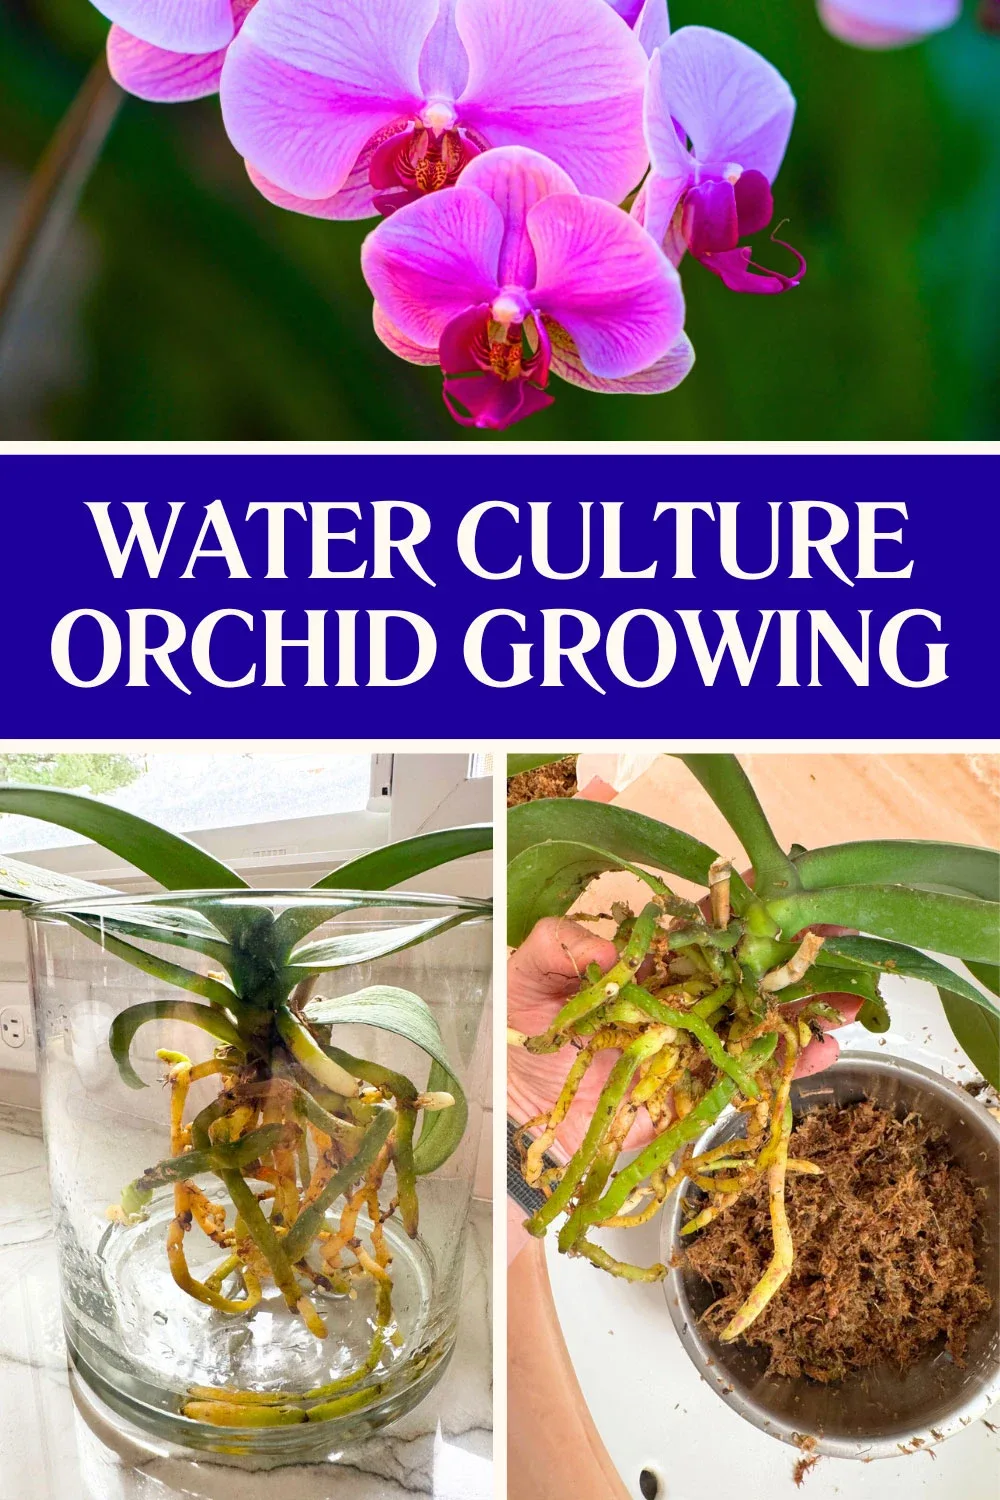
Image source: Web (Bing) / fity.club (Web image (fair-use with source credit))
Watering is where most people mess up, and honestly, it's not their fault. The common advice "water once a week" sets you up for failure because it ignores your environment entirely. Here's a better approach built around what your plant actually needs.
The Immersion Method
For bark-based potting mixes, the right way to water is to soak the whole pot. Place it in a basin or sink with room-temperature water. The water should come up to about the top edge of the pot, not over it.
Let it sit for 10 to 15 minutes so the bark absorbs moisture, then pull it out and let it drain thoroughly.
Wait, thirty minutes is too long. Sitting in water that long can start suffocating the roots. Ten to fifteen minutes is the sweet spot, and you want to check that the bark actually wicks up moisture rather than just floating.
Never use cold water straight from the tap. That temperature shock can stress the roots. Room-temperature or slightly warm water is much gentler.
Flow-Through and Other Methods
The flow-through method is simpler. Run water through the pot until it pours out the drainage holes, then let it drain completely. This works well for potted orchids that have several drainage slits.
Ice cube watering, we'll be blunt, is a bad idea. The cold hits tropical roots like frost on a banana plant. It's a hack that went viral because it's easy, not because it's good for the plant.
Skip it.
What about misting? A light mist on aerial roots can help in very dry homes, especially during winter. It's not a substitute for watering, just a humidity boost.
Frequency and Adjustment
In our research, the right frequency lands somewhere between every five and twelve days for most homes. Here's how to decide where you fall:
- Warm, dry room or summer months: water every five to seven days.
- Normal room temperature, average humidity: every seven to ten days.
- Cool, humid room or winter: every ten to fourteen days.
Check the medium regularly during the first few weeks after bringing a plant home. You'll quickly learn your own rhythm. That data is more useful than any generic schedule.
Common Visual Mistakes That Kill Orchids
We've covered what healthy looks like. Now let's talk about what goes wrong. In aggregate reviews and grower discussions, a handful of mistakes come up over and over.
Each one has a visual signature you can learn to spot before it's too late.
Mistake One: Overwatering
The number one killer. People water on a schedule, the medium stays soggy, and the roots suffocate. The visual clue is brown, mushy roots and yellowing leaves that feel soft.
The fix is immediate: stop watering, pull the plant out, cut away dead roots, and repot in fresh bark.
Mistake Two: Crown Rot
This one happens when water collects in the middle of the leaves where they overlap. The plant rots from the inside out, and by the time you notice, it's usually fatal. Avoid this by watering the medium directly instead of pouring water over the top of the plant.
If you do get water in the crown, tilt the pot and blot it out with a paper towel right away.
Mistake Three: Too Much Direct Sun
An orchid's leaves are adapted to filtered jungle light, not a south-facing windowsill in July. The visual clue is a pale, washed-out green with scorched brown patches. The fix is simple: move it a few feet away from the window or filter the light with a sheer curtain.
Mistake Four: Ignoring Fertilizer
Orchids are light feeders, but they still need food. When they're actively growing, weekly feeding at quarter strength keeps them healthy. Skip it and you'll see stalled growth and leaves that stay small.
Use a balanced liquid fertilizer formulated for orchids and always dilute it past what the label says for regular houseplants.
Frequently Asked Questions
How often should I water my orchid?
Water when the potting medium feels dry and the roots look silvery-gray. That happens every five to twelve days depending on your home. Soak for ten to fifteen minutes, drain completely, then wait for it to dry out again.
Why are my orchid's leaves wrinkled?
Wrinkled leaves mean the plant isn't getting enough water. Check the roots first. If they're firm and green, you're underwatering.
If they're brown and mushy, they're rotting and can't absorb water, which means you need to repot in fresh bark.
Should I cut the flower spike after bloom?
Once the flowers drop, cut the spike back to about an inch above a node. This won't hurt the plant. It can even trigger a second bloom from a side branch.
If the whole spike turns brown, cut it off at the base.
Can I use ice cubes to water my orchid?
No. Ice-cold water shocks tropical orchid roots and can cause tissue damage over time. Use room-temperature water and soak the pot instead.
It takes about ten extra seconds and keeps the roots healthy.
Why are my orchid's roots turning black?
Black, mushy roots indicate rot from sitting in too much moisture. Remove the plant from its pot, trim all dead roots with sterilized scissors, and repot in fresh bark. Adjust your watering so the medium dries out completely between waterings.
How do I know when to repot my orchid?
Repot every one to two years or when the bark breaks down into fine, dark particles. The best time is right after flowering finishes and new root growth begins. Fresh bark gives the roots the air circulation they need to stay healthy.
How to Get Your Orchid to Rebloom (Without Stress)
Getting a grocery store Phalaenopsis to bloom again is the question we hear most often. The good news is that it's straightforward once you understand what triggers flowers. The bad news is that doing nothing almost never works.
The secret is a temperature drop. In the wild, orchids bloom when nights get cooler in late autumn. Your home's steady temperature tells the plant it's always growing season, so it never gets the signal to produce a spike.
The Cool Night Method
For about three to four weeks, move your orchid to a spot where nighttime temperatures drop to 55-65°F. A drafty window in late fall works well. During the day it can stay in its normal spot with regular light.
The temperature difference needs to be about ten degrees cooler at night than during the day. That shift tells the plant "winter is coming, time to bloom." Without it, you'll get leaves and roots but no flowers.
If you don't have a naturally cool spot, you can use a basement window or even a cooler room you don't heat as much. Just avoid spots below 50°F, which can damage the leaves.
Light and Fertilizer Adjustments
During this cooling period, keep the light levels the same, bright but indirect. Reduce fertilizer to once a month at quarter strength. You want the plant to focus energy on spike formation, not leaf growth.
After you see a new spike emerging, about an inch or two long, move the plant back to its regular spot and resume normal watering and weekly weak feeding. The spike will continue growing and buds will form over the next few weeks.
What If It Still Won't Bloom?
Sometimes the plant itself isn't mature enough. A Phalaenopsis typically needs to be at least a year old and have five or more leaves before it can reliably bloom. Young plants just haven't built up enough energy reserves.
Other factors include too little light during the day, which means the plant can't photosynthesize enough to support blooming, or too much nitrogen in the fertilizer, which pushes leaf growth instead of flowers. Switch to a bloom booster formula with a higher phosphorus number, like 10-30-20, once you start the cooling period.
Spike Care During Bloom
Once buds form, avoid moving the plant. Bud blast, where buds dry up and fall off before opening, is almost always caused by environmental changes during this sensitive phase. A sudden draft, a different window, or even just rotating the pot can trigger it.
Keep the plant in place, keep watering consistent, and let nature do the rest. Blooms typically last six to twelve weeks depending on temperature and humidity. Cooler rooms keep flowers longer, while warm rooms speed up the fade.