You've got a thriving banana plant in your yard, and naturally, you want more. The best way to propagate banana plants is by dividing the pups, or offsets, that sprout from the parent's underground stem. Most gardeners think you just dig up any sucker and plant it, but that's where the trouble starts.
Getting it wrong means losing both the pup and potentially damaging the parent plant. With over 1,000 banana varieties in cultivation worldwide, most backyard growers rely on this exact cloning method to keep their favorite cultivar going. What separates success from failure comes down to one thing: learning to read what the plant is telling you visually.
Quick Answer
Dig up a healthy sword sucker when it reaches knee height. Cut the connection to the parent corm cleanly. Trim the leaves.
Replant at the same depth. Water deeply. Keep soil moist.
That stripped-down version works, but skipping the visual details is how people end up with a dead pup and a damaged parent. The rest of this guide fills in what the eye needs to catch.
Why the "Eyes" Matter So Much in Banana Propagation
Every banana pup grows from a bud, or "eye," on the parent corm. These buds look like small pink or white bumps nestled against the main corm body. You need to locate them before you cut.
The eye sits at the junction point between pup and parent. Cut too far from it, and you leave the pup with no attached corm tissue to support new roots. Cut through it, and you destroy the pup's growing point entirely.
Our research into propagation guides from multiple university extension services confirms one consistent warning: the eye is the most overlooked detail. New propagators rush to pull the pup free without exposing and inspecting this connection point first.
A healthy eye is firm and plump, about the size of a pea. A shriveled or discolored eye means the pup may already be struggling. Visual inspection of the eye tells you whether the pup has enough stored energy to survive transplant.
This is where photos become invaluable. In person, you can gently brush away soil with your fingers to expose the corm surface. The eyes are easier to spot on a cleaned, damp corm than on one caked with dry dirt.
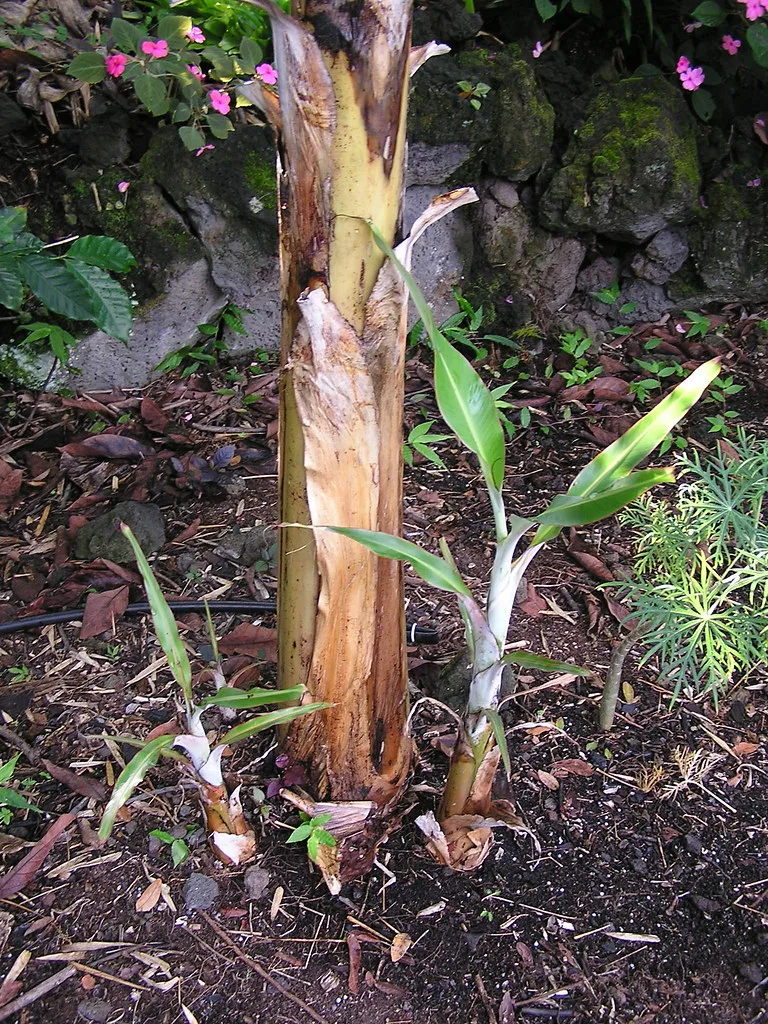
Image source: Bing (Web (fair-use with source credit))
The main image here shows how pups cluster around the base. Notice how each pup connects to the shared corm mass. That connection point, with its eye bud, is what you're looking for.
Sword vs. Water Suckers: Learning to Spot the Right Pup
Not all pups are created equal. Banana growers classify offsets into two types based on leaf shape and growth habit. Choosing the wrong one is the single most common mistake in propagation.
Sword suckers have narrow, lance-shaped leaves that stay tight against the pseudostem. They grow close to the parent and develop a substantial root system before pushing out wide leaves. These are the pups you want.
Water suckers have broad, spreading leaves right from the start. They look impressive above ground but often have a weak or incomplete root system below. They grow farther from the parent and depend on the parent's resources longer.
| Feature | Sword Sucker | Water Sucker |
|---|---|---|
| Leaf shape | Narrow, sword-like | Broad, rounded |
| Leaf position | Tight against stem | Spread outward |
| Root system | Well-developed | Sparse or tiny |
| Best height for cutting | 12–36 inches | Not recommended |
| Success rate after transplant | High | Low |
Here is the direct rule: if you have a choice, always take a sword sucker. If you only have water suckers available, wait until they reach at least 24 inches tall and check for roots by gently tugging. A water sucker that resists light pulling has some root anchorage.
One that lifts easily is not ready.
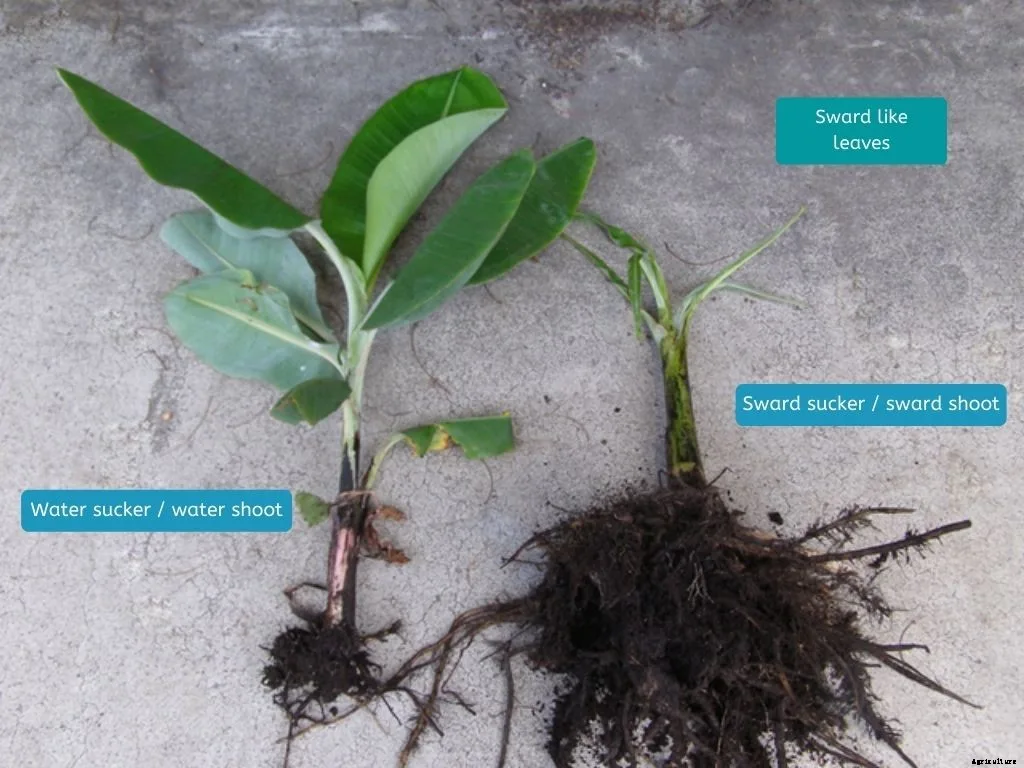
Image source: Bing (Web (fair-use with source credit)
The leaf difference is dramatic in side-by-side comparison photos. Sword suckers look like a tight cluster of green blades pointing upward. Water suckers look like a miniature version of the adult plant with leaves already flopping open.
Aim for sword suckers that are at least 12 inches tall and no taller than 36 inches. At this size, they have enough stored energy to survive separation but are still small enough to establish quickly in new soil.
What to Gather: Tools and Materials Before You Dig
Preparation prevents damage. Rushing out with a dull shovel is how you bruise the corm or tear the pup's roots. Gather everything before you approach the plant.
| Tool or Material | Purpose |
|---|---|
| Sharp spade or shovel | Expose the corm and loosen soil |
| Pruning knife or hori-hori | Cut the pup-parent connection cleanly |
| Pruning shears | Trim pup leaves after separation |
| Rubbing alcohol or bleach solution | Disinfect tools between cuts |
| Well-draining potting mix or garden soil with compost | Fill the new planting hole |
| Large container with drainage holes | For potted propagation |
| Mulch (straw, wood chips, or dried leaves) | Insulate roots and retain moisture |
Disinfecting tools is not optional. Per University of Florida IFAS Extension guidelines, banana plants are susceptible to fungal diseases like Fusarium wilt and Panama disease. A contaminated tool can introduce pathogens directly into the corm wound.
Mix one part bleach to nine parts water, or use undiluted rubbing alcohol in a spray bottle. Wipe the blade between every cut, especially if you are taking multiple pups from the same plant.
For the planting site, prefer a spot with full sun and well-draining soil. Bananas hate soggy feet. If your soil is heavy clay, amend it with compost and coarse sand, or plant the pup in a raised mound.
Container growers should choose a pot at least 15 gallons for dwarf varieties and 25 gallons for standard types. Larger is always better for root development.
The Visual Step-by-Step: Separating and Planting Banana Pups
This process works best when you can see exactly what you are doing. The visual guide here walks you through each stage.
Step 1: Expose the connection point. Dig around the pup in a wide circle, about 6 to 8 inches from its base. Go deep enough to reveal the corm where pup and parent meet. You want to see the full width of the connecting tissue.
Step 2: Assess the attachment. Look for the eye bud and estimate the thickness of the connecting corm bridge. A bridge thinner than your thumb is easy to cut. A thicker connection may require a saw.
Step 3: Make the cut. Position your knife blade right at the pup side of that connecting bridge. Cut outward, away from the parent corm, in one clean motion. A sawing motion tears the tissue and invites rot.
Step 4: Lift the pup. Gently rock the pup back and forth while lifting upward. If it resists, check for an uncut piece of corm tissue. Never yank.
Pulling separates the pup from its root system.
Step 5: Trim the leaves. Cut the broad leaves back to about half their length. This reduces water loss while the pup establishes new roots. Leave the central spear untouched.
Step 6: Prepare the planting hole. Dig a hole wide enough to spread the pup's roots outward. Place the pup so the corm base sits at the same depth it grew originally. Burying it deeper invites rot.
Planting it shallower exposes the roots to air.
Step 7: Backfill and water. Firm the soil gently around the roots, eliminating air pockets. Water thoroughly until the soil is moist all the way through the root zone. Apply a 2- to 3-inch layer of mulch around the base, keeping it an inch away from the pseudostem.
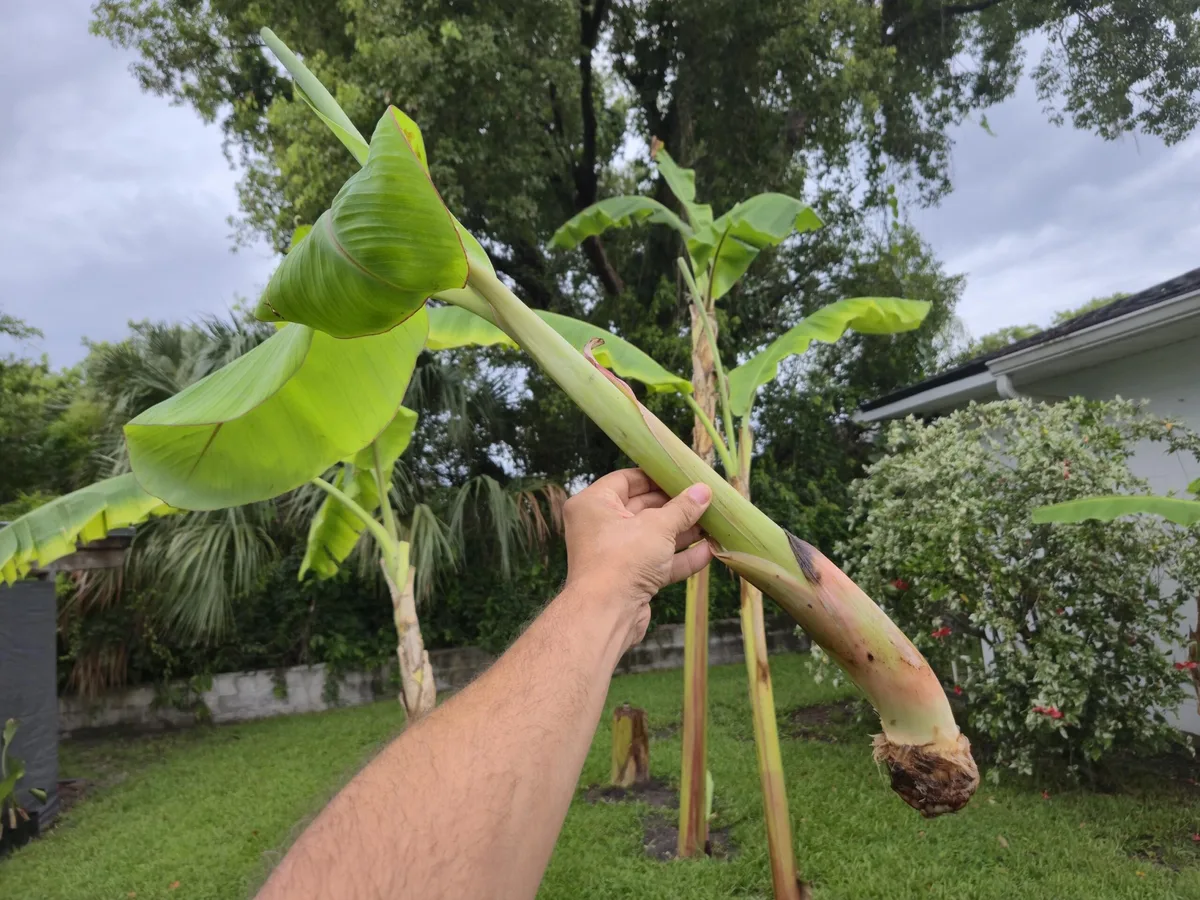
Image source: Bing (Web (fair-use with source credit))
The cutting angle matters. In the photo, notice how the blade enters from the pup side, not the parent side. This spares the parent corm from unnecessary damage and leaves a clean wound on the pup that heals quickly.
Common Visual Mistakes and How to Avoid Them
Even experienced gardeners make errors that cost them pups. These are the most frequent ones we see in propagation forums and extension service Q&A sessions.
Taking a water sucker thinking it is a sword sucker. The leaves look similar when the pup is very small. Wait until the pup reaches 12 inches to confirm leaf shape. Narrow leaves that point up equal sword sucker.
Wide leaves that flop open equal water sucker.
Cutting too close to the parent corm. The goal is to leave as much corm tissue attached to the pup as possible. A clean cut made 1/2 to 1 inch away from the parent corm side gives the pup a good corm base. Cutting too close leaves the pup with a tiny nub of tissue and few stored nutrients.
Leaving the pup attached for too long. Small pups that linger on the parent for months become dependent on the parent's root system. They grow wide leaves early and develop weak roots. Cut pups when they are actively growing in spring or early summer, not during winter dormancy.
Planting the pup too deep or too shallow. The corm top should sit level with the soil surface. If you bury the corm, water pools around the stem and rot sets in. If you plant it too high, roots dry out and the pup topples in wind.
Skipping the leaf trim. A full set of leaves demands water from a root system that does not yet exist. Trimming leaves by half reduces transplant shock. New growers often skip this step because the pup looks "sad" after trimming, but it recovers faster.
Using dull tools. A dull knife crushes the corm tissue rather than slicing it cleanly. Crushed tissue dies back and opens a pathway for disease. Sharp tools make a clean cut that heals over in days.
The easiest way to avoid these mistakes is to photograph your pup before cutting. Compare its leaf shape and corm width against reference photos. When in doubt, wait a few more weeks.
A larger pup with better roots always outperforms a tiny one taken too early.
Aftercare: Settling the Pup In for Strong Growth
The work does not end when the pup goes in the ground. The first four weeks determine whether the transplant survives or stalls.
Water is the critical variable. Keep the soil consistently moist but never waterlogged. In warm weather, that means watering every two to three days.
In cooler weather, once a week is usually enough.
Stick your finger two inches into the soil near the pup. If it feels dry at that depth, water. If it feels damp, wait.
Overwatering is the fastest way to rot a newly planted corm.
Fertilizing should wait until you see new leaf growth. That is the signal that roots have established. Apply a balanced fertilizer like 8-10-8 or 10-10-10 at half the recommended rate for the first feeding.
Mulch works hard for you here. A three-inch layer of straw, wood chips, or dried leaves keeps the soil temperature steady and holds moisture. Keep the mulch pulled back an inch from the pseudostem to prevent stem rot.
Watch for yellowing leaves in the first week. Some yellowing is normal as the pup sheds leaves it cannot support. But if the central spear turns yellow or brown, the pup is in trouble.
That usually means root damage during transplant or a fungal infection at the cut site.
Pests rarely bother fresh transplants, but keep an eye out for banana weevils. They bore into the corm through wounds. If you see small holes or sawdust-like frass at the base, treat with an appropriate insecticide labeled for soil-borne weevils.
A healthy pup shows new leaf growth within three to four weeks in warm conditions. Once you see that first unfurling leaf, you can relax. The pup has taken hold and will begin growing on its own schedule.
Frequently Asked Questions
Can I propagate a banana plant from a store-bought banana fruit?
No. Commercial bananas are sterile and do not contain viable seeds. The fruit you buy at the grocery store comes from plants grown through tissue culture or pup division.
Propagation requires a living corm or a pup from an established plant.
How long does it take a banana pup to produce fruit after transplanting?
Expect 10 to 18 months from planting to harvest. Dwarf varieties tend to fruit faster, usually within 10 to 14 months. Full-sized varieties like Cavendish take 15 to 18 months with consistent warmth and moisture.
Can I propagate a banana plant indoors in a pot?
Yes, if you choose a dwarf variety and a container of at least 15 gallons. Dwarf Cavendish and Super Dwarf Cavendish are the most reliable for indoor propagation. Place the pot in the sunniest window you have, and supplement with grow lights in winter.
What is the best season to separate banana pups?
Early spring is ideal in most climates. The soil has warmed but the air is not yet scorching. This gives the pup mild conditions to establish roots before summer heat arrives.
In tropical climates, any season works as long as rain is consistent.
Should I remove all the pups from a banana plant at once?
No. Leave at least one strong pup attached to the parent plant. The parent needs that pup to continue its growth cycle.
Removing all pups at once weakens the parent and reduces future fruit production.
How do I know if a pup is ready to separate?
Look for three signs: knee-height (12 to 36 inches tall), narrow sword-shaped leaves, and a visible root system when you gently tug. If the pup resists light pulling, it has roots anchoring it. If it lifts easily, wait a few more weeks.



