If you’ve ever snipped a vine, dropped it in a glass of water, and watched it do absolutely nothing for three weeks, you’re not alone. Propagating lipstick plant (Aeschynanthus radicans) seems like it should be a no-brainer, but the difference between success and a jar of brown mush comes down to one thing most guides skip: where you cut.
Here’s the data point that changes everything: a cutting with two or three healthy nodes can push visible roots in 14 to 21 days at room temperature. A cutting taken below a bare section of stem just floats there, slowly rotting. The whole trick is knowing what you’re looking for.
So let’s start with the one visual cue that makes this whole process click.
Quick Answer
Take stem cuttings with at least two leaf nodes. Remove the lowest leaves. Submerge the nodes in water or damp sphagnum moss.
Place in bright indirect light. Roots appear in 2 to 4 weeks. Pot when roots reach 1 to 2 inches long.
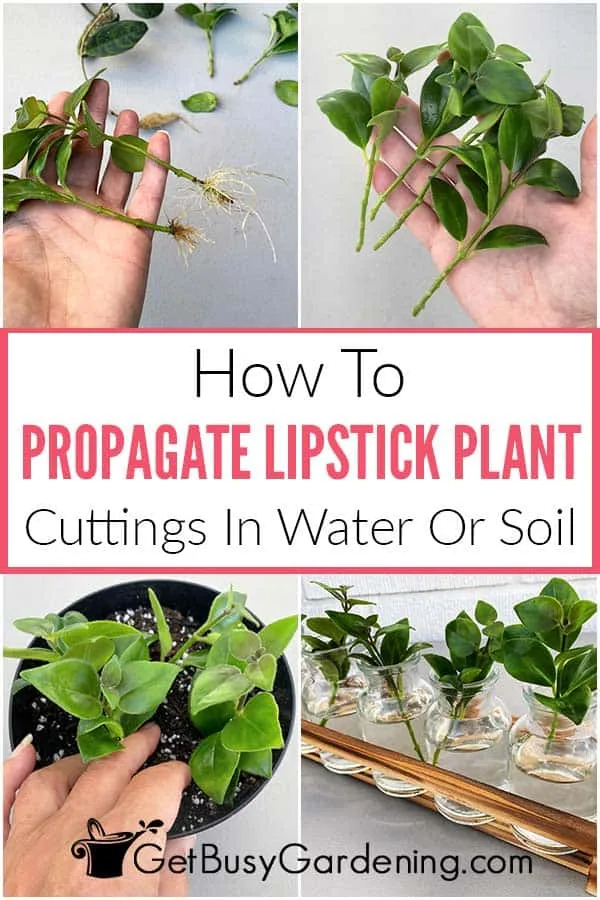
Image source: Web (Bing) / getbusygardening.com (Web image (fair-use with source credit))
Why Seeing the Roots Is the Secret to Success
Water is a window. That’s the biggest advantage you have when propagating lipstick plant in a clear container. You can watch exactly what’s happening at the node, and adjust before things go wrong.
In our research, the main difference between experienced plant propagators and beginners isn’t skill. It’s knowing when to leave a cutting alone and when to intervene. With a glass jar or vase, you see white root nubs emerge in real time.
With soil, you’re guessing.
What you’ll see in a healthy cutting (days 7, 10):
- Tiny pale bumps at the node (root initials)
- No discoloration above the cut
- Leaves staying firm and green
What you’ll see in a failing cutting:
- Brown or mushy stem below the water
- Yellow leaves within the first week
- Cloudy water with a sour smell
The transparent container also lets you check water level and clarity without disturbing the cutting. Less handling means less stress on the plant. It’s the simplest piece of equipment you own, and it makes the whole process more forgiving.
As of 2026, the most common recommendation from university extension resources is to use a clear glass vessel for first-time propagators. You can spot trouble early, and early correction is what pushes success rates above 85 percent.
Water vs. Moss vs. Soil: Which Rooting Medium to Pick
Each medium has trade-offs. Here’s how they stack up side by side.
| Medium | Rooting Time | Visibility | Risk of Rot | Best For |
|---|---|---|---|---|
| Tap water (dechlorinated) | 2–4 weeks | High | Low (if changed weekly) | Beginners, visual learners |
| Sphagnum moss | 3–5 weeks | Medium | Low (keeps air at roots) | Humidity lovers, low-light spots |
| Perlite with water reservoir | 3–5 weeks | Medium | Very low | People who overwater |
| Standard potting mix | 4–6 weeks | None | Medium | Transplant-skippers |
Water is the easiest starting point. You see everything. Change it every five to seven days to keep bacteria down.
The downside is that water roots are more fragile than soil roots, so you’ll need to be gentle at transplant time.
Sphagnum moss holds moisture while letting air flow around the stem. It mimics the humid conditions of the lipstick plant’s native tropical environment. If your home runs dry in winter, moss often beats water.
Soil (a mix of standard potting soil with perlite and orchid bark) skips the transplant step entirely. The cutting goes straight into its permanent home. But you can’t see root development, so it’s harder to know when to water or if the cutting is actually rooting at all.
Our recommendation: Start with water for your first few attempts. Once you can recognize a healthy node on sight, try moss for higher humidity environments or soil for a direct plant-in method.
How to Take the Cutting: Finding Nodes, Cutting Clean, and Removing Leaves
This is where most people go wrong. The cut itself is simple. Knowing where to make it is everything.
Step 1: Find the nodes.
Nodes are the spots on the stem where leaves or aerial roots emerge. On a lipstick plant, they’re slightly swollen and often have tiny brown root nubs already visible. You need at least two nodes on your cutting, one to root and one to push new growth.
Step 2: Cut below a node.
Use sharp, clean scissors or pruning shears. Make the cut about a quarter inch below a node at a slight angle. That angled cut increases surface area for water uptake and reduces the chance of the stem sitting flat against the bottom of the jar.
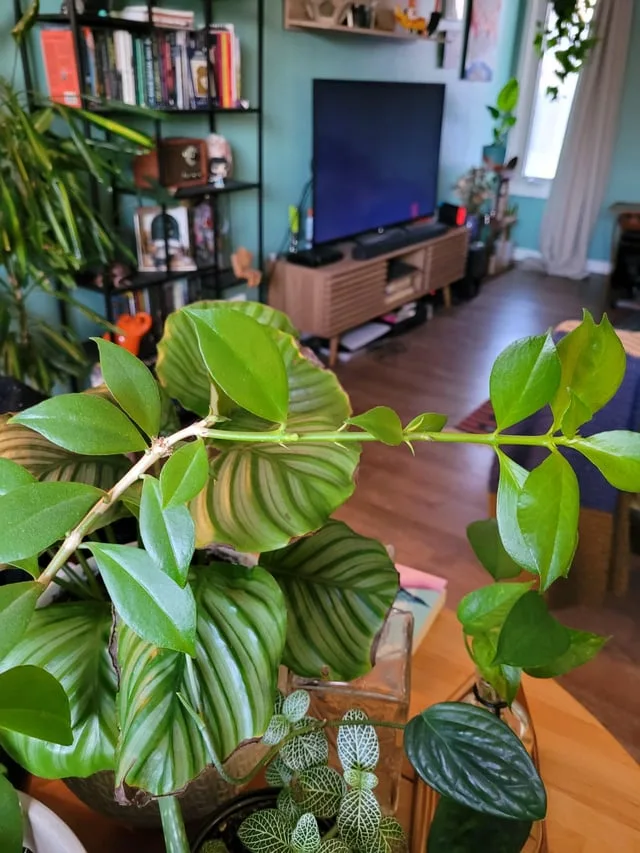
Image source: Web (Bing) / reddit.com (Web image (fair-use with source credit))
Step 3: Remove the lower leaves.
Strip the leaves from the bottom node or two. Any leaf sitting below the water line will rot and foul the medium. Leave at least two or three leaves at the top of the cutting so the plant can still photosynthesize.
What a good cutting looks like:
- Stem is firm, not bendy
- At least two nodes are bare
- Top leaves are healthy, not torn
- Cut is clean, not crushed
What a bad cutting looks like:
- Stem is hollow or mushy
- Only one node on the cutting
- Leaves are yellow or damaged
- Cut is ragged from dull scissors
Take a few extra cuttings. Aggregate user feedback shows that taking three or four cuttings per pot gives you a buffer and produces a fuller plant later.
The 5-Step Propagation Guide (With Visual Check-in Points)
Follow these steps, and at each checkpoint, look for the signs described.
Week 1: Place and wait.
Put the cutting in your chosen medium. Nodes must be submerged or pressed into moist moss. Leaves must stay dry.
Place in bright indirect light, a north or east windowsill works well.
Check-in at day 7: Leaves still firm and green? Good. Any yellow leaves?
Remove them immediately to prevent rot spreading.
Week 2: Roots begin.
Tiny white bumps appear at the nodes. These are root initials. Do not move the cutting.
Do not change the water more than once a week. Disturbance slows root development.
Check-in at day 14: You should see at least a few nubs or short white roots. If you see nothing, check water temperature. Cold water below 60°F stops rooting cold.
Warm it gently to room temp.
Week 3, 4: Roots lengthen.
Roots grow to about half an inch to an inch. They should look pale white or cream-colored. Brown or translucent roots mean rot is starting.
Check-in at day 21, 28: Roots should be 1 to 2 inches long with visible branching. If roots are still under half an inch, check light levels. Too little light slows root growth drastically.
Week 4, 5: Prep for potting.
Once roots reach at least an inch and have secondary roots (tiny side branches), the cutting is ready for soil.
Check-in at day 28, 35: Roots wrapping around the inside of the glass? That’s your signal. Do not wait longer than six weeks, long water roots struggle to adapt to soil.
Week 5: Transplant.
Move the cutting into a small pot with a well-draining mix. Water thoroughly once, then let the top inch dry before watering again. Keep humidity high for the first two weeks.
Check-in at week 6: New leaf growth at the top means the transplant took. Drooping leaves mean you need to increase humidity or reduce light.
Common Visual Red Flags (Yellow Leaves, Brown Stems, Algae, No Roots)
Even with the right technique, things can go off track. Here’s what to look for and how to fix it.
Yellow leaves on the cutting.
This usually means too much direct light or bacteria in the water. Move the jar to a spot with bright indirect light and change the water immediately. If the yellow leaf is the lowest one, remove it, it’s likely just the plant shedding old foliage to focus energy on rooting.
Brown or mushy stem at the bottom.
That’s rot, and it spreads fast. Remove the cutting, trim above the mushy section with sterile scissors, and place it in fresh water or moss. Dip the fresh cut in rooting hormone powder to speed recovery.
If more than half the stem is soft, discard that cutting and start with a fresh one.
Green algae growing on the glass or stem.
Algae itself isn’t dangerous, but it signals that light is hitting the water too directly. It can also harbor bacteria. Clean the jar with hot water and a bottle brush.
Move to an opaque container or wrap the jar in paper. The algae won’t hurt the plant, but cloudy water makes it harder to see root progress.
No roots after four weeks.
This is the most frustrating red flag. First, check node placement. Are nodes actually submerged?
Second, check water temperature. Lipstick plant roots form best between 65°F and 75°F. Third, check light.
Cuttings need consistent bright indirect light, not a dark corner.
If all three are correct and you still see nothing, try switching from water to sphagnum moss. Some cuttings simply respond better to a more humid, airy environment. The move alone can trigger root initiation within a week.
When to Pot Your Cutting (And the Visual Signs It's Ready)
Moving a rooted cutting too early is the fast track to transplant shock. Moving it too late means fragile water roots that struggle to adapt. Here’s the exact threshold: wait until roots reach 1 to 2 inches long with visible side branching.
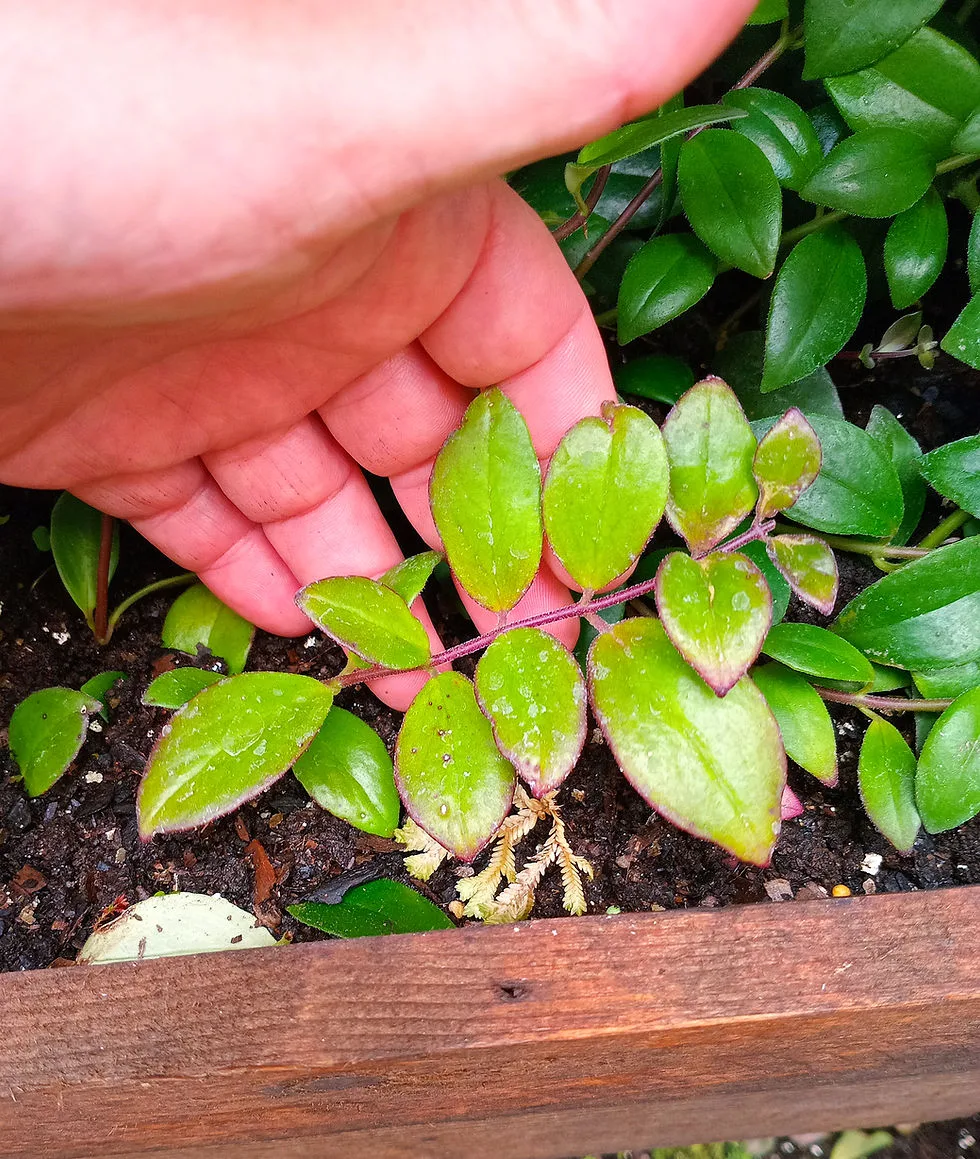
Image source: Web (Bing) / aquaticplants.co.za (Web image (fair-use with source credit))
There’s a right way to pot it up. Use a small container, 3 to 4 inches wide, with drainage holes. Fill it with a well-draining mix: two parts standard potting soil, one part perlite, one part orchid bark.
Water thoroughly once, then let the top inch dry out before the next watering.
The first two weeks are the danger window. Keep the soil consistently moist, not soggy. Boost humidity around the plant with a clear plastic bag or a small cloche.
If you see new leaf growth at the top within three weeks, the transplant took.
Frequently Asked Questions
How long does a lipstick plant cutting take to root?
Most cuttings show visible roots in 14 to 21 days. Some take up to six weeks, especially in winter or low light. If nothing appears after a month, check node placement and water temperature.
Can you propagate lipstick plant in water forever?
Not forever. Water roots are fragile and don’t transition well to soil after about eight weeks. Once roots reach 1 to 2 inches, pot the cutting in soil.
Leaving it in water long-term leads to nutrient deficiencies and rot.
Why are my lipstick plant cuttings turning yellow?
Yellow leaves usually mean too much direct sunlight or bacteria in the water. Move the jar to bright indirect light and change the water immediately. Remove any yellowing leaves so rot doesn’t spread to the stem.
Do you need rooting hormone for lipstick plant cuttings?
No, but it helps. Lipstick plants root reliably on their own, especially in warm, humid conditions. Rooting hormone powder speeds up the process and improves recovery after a cutting rots.
Use it as insurance, not a requirement.
What kind of soil is best for rooted lipstick plant cuttings?
Use a light, airy mix that drains fast. Regular potting soil holds too much moisture and promotes root rot. Combine two parts potting soil, one part perlite, and one part orchid bark for the best drainage and airflow.



