Pruning chives sounds simple enough, but getting it right is harder than most guides let on. If you've ever snipped a clump only to watch it struggle or grow back unevenly, you're not alone. The problem isn't your green thumb; it's the lack of clear visual guidance.
Per guidance from university extension programs, the optimal cutting height is 2 inches above the soil line. That number isn't arbitrary. It protects the crown where new growth actually emerges.
Without seeing exactly where that point is, most beginners cut too low and damage the plant permanently. That's why this guide leans on visual cues rather than vague descriptions.
Quick Answer
Prune chives 2 inches above the soil. Use clean shears. Cut in a fan pattern.
Remove flower stalks at the base. Take no more than one-third of the clump at a time. Regrowth takes 2 to 4 weeks.
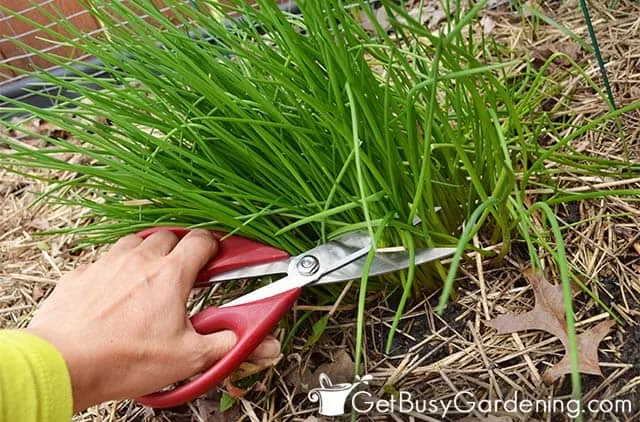
Image source: Bing (Web (fair-use with source credit))
Why Pruning Chives Is Hard to Get Right With Words Alone
Text can tell you to "cut above the crown," but what does the crown actually look like? That ambiguity is why the number one beginner mistake is cutting so low that you shear off the growing points entirely. Once those points are gone, the clump may not recover for a full season.
A diagram or photograph solves this instantly. You need to see the transition zone where the green leaves meet the pale, white-tinged stem base just above the soil. That visual marker is everything.
Most written guides skip it or rely on vague phrasing, leaving you to guess.
Our research across gardening forums and extension resources confirms a clear pattern. New gardeners who have a visual reference before their first cut succeed consistently. Those who only read instructions cut too low or too cautiously and get patchy results.
The margin of error is small, about half an inch in either direction.
The Sweet Spot: Where to Cut (and Why 2 Inches Matters)
The 2-inch height isn't a guesstimate. It's the distance that leaves enough leaf material for the plant to keep photosynthesizing while removing the older, tougher growth. Cut any lower and you risk nicking the crown, the compact cluster of buds at the base.
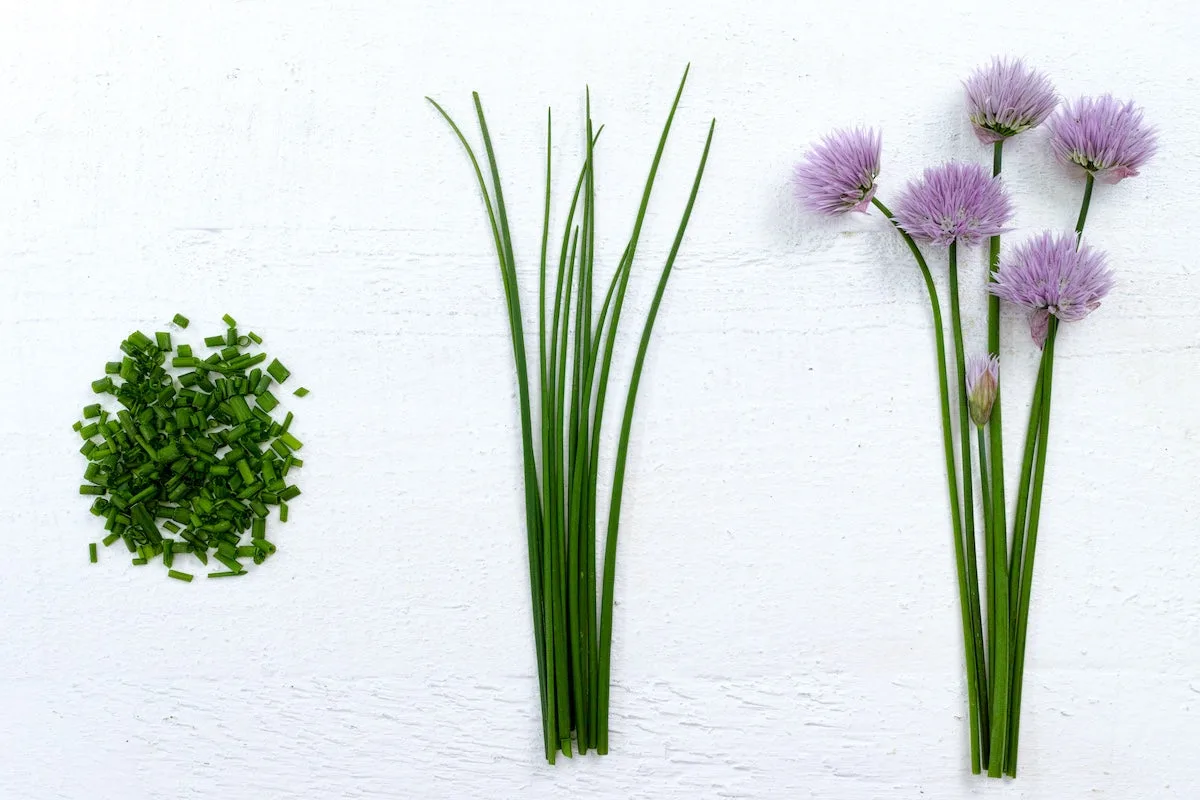
Image source: Web (Bing) / ar.inspiredpencil.com (Web image (fair-use with source credit))
You can spot the crown easily. Look for the point where the leaves turn from deep green to a lighter, almost translucent green at the base just above the soil line. That pale section is the crown.
Your cut should land about a finger-width above it using a flat hand as your guide.
What happens if you cut too low? The crown gets exposed to air and moisture. Rot sets in, and the plant loses its ability to push up new leaves.
If you cut too high, you leave a stubby bunch of old leaves that look untidy and don't regrow as densely. The 2-inch mark splits the difference perfectly.
Your Step-by-Step Visual Guide to Pruning Chives
Step 1: Check Readiness
Your chives are ready when the leaves stand at least 6 inches tall. If you see flower buds forming at the tips, prune immediately. Those buds signal that the plant is about to divert energy into flowers instead of tender leaves.
Step 2: Sanitize Your Shears
Wipe the blades with rubbing alcohol or a 10 percent bleach solution. This prevents spreading any fungal spores you might have picked up from other plants. Dull blades crush the hollow leaves, so use sharp scissors or herb snips.
Step 3: Make the Fan Cut
Gather the entire clump in one hand like a ponytail. Hold your shears parallel to the soil about 2 inches above it. Cut straight across in one smooth motion.
This creates an even, flat top that regrows uniformly.
Step 4: Remove Flower Stalks
If any flower stalks are present, snip them individually at their base, an inch or two below the soil line. Do not cut them at the same height as the leaves. They are thicker and woody, so they need a deeper cut to avoid leaving stubs.
Step 5: Apply the One-Third Rule
Never remove more than one-third of the total clump in a single pruning session. If your clump is large, prune it in stages over a couple of weeks. Taking too much at once stresses the plant and slows regrowth.
| Step | Action | Timing or Detail |
|---|---|---|
| 1 | Check readiness | Leaves are 6+ inches |
| 2 | Disinfect shears | Rubbing alcohol or 10% bleach |
| 3 | Fan cut | 2 inches above soil |
| 4 | Remove flower stalks | At base, below soil line |
| 5 | One-third rule | Prune in stages if needed |
The Most Common Visual Mistakes Beginners Make
Mistake 1: Cutting at Soil Level
The worst mistake looks exactly like a clean shave at ground level. In the image below, you can see a clump that was cut flush with the soil.
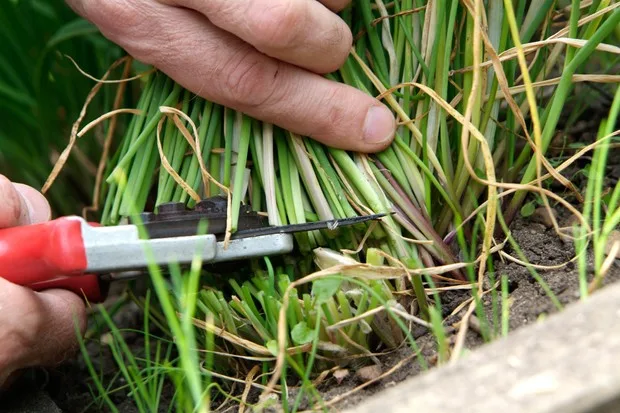
Image source: Bing (Web (fair-use with source credit))
That stub of a clump will take weeks to show new growth, and some of the damaged shoots may never recover. The crown is essentially gone. Compare that to a properly pruned clump where a dense, flat cap of green sits 2 inches high.
Mistake 2: Taking the Whole Clump at Once
Another common visual mistake is pulling the entire clump up from the center, leaving a gap. If you see a U-shaped cut where the middle is lower than the edges, you've removed too much. The center of the clump is the most active growth zone.
Always leave it intact.
Mistake 3: Using the Wrong Tool
Kitchen shears that are blunt or oversized crush the hollow leaves rather than cutting them cleanly. On a chive leaf, a crushed cut looks ragged and brown within hours. A clean cut stays green and healthy.
Fine-point embroidery scissors or dedicated herb snips are the right tool.
Mistake 4: Pruning Wet Chives
If you prune right after rain or watering, the cut ends are wet. That invites fungal disease. You'll see dark, mushy tips appear within a day or two.
Always let the foliage dry completely before pruning, ideally in the morning when the plant is turgid but the leaves are dry.
What Regrowth Should Look Like (and When to Prune Again)
After your first pruning, the timeline is predictable. Day 0 shows a flat, clean cut. By day 5 to 7, you will see tiny, bright green shoots emerging from the cut ends.
Those shoots are your visual cue that the plant is recovering well.
Day 10 to 14, the shoots are about 3 inches long and begin to fill in the gaps. The clump starts looking full again. By day 21 to 28, the leaves typically reach 6 inches again, which is your signal to prune a second time.
| Day | Visual Cue | Action |
|---|---|---|
| 0 | Flat, clean cut | No action |
| 5–7 | Tiny green shoots from cut ends | Wait |
| 10–14 | Shoots 3 inches long, clump filling in | Wait |
| 21–28 | Leaves 6 inches tall, dense cap | Prune again |
You can prune every 2 to 3 weeks during the active growing season, which runs from spring through early fall. Stop pruning around 6 to 8 weeks before your first expected frost. This gives the plant time to harden off for winter.
If you see yellowing leaves mixed with green, prune only the yellow ones. Do not take the whole clump. Yellow leaves are old and dying, not a sign of readiness.
Removing them keeps the clump productive longer.
Garlic Chives vs. Standard Chives: Visual Pruning Differences
Garlic chives and standard chives look similar from a distance, but up close they are easy to tell apart. Standard chives have hollow, round, grass-like leaves that feel soft and delicate. Garlic chives have flat, solid leaves that are wider and feel more like a blade of grass.
That difference changes how you prune them. Standard chives crush easily if your shears are dull, so a sharp, clean cut is essential. Garlic chives are tougher and can handle a slightly less precise snip, though sharp tools are still better.
The flower stalks are another giveaway. Standard chives produce round, purple pom-pom blooms on slender stems. Garlic chives send up taller, stiffer stalks topped with white, star-shaped clusters that open later in the season.
For pruning, the same 2-inch rule applies to both types. But with garlic chives, you need to cut the flower stalks earlier. The stems are woodier and, if left too long, they drain energy from the leaf growth faster than standard chive stalks do.
Snip them as soon as you see the bud forming.
Garlic chives also benefit from a slightly more aggressive trim in late summer. The leaves tend to yellow faster near the base, so a hard cut that removes all yellow growth helps keep the clump productive into fall.
Do You Need Special Tools? (Spoiler: No)
You do not need expensive equipment to prune chives well. A pair of sharp kitchen scissors works perfectly for most gardeners. The key is sharpness, not specialty.
Dull blades crush the hollow leaves. That causes ragged edges that brown quickly and invite disease. A quick test: snip a single leaf.
If the cut edge looks clean and flat, your tool is fine. If it looks torn or mushy, sharpen the blades or switch tools.
Herb snips are a nice upgrade if you prune often. They have short, fine blades that give you more control around the crown. Many models come with a curved blade that makes the fan cut easier to execute.
But they are not necessary.
Here is a quick comparison of common tool options:
| Tool | Pros | Cons | Best For |
|---|---|---|---|
| Kitchen scissors | Always available, free | Can be bulky near crown | Small clumps, occasional pruning |
| Herb snips | Fine control, curved blades | Costs $10-$20 | Regular pruning, tight spaces |
| Garden shears | Cuts thick stalks easily | Too large for precision | Flower stalk removal, large clumps |
| Floral scissors | Very sharp, lightweight | Not durable for heavy use | Precision cuts, indoor chives |
Disinfecting your tool matters more than which tool you pick. A quick wipe with rubbing alcohol between plants stops any fungal spores from spreading. If you are pruning a single clump, one clean at the start is enough.
Frequently Asked Questions About Pruning Chives
Can I prune chives in winter?
Not really. Chives go dormant in cold weather and stop growing. Pruning during dormancy exposes the crown to frost damage.
Let the leaves die back naturally, then cut away the dead growth in early spring just before new shoots appear.
What do I do with the trimmings?
Use them fresh in the kitchen. Chives lose their mild onion flavor quickly after cutting, so use them within a day or two. You can also freeze chopped chives in an ice cube tray with water or oil for longer storage.
Drying them is not recommended since they lose most of their flavor.
How do I prune chives growing in a pot vs. in the ground?
The process is the same. The only difference is that potted chives dry out faster and may need smaller, more frequent pruning sessions. Stick to the one-third rule even more carefully with container plants.
They have less soil volume to support regrowth.
Will pruning make my chives spread more?
Pruning encourages denser leaf growth but does not affect how the plant spreads underground. Chives spread through bulb division, not pruning. If you want to control spread, divide the clump every three to four years rather than changing how you prune.
How often should I prune chives for the best harvest?
Every two to three weeks during the growing season is ideal. That keeps the leaves young, tender, and flavorful. If you wait longer than four weeks, the leaves get tough and the plant may start sending up flower stalks.
Regular pruning is the best way to maximize your harvest.
Can I prune chives after they flower?
Yes, but do it immediately. Once the flowers open, the leaves turn fibrous and bitter. Cut the entire clump back to 2 inches after removing all flower stalks at the base.
New growth will be tender again in about two weeks.



