If you've ever stood over a Russian sage in early spring with pruners in hand, you know the moment: one wrong cut could mean a lanky, floppy mess all summer. The right cut gives you a compact, flower-filled show from July through frost. That's what we're here to clear up.
Pruning Russian sage isn't complicated, but it's not a one-size-fits-all job either. The key variable is your climate zone. In our research, the single biggest factor determining when and how hard to cut is whether you live in USDA zone 5 or colder versus zone 6 or warmer.
Get that right, and the rest falls into place.
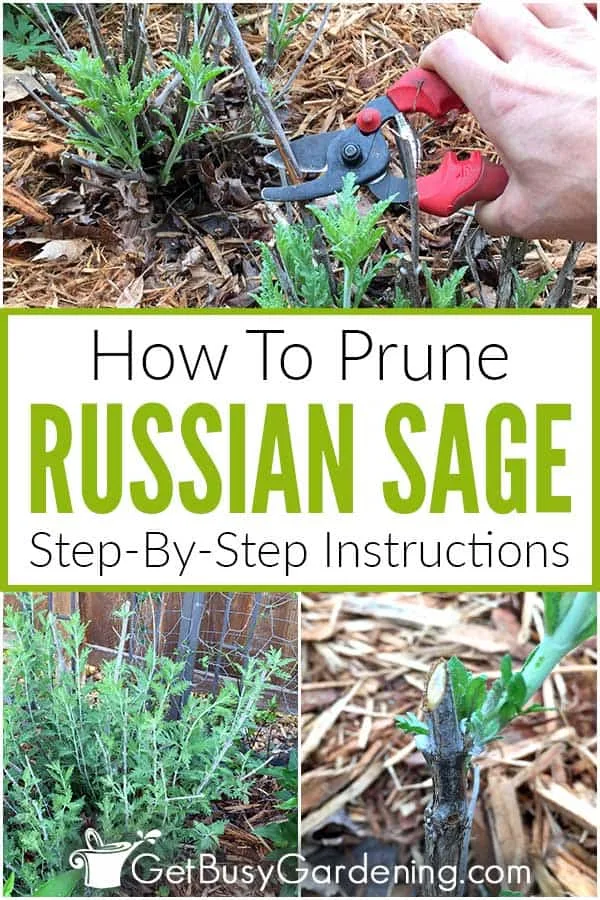
Image source: Web (Bing) / getbusygardening.com (Web image (fair-use with source credit))
Quick Answer
Cut Russian sage back to 6 to 12 inches in early spring. Wait until you see new green growth at the base. For cold zones, never prune in fall.
For mild zones, spring pruning is still best. Old woody plants need a harder cut.
The 5-Minute Answer: Pruning Russian Sage Without Overthinking It
Let's cut through the conflicting advice you'll find online. This plant is a subshrub, meaning it has woody stems at the base but acts like a perennial in most gardens. It doesn't need delicate handling or expensive tools.
Here's the short version: in early spring, after the last hard frost, grab a pair of sharp pruners or loppers. Look for the lowest point where you see tiny new shoots emerging from the stems. Cut everything above that point.
If the whole plant looks dead (no green anywhere), cut every stem down to 6 to 8 inches above ground level.
That's it. That single rule covers 90 percent of pruning situations. The remaining 10 percent involves a few climate-specific tweaks and decisions about plant age, which we'll get into below.
What you absolutely do not need: fancy pruning shears, sealing compounds, or any kind of fall anxiety about "hurting" the plant. Russian sage is tough. It evolved in rocky, dry, cold regions of central Asia.
A hard spring cutback is the closest thing to a guarantee of good performance.
[Image: pruning russian sage]
Pruning Russian sage at the right height and timing keeps plants compact and loaded with flowers.
Why Pruning Russian Sage Is Different From Other Perennials
Most perennials in your garden, coneflowers, black-eyed Susans, daylilies, die back completely to the ground each winter. You can cut them to the dirt in fall or spring and they come back fine.
Russian sage is different. It's a subshrub. The stems near the base become woody and persistent over several seasons, like lavender or butterfly bush.
Those woody stems don't die back in winter. They stay standing, and they matter.
Here's what that means for you: if you cut everything to the ground (what many gardeners mistakenly do with woody perennials in fall), you remove the plant's natural winter protection. The crown and roots become exposed to freeze-thaw cycles. In cold zones with no reliable snow cover, that's a death sentence.
But if you don't prune at all, the plant gets taller, woodier, and eventually opens up in the middle. The new growth flops over because it's supported by old, brittle stems. Flower production drops.
The plant looks rangy and unkempt.
This middle ground is why so many gardeners feel confused. You can't treat it like a true perennial, but you also can't treat it like a woody shrub that only needs light shaping. The sweet spot is specific and predictable, once you understand the two main decision points.
Decision Branch 1: When Are You Pruning?
Image source: Web (Bing) / plantcaremastery.com (Web image (fair-use with source credit))
The first decision is whether you're pruning in fall or spring. Your climate zone dictates the answer.
Cold Climates (Zones 4–5)
If you live in USDA zones 4 or 5 (or colder parts of zone 6 with low snow), do not prune in fall. Leave every stem standing through winter. Those old stems trap insulating snow around the crown and protect the plant from temperature swings.
Prune only in spring, after you see new growth starting. In these zones, new growth usually appears in late March to mid-April. Don't prune earlier.
Cutting into dead-looking wood before growth starts leaves stubs that can rot back into the crown.
Mild Climates (Zones 6–9)
In zones 6 through 9, you have a choice, but spring pruning is still safer. Fall pruning in mild zones is fine if you want a tidy winter garden, but you'll get a slightly later bloom the following summer. The reason is that fall pruning removes flower buds that were set on the current year's growth.
Spring pruning removes those same buds but later, so the plant redirects energy into branching and produces more flower spikes overall.
If you absolutely need to prune in fall for aesthetic reasons, cut back to about 18 inches. Leave more stem than you think you need. The remaining stubs still provide some insulation if a freak cold snap hits.
[Image: snow cover]
Snow insulates the crown of Russian sage in cold zones. Fall pruning removes this protection.
Decision Branch 2: What Is the Plant's Age and Condition?
The second decision point is how old and healthy the plant is. Different pruning approaches work for different stages.
Young, Healthy Plants
If you planted your Russian sage within the last three years, it's still building its root system and its wood structure. These plants are vigorous and respond beautifully to a hard spring cutback. Cut stems down to 6 to 10 inches.
The plant will produce dense, upright growth and heavy flowering.
Don't worry that you're "starting over." Subshrubs grow fast from stored root energy. A 6-inch stub in early April becomes a 3-foot bush by July.
Old, Woody, or Leggy Plants
Once a Russian sage is five or more years old, the center of the plant often becomes bare. The oldest stems get thick, gray, and brittle. New growth comes mainly from the outer ring of stems.
Flowering becomes sparse.
For these plants, use a rejuvenation prune in spring. Cut every stem back to 6 inches. Then, after the new growth reaches about 12 inches, reach into the center of the plant and remove the one or two thickest, oldest stems completely, cutting as close to the crown as possible.
This thins out the plant and opens it up. It also stimulates fresh growth from the crown that will fill in the bare center over the next season.
Do not attempt rejuvenation in fall. The cut stems will not have time to heal before winter, and cold air can travel down open wounds into the crown.
| Plant Age | Spring Cut Height | Fall Cut | Notes |
|---|---|---|---|
| 1–3 years | 6–10 inches | Avoid | Vigorous growth, heavy blooms |
| 4–10 years | 6–10 inches | Avoid | Remove 1–2 oldest stems |
| 10+ years | 6 inches, plus thinning | Avoid | Look for signs of decline |
The Step-by-Step Pruning Process (Spring)
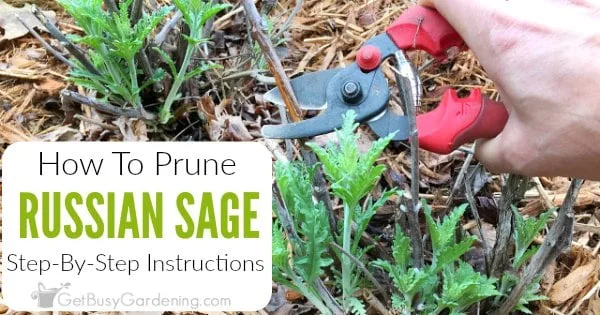
Image source: Bing (Web (fair-use with source credit))
Here's the actual process, from tool selection to cleanup. You'll spend about 10 to 15 minutes per mature plant.
Step 1: Wait for signs of life. Don't prune based on the calendar alone. Look for tiny swelling buds or new green shoots emerging from older stems. If you see nothing green, wait another week.
In our research, the most common mistake is pruning too early, when the plant still has weeks of dormancy ahead of it. The result is more dieback and slower regrowth.
Step 2: Sanitize your tools. Wipe pruner blades with rubbing alcohol or a 10 percent bleach solution. This prevents spreading any fungal disease from other plants. It's a 30-second step that costs nothing.
Step 3: Cut above the new growth. For each stem, find the first visible new leaf or bud. Cut about a quarter inch above it. If a stem has no green signs at all, cut it to 6 inches.
If a stem snaps off cleanly when bent, it's dead and should go to 6 inches.
Step 4: Remove old, thick stems from the center. Reach into the plant and identify the thickest, grayest stems. Cut them as low as possible, ideally at ground level. Remove no more than one-third of the total stems in any single year.
This keeps the plant from going into shock while still rejuvenating it.
Step 5: Clean up the debris. Remove all cut stems from around the plant. Old Russian sage stems harbor fungal spores and pests. Dispose of them in yard waste, not your compost pile, unless your pile runs hot enough to kill pathogens.
Step 6: Optional light mulch. In cold zones, a loose layer of straw or shredded bark around the crown (not piled on it) provides insulation for the regrowing shoots. Do not use heavy bark or leaves that could trap moisture against the new growth.
[Image: hard pruning]
A hard spring prune: stems are cut to 6 to 8 inches above ground, just above visible new growth.
Warm Climates (Zones 6–9)
Your warm-climate spring pruning follows the same basic process, but you have a little more wiggle room. Because your plant won't face a deep, killing freeze after you cut, you can start a couple of weeks earlier, usually mid-March to early April.
The main shift here is height. Feel free to cut a little harder if you want a more compact plant. Trimming to 6 inches in a mild zone will still give you a 3-foot bush by summer. If you'd rather have a taller, airier plant, leave 10 to 12 inches of stem.
This is purely a visual preference; both approaches keep the plant healthy.
Specific steps:
- Wait for the same "new growth" sign we talked about above. This is non-negotiable, no matter where you live.
- Cut just above the lowest visible new buds.
- Thin out a few of the oldest stems every year, especially if the plant is over 4 years old.
- Skip the mulch unless you had a particularly dry fall. In mild zones, mulch can hold excess moisture against the crown, which promotes root rot.
Optional fall cut (zones 6, 9 only): If you're okay with a slightly later bloom next summer, you can cut back to about 12, 18 inches in late fall. This keeps your winter garden looking tidy. But know that you're sacrificing the insulating effect of the dead stems, which is only an issue in marginal zone 6 winters.
If you choose this route, wait until the stems are fully dried out and brown, usually late November.
Rejuvenation Pruning: Dealing with Old, Leggy Plants
Here's the scene. You've got a Russian sage that's been in the ground for 8, 10 years. It looks like a gnarled, woody mess.
Most of the stems are gray and bare on the bottom, with foliage on top looking sparse and desperate. The whole plant flops open in the middle like a bad haircut.
Don't toss it. You can bring it back.
Rejuvenation pruning is a more aggressive approach than the standard spring cut. The goal is to push the plant to generate fresh growth from the crown and the lowest woody stems. Here's how:
- Do it in early spring, right as you see the first new growth at the base.
- Cut all stems back to 6 inches above ground. No exceptions. This feels extreme, but it's the right call.
- Reach into the base and identify the 2, 3 thickest, grayest, oldest stems. Cut these flush to the ground.
- Thin out about 1/3 of the remaining stems altogether, removing them at ground level. This reduces crowdedness and opens up the center of the plant to light and air, which prevents disease.
The result: the plant will push out lots of vigorous new shoots from the remaining stems and the crown. Growth will be more compact and heavily flowered than you've seen in years.
One real-world tip: If you're worried about a hard cut like this, split it into two years. In year one, prune the whole plant to 12 inches. In year two, go down to 6 inches and remove the oldest stems.
This is gentler on the plant and still gets you to the same place.
Common Questions, Straight Answers
"Why didn't my Russian sage come back this year?"
This usually comes down to one of three things:
- The plant was pruned in fall in a cold zone, leaving the crown exposed and it winterkilled.
- Too much water in the dormant season caused crown rot. Russian sage is a desert-margin plant; it hates soggy feet.
- The plant was cut too early in spring, before the first leaves had emerged, and a late freeze got it.
"Can I cut it to the ground like a regular perennial?"
If you're in zones 4, 5, don't. Cutting it flat to the ground exposes the crown to killing cold and keeps it in a stressed state. It might survive a mild winter, but the risk isn't worth it.
Cut to 6 inches at the lowest.
"What about shearing in midsummer?"
Don't bother. Russian sage doesn't bloom continuously, and a shear midseason forces a flush of weak, floppy growth that often fails to set buds before frost. Instead, cut the spent flower spikes off individually as they fade in late summer, takes 15 minutes and keeps the plant looking clean without stressing it.
"My plant is really tall and flopping everywhere. Should I prune more?"
The flop is almost always caused by too much nitrogen in the soil or too little sunlight. It's not a pruning problem. Pruning harder won't fix it; planting it in full sun and backing off on fertilizer will.
The Reality Check: What Happens When You Get It Wrong?
Let me walk you through a quick "what if" scenario so you know what to expect. Take a sage in zone 5 that got left alone entirely, no pruning at all in early spring.
Come May, it looks alive. By mid-June it's 4 feet tall and blooming. By July it's flopping over, mostly bare on the bottom, and every spent flower spike is producing seed that's about to create volunteer seedlings everywhere.
The flowers are still pretty, but the plant is a mess. It's lanky, open in the center, and the stems nearest the ground sport no leaves at all. That's a classic "no-prune" problem, and you'll know it when you see it.
Now take a zone 5 sage that got pruned in the fall. Come March, it's a collection of dead gray sticks. No green anywhere.
By June, you might see scrawny growth only at the base of each stem, leaving the center bare. In a bad winter, that plant won't come back at all.
Neither extreme is wrong in a "you're a plant-killer" sense, both will likely survive, but both turn a stunning plant into an eyesore. That's why the spring-based method exists.
What About 'Shearing' It Like a Hedge?
I get why people do it. Russian sage has a nice rounded shape, and it's tempting to just grab a hedge trimmer and even it out in fall or spring. The problem with hard shearing is that you remove the living buds at the tips, and you remove them indiscriminately across the whole canopy.
In practice, shearing gives you a plant that looks like a spiky sea urchin for a month, with all the new growth emerging from the cut ends in one synchronized burst. The lanky stems inside that you were trying to hide don't get fixed, they just get buried under new top growth.
Instead of shearing, stick to the "cut above visible new growth" method. You get a more natural, open habit, better airflow, and you preserve the plant's naturally delicate, silver-blue color.
Tools of the Trade
You don't need fancy gear for this, but there are a few things that make it easier.
Bypass Pruners
Good-quality bypass pruners (blades that slide past each other like scissors) are the main tool. They make sharp, clean cuts that heal quickly. Look for a pair you can grip with one hand and hold comfortably.
Avoid anvil pruners, they crush the stem rather than cutting cleanly, which invites disease.
Loppers
If you have older, thicker stems, a pair of loppers (long-handled pruners) will make the cuts easier and protect your hands. Get a pair with a a high-carbon steel blade that you can sharpen. You'll thank yourself when you're cutting through a stem that's a half-inch thick.
Pruning Saw
For truly old, gnarled plants (10+ years), a small pruning saw comes in handy. It lets you cut close to the crown without mangling the plant. A basic 8-inch pruning saw will set you back about $15 and last a decade or more.
A Bucket or Tarp
You'll cut a lot of stems off. Haul the dead wood to the compost pile or curb. A tarp makes it easy to drag the debris in one trip.
Sharp blades matter. Dull blades crush and shred the stems, leaving ragged cuts that are more likely to freeze back in winter and a prime entry point for fungal diseases. Before pruning, run a sharpening stone over the blades. It takes two minutes and prevents a lot of headaches later.
What If You Prune Too Late in Spring?
Picture this: it's mid-May. Your Russian sage is already 2 feet tall with foliage out. You forgot to prune.
What now?
Don't panic. You have two options:
- Leave it alone and accept a slightly less compact shape. The plant will still bloom and be healthy.
- Cut back to the lowest side shoots (lateral branches with leaves), protecting most of the existing growth. This sends energy into those lower buds and encourages branching. Just don't expect much flowering in the next several weeks, the plant will set fewer flowers because you removed most of the buds it already set.
The real takeaway: timing really isn't the end of the world. What kills Russian sage isn't late pruning. It's fall pruning in cold zones, or pruning to the ground in any zone.
Parting Thoughts
Pruning Russian sage isn't a skill built on mystery. It's a plant that begs for a confident, sharp tool and a little common sense. Cut in spring, keep those old stems for winter protection, and stay patient.
One season's fine. Next spring, you'll tuck your pruners in your back pocket and head out with a cup of coffee, knowing exactly what to do. The plant will respond with a flush of silver-green growth.
It doesn't need pampering. It just needs you to show up at the right moment, make a clean cut, and get out of its way.
Happy pruning.



