If you've ever watched rainwater vanish down a gutter while you're dragging a hose across the yard, you've already wondered how do rain barrels work. The idea is simple: capture what falls for free, then use it later when the ground is dry. A rain barrel turns your downspout into a storage tank, giving you a steady supply of water for plants, gardens, and outdoor cleaning.
Here's a number that might surprise you. A typical 55-gallon barrel fills up after just a quarter-inch of rain on a 1,000-square-foot roof section. That same roof can send over 600 gallons down the spout during a single moderate storm.
With a barrel in place, you keep that water on your property instead of sending it to the storm drain. And as of 2026, more homeowners are finally catching on to just how little effort this setup actually takes.
Quick Answer
Rain barrels capture roof runoff. They divert gutter water into a storage tank. Gravity feeds it through a spigot.
A screen keeps debris and mosquitoes out. An overflow hose directs extra water away from your foundation. That is the whole system in four sentences.
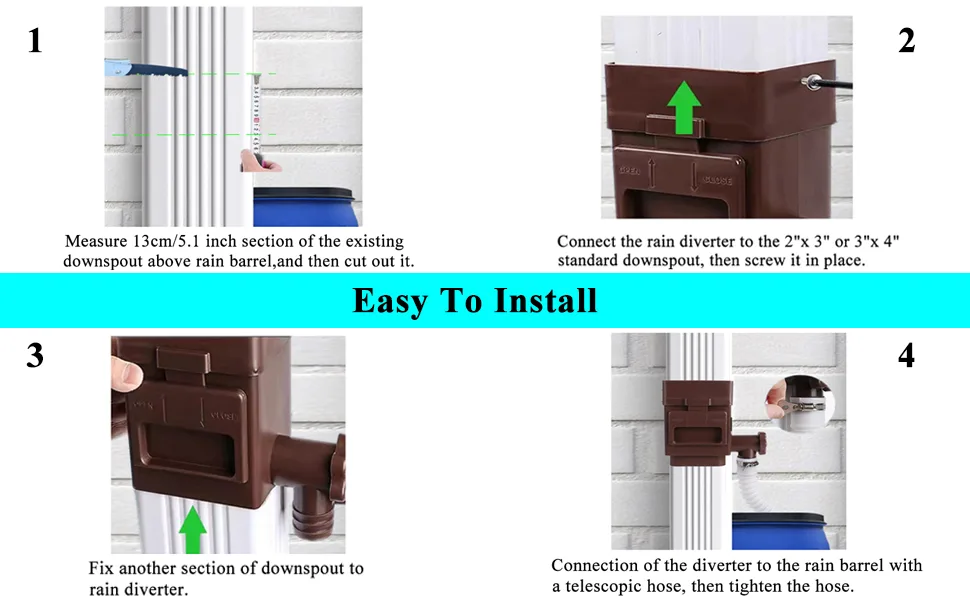
Image source: Web (Bing) / amazon.com (Web image (fair-use with source credit))
🧱 What's Inside — The Components You'll See in Any Diagram
If you look at a typical rain barrel setup, the parts are straightforward. Every diagram shows the same handful of pieces working together. Here is what you are really looking at.
The barrel itself
Most barrels are 50 to 60 gallons. They are made from polyethylene, which is a food-grade plastic that resists UV damage. Dark colors are common because they block sunlight and slow algae growth.
Some barrels are recycled from bulk food shipping containers. Others are purpose-built with flat backs that sit flush against your siding.
The diverter
This is the piece that connects your downspout to the barrel. A flexible hose runs from a T-fitting in the downspout to an inlet near the top of the barrel. Water flows down the gutter, hits the diverter, and spills into the hose instead of continuing straight down.
Some diverters include a first-flush mechanism that discards the first few gallons of dirty water before sending the rest to the barrel.
The spigot
A brass or plastic faucet near the bottom of the barrel lets you attach a garden hose or fill a watering can. Gravity provides the pressure. The higher the barrel sits, the better the flow.
At two feet of elevation, you get roughly 0.86 psi, which is enough for a soaker hose but not a sprinkler.
The overflow port
When the barrel fills up, extra water needs somewhere to go. An overflow port near the top connects to a hose that carries water away from your foundation. If you skip this, a full barrel will spill over the top and pool against your house.
That is how you get a wet basement.
The screen
Every opening on the barrel needs a fine mesh screen. The inlet, the overflow, and the top opening all require one. A 1/16-inch screen stops mosquitoes from breeding in standing water and keeps leaves and debris out.
Here is a quick reference table for the core components.
| Component | Function | What to Look For |
|---|---|---|
| Barrel | Stores water | 55-gallon, UV-resistant polyethylene |
| Diverter | Routes water from downspout to barrel | Flexible hose, first-flush option |
| Spigot | Releases water by gravity | Brass or plastic, 3/4-inch thread |
| Overflow port | Prevents flooding | Directs water away from foundation |
| Mesh screen | Blocks debris and insects | 1/16-inch or finer, on all openings |
💧 The Water Path — Downspout to Diverter to Barrel to Garden
Follow the water from a raindrop to your tomato plants. The path is short and simple. You will understand the whole system once you trace it once.
Step one: the gutter
Rain hits your roof and runs into the gutter. The gutter slopes toward the downspout. Gravity does all the work here.
Nothing special happens yet.
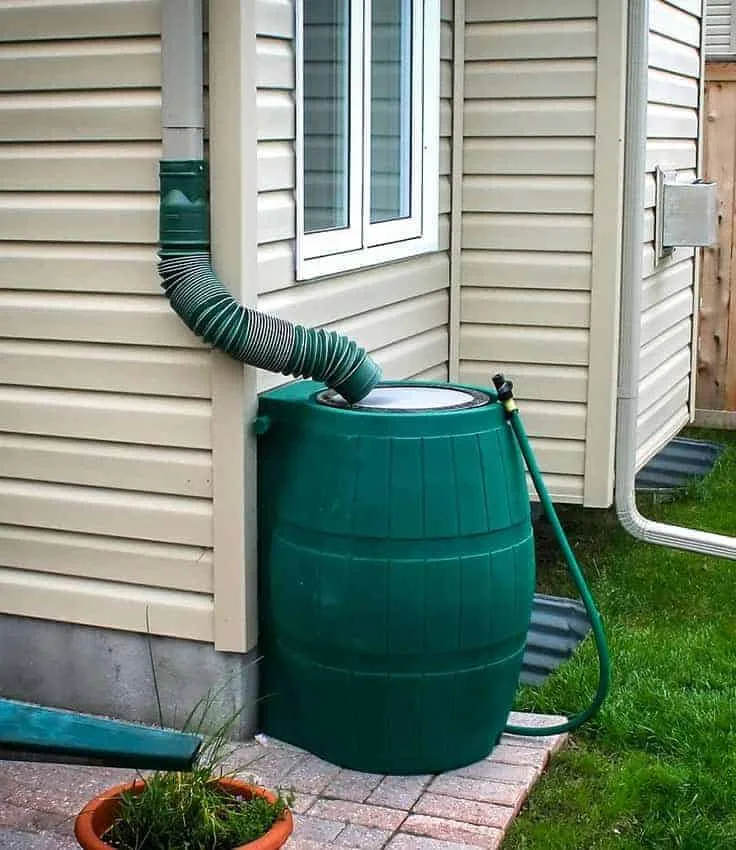
Image source: Web (Bing) / worldwaterreserve.com (Web image (fair-use with source credit))
Step two: the diverter
The downspout has a T-shaped fitting about two feet above the ground. Water hits that T, and some of it turns sideways into a short hose. That hose connects to the barrel inlet.
This is the only moving part in the system, and it has no moving parts at all. It is just a redirect.
Step three: the barrel
Water enters through the top inlet. It passes through the mesh screen and falls into the barrel. The barrel fills from the bottom up.
As it fills, the water level rises past the inlet and up toward the overflow port.
Step four: the overflow
Once the barrel is full, water climbs to the overflow port. It exits through a hose that runs downhill. That hose should end at least ten feet from your foundation.
Many people run it into a rain garden or a second barrel.
Step five: the spigot
Open the spigot and water flows out. It pours into a watering can or through a hose. The flow rate depends on elevation.
A barrel on a two-foot stand delivers a steady stream. A barrel on the ground gives a slow trickle. That is why you elevate the barrel.
Step six: the garden
The water ends up on your plants. It is untreated and contains no chlorine or fluoride. Plants actually prefer it.
Our research aligns with guidance from the U.S. Environmental Protection Agency, which notes that rainwater is often better for soil health than treated tap water.
🛠️ Installation Steps You Can See (and Get Right the First Time)
You can install a rain barrel in about an hour. The hardest part is cutting your downspout. Everything else is just connecting parts.
Here is the step-by-step, as you would see it in a photo guide.
1. Choose your spot
Find a downspout near the area you water most. A corner of the house that drains the largest roof section is ideal. Level the ground or build a small gravel pad so the barrel sits flat.
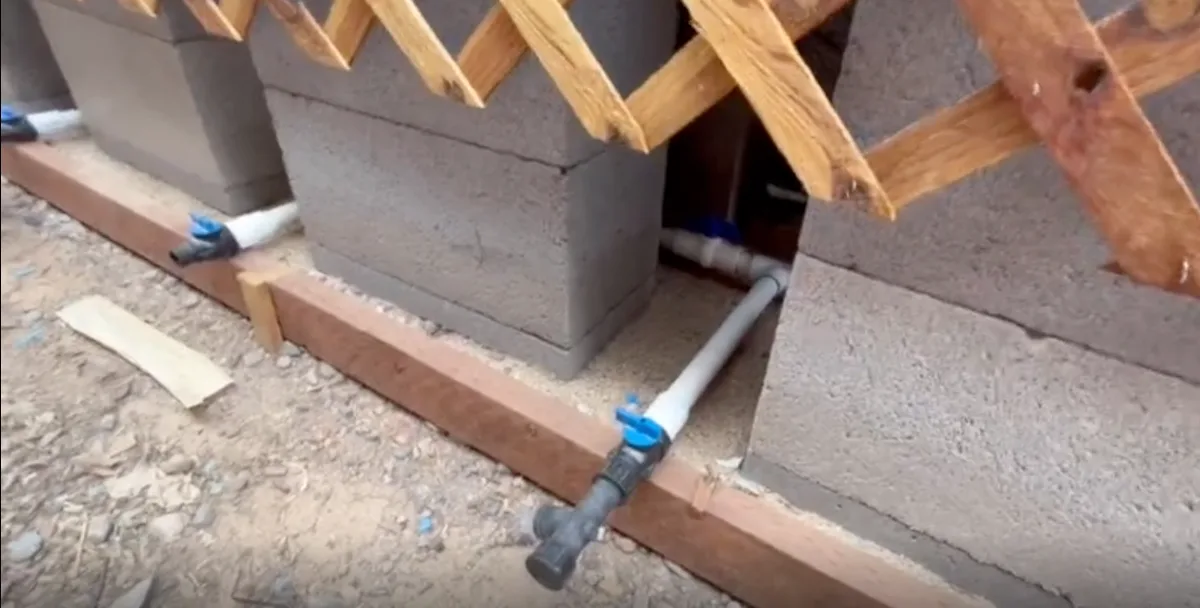
Image source: Bing (Web (fair-use with source credit))
2. Build or buy a stand
Elevate the barrel 18 to 24 inches off the ground. You can use cinder blocks, a wooden pallet, or a metal stand made for rain barrels. Do not skip this.
A barrel on the ground gives almost no water pressure.
3. Cut the downspout
Mark the downspout at a point about 12 inches above the top of the barrel. Cut it with a hacksaw. A few seconds of sawing is all it takes.
Remove the bottom section of the downspout.
4. Install the diverter
Fit the T-shaped diverter into the gap. Secure it with sheet metal screws. Attach the flexible hose from the diverter to the barrel inlet.
Hand-tighten the fittings. Use plumber's tape on the threaded connections.
5. Position the barrel
Set the barrel on the stand. Make sure the inlet lines up with the diverter hose. The barrel should sit level.
A wobbly barrel is dangerous when it gets heavy.
6. Connect the overflow
Attach a hose to the overflow port. Run it downhill and away from the house. A 10-foot length of garden hose works fine.
Direct the water into a garden bed or a second barrel.
7. Seal and test
Tighten all connections. Cover the top opening with the lid. Pour a bucket of water into the gutter upstream.
Watch the water flow into the barrel. Check for leaks at the diverter and spigot. Tighten anything that drips.
Common installation mistakes in the photos
The installation photos that show a barrel sitting on bare ground without a stand are misleading. You need elevation. Also watch for photos that show the overflow hose dumping right next to the foundation.
That is a basement flood waiting to happen. Look for images that show the barrel on a platform with the overflow pipe pointing downhill.
🚫 Four Visual Mistakes That Ruin a Setup
You can spot a bad rain barrel install from across the yard. These four problems show up again and again in user photos and aggregate reviews.
Mistake one: barrel on the ground
A barrel sitting directly on soil looks tidy, but it kills water pressure. You get a weak dribble instead of a steady stream. More importantly, the spigot is too low to fit a watering can underneath.
Elevate every barrel at least 18 inches.
Mistake two: overflow pointing at the foundation
People run the overflow hose straight out and let it spill onto the ground next to the house. That water seeps down and saturates the soil against the foundation. Over time, this causes cracks and basement leaks.
Always run the overflow hose at least 10 feet away.
Mistake three: missing or torn screen
A missing screen is an open invitation for mosquitoes. A female mosquito lays eggs in as little as a teaspoon of standing water. One rain barrel with no screen can breed hundreds of mosquitoes in a week.
Check the screen every month. Patch any holes immediately.
Mistake four: no winter prep
In freezing climates, water expands inside the barrel. Ice cracks the plastic. One freeze-thaw cycle can split a 55-gallon barrel beyond repair.
Drain the barrel completely before the first frost. Disconnect the diverter hose. Store the barrel upside down in a garage or shed.
If you forget, you are buying a new barrel next spring.



