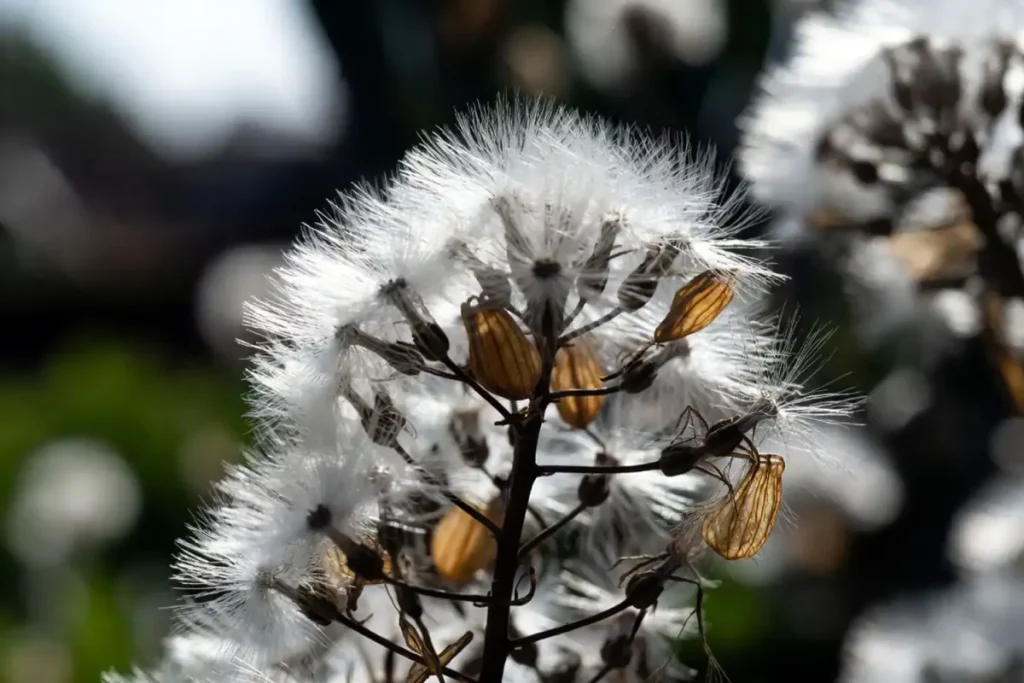
Most gardeners harvest lettuce leaves and call it done. The hardest part of harvesting lettuce seeds is knowing exactly when to cut the stalk. You've watched your lettuce bolt and flower, and now those fluffy white heads are teasing you.
Wait too long and the seeds scatter. Cut too early and they won't germinate.
Per standard seed-saving guidelines from cooperative extension programs, lettuce seeds reach maturity about 12 to 16 days after the flower opens. Temperature and humidity shift that timing by a few days in either direction. Catching the right moment comes down to recognizing the visual cues.
Let's walk through the whole process.
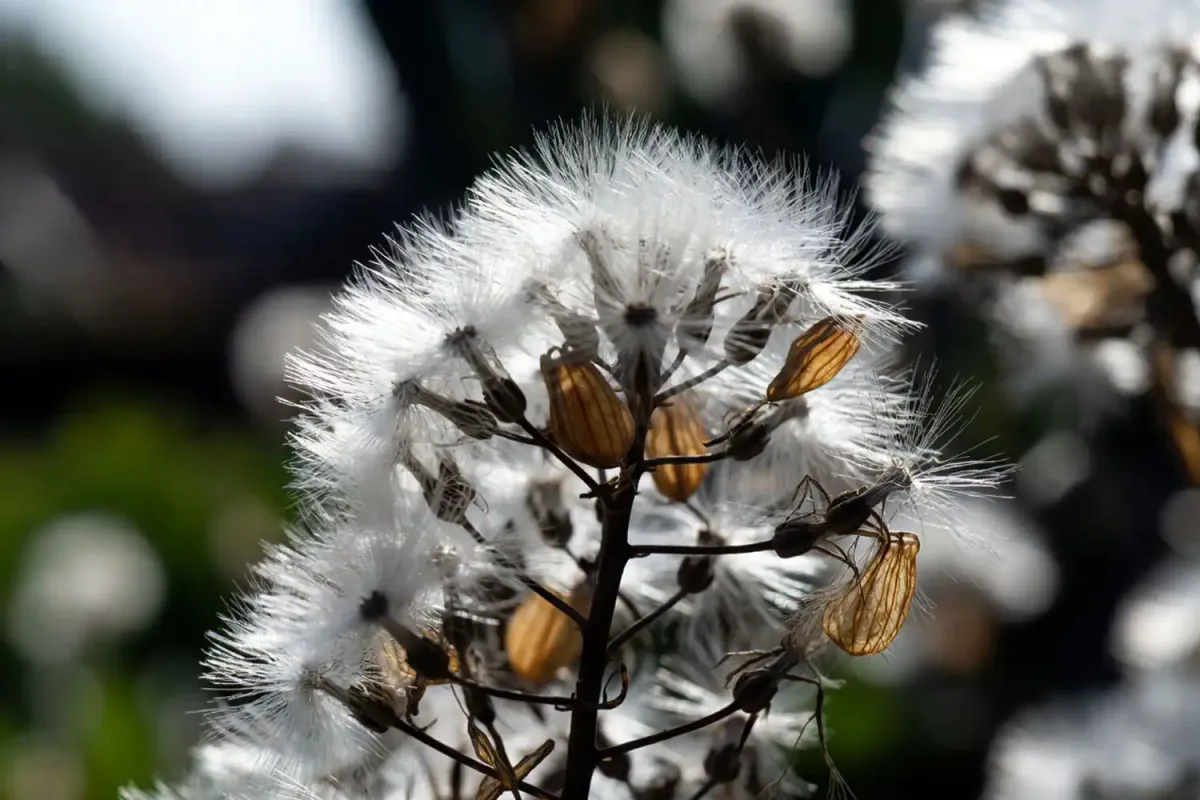
Image source: Bing (Web (fair-use with source credit))
Quick Answer
Harvest lettuce seeds when the seed head turns fluffy and brown. Cut the stalk and hang it upside down for 1 to 2 weeks. Rub the dry heads over a fine screen, then blow away the chaff.
Store seeds in a labeled envelope in a cool, dark place.
When to Harvest: How Lettuce Seeds Develop (and Why You Keep Missing the Window)
Your lettuce has bolted. That tall, awkward stalk with tiny yellow flowers is the signal that seeds are coming. But those flowers don't all open at once.
They open in sequence from the bottom of the stalk upward. That means the seeds on the same plant ripen at different times.
Here is what the progression looks like. A few days after each flower closes, the base of that flower starts swelling. That swollen part is the seed head.
Inside are the achenes, the actual seed bodies. At first the head is green and compact. As the seeds mature, it turns tan or brown.
The telltale sign is when the white pappus, the fluffy parachute, starts showing.
The window for harvest opens when the bottom seeds are brown and dry and the top seeds are still slightly green. In our research, the most common mistake is waiting until the whole head is fluffy. By then, the bottom seeds have already fallen off or blown away.
Aggregate reviews from experienced seed savers confirm that the best time to harvest is when the head looks about 70 to 80 percent brown. If you squeeze a seed between your thumbnail and fingertip, a ripe seed is hard and won't dent. An unripe seed is soft and pale.
Decision Guide: Which Harvest Method Fits Your Situation?
You have two main choices: bag the seed head on the stalk, or cut the entire stalk and dry it indoors. The right method depends on your conditions.
Method 1: Bag on the stalk. You slip a breathable paper bag over the ripening seed head and tie it at the base. The bag catches seeds as they mature and drop. This method works best when the weather is unpredictable.
Rain, wind, or humidity can ruin open heads quickly. It also helps if you are saving seed from a specific plant and don't want to lose any seeds.
Method 2: Cut the stalk. You let the head dry on the plant until most seeds are brown. Then you cut the stalk, hang it upside down indoors, and collect seeds after it dries. This is simpler and requires less daily attention.
But it only works well when the weather is dry and stable. If rain is in the forecast, cutting early is risky because the seeds might not be mature enough.
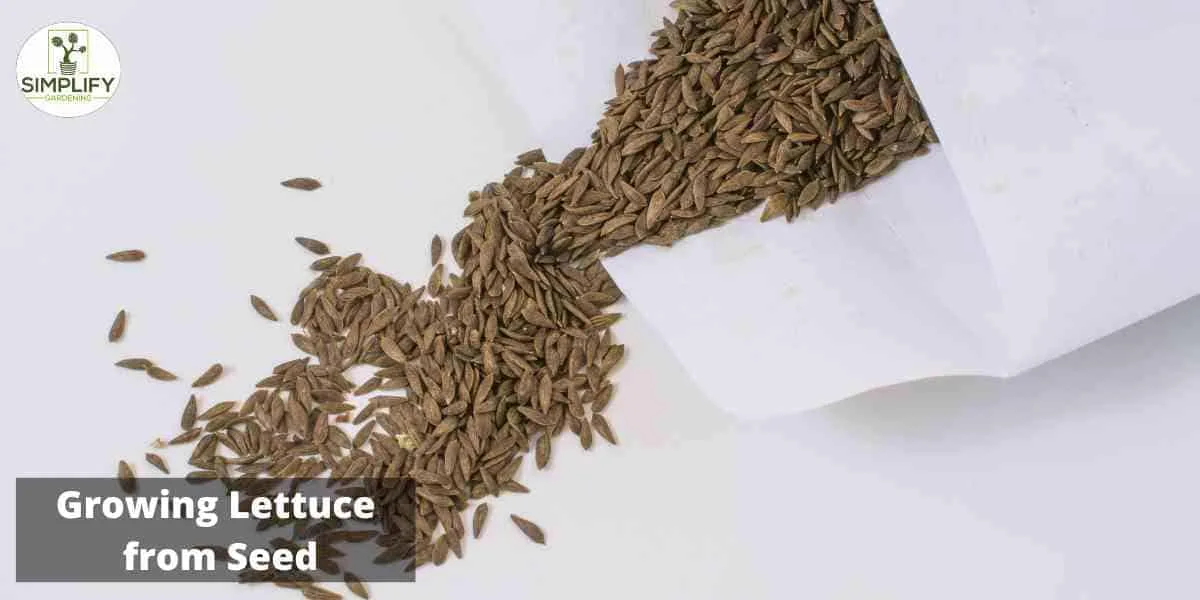
Image source: Web (Bing) / simplifygardening.com (Web image (fair-use with source credit))
When to pick each method
| Your Situation | Best Method | Why |
|---|---|---|
| Rain or high humidity expected | Bag on stalk | Protects seeds from moisture |
| Dry, stable weather forecast | Cut stalk | Simpler, less hands-on |
| Only one or two plants to save | Either | Personal preference |
| Saving from many plants | Cut stalk | Faster to process |
| Risk of cross-pollination | Bag on stalk | Lets you isolate specific plants |
If you live in a region with summer rain, like the Pacific Northwest or the Southeast US, the paper bag method is almost essential. Growers in dry climates like the Southwest can usually get away with cutting the stalk and hanging it.
Step-by-Step: The Paper Bag Method (Most Reliable for Home Gardeners)
This method is the gold standard for a reason. It minimizes seed loss and protects against weather. Here is the exact process.
Step 1: Watch the flower stalk daily. Once the flowers fade and the seed heads start turning brown, check the plant every morning. The heads can go from mostly green to fully fluffy in just a few days.
Step 2: Bag the head when it is about 70 percent brown. Take a small paper lunch bag. Gently slide it over the seed head. Tie the open end of the bag around the stalk with a twist tie, string, or a rubber band.
Leave the bag loose enough that air can circulate. Tight bags trap moisture and cause mold.
Step 3: Leave the bag on for 7 to 14 days. The seeds will continue to ripen and fall into the bag naturally. Shake the bag gently every few days to dislodge any seeds that are stuck in the head.
Step 4: Check for fullness. After a week, open the bag and look inside. You should see a layer of seeds mixed with chaff at the bottom. If the head still has many seeds attached, rebag and wait a few more days.
Step 5: Cut the stalk and bring it inside. Once most seeds have dropped into the bag, cut the stalk just below the bag. Bring the whole thing indoors. Open the bag over a bowl or a sheet of paper.
Remove the stalk and empty the contents.
Step 6: Clean the seeds. This is where a fine mesh screen or a kitchen strainer helps. Pour the contents of the bag through the screen. The seeds fall through while the larger chaff stays on top.
Gently blow or fan the remaining pile to remove the fluffy pappus. You can also rub the pile between your palms to loosen stubborn chaff.
Step 7: Dry the seeds completely. Spread the cleaned seeds on a plate or a paper towel in a single layer. Leave them out for 3 to 5 days in a dry, ventilated area. Stir them once a day so they dry evenly.
Moist seeds will mold in storage.
The Stalk-Cut Alternative: When It Makes Sense
Cutting the whole stalk and drying it indoors is the faster, less fiddly option. It works best when your timing is good and the weather cooperates.
Here is when to choose this method. You have a dry week ahead. The seed heads on your plants are mostly brown.
You are saving from multiple plants and don't have time to bag each one individually.
The process is straightforward. Cut the stalk at the base using clean pruners or scissors. Bring it indoors.
Hang it upside down in a dry spot with good airflow. A spare closet, a garage, or a covered porch works fine. Place a tray, a sheet of paper, or a bowl underneath to catch falling seeds.
Let the stalk hang for 1 to 2 weeks. The seeds will continue to dry and drop naturally. Once the heads look completely dry and empty, take the stalk down.
Gently rub the heads over a screen or into a bowl to release any remaining seeds.
The biggest risk with this method is cutting too early. If you cut the stalk when the top seeds are still green, those seeds will not finish ripening. They will stay soft and nonviable.
Wait until at least 80 percent of the head is brown before you cut.
This method also requires a pest check. Bring the stalk indoors and inspect it for aphids or other insects. A quick rinse with water or a light brushing can remove them before the stalk goes into your drying space.
5 Mistakes That Ruin Your Lettuce Seed Harvest
Even experienced gardeners make these errors. Avoid them and your seed saving success rate jumps significantly.
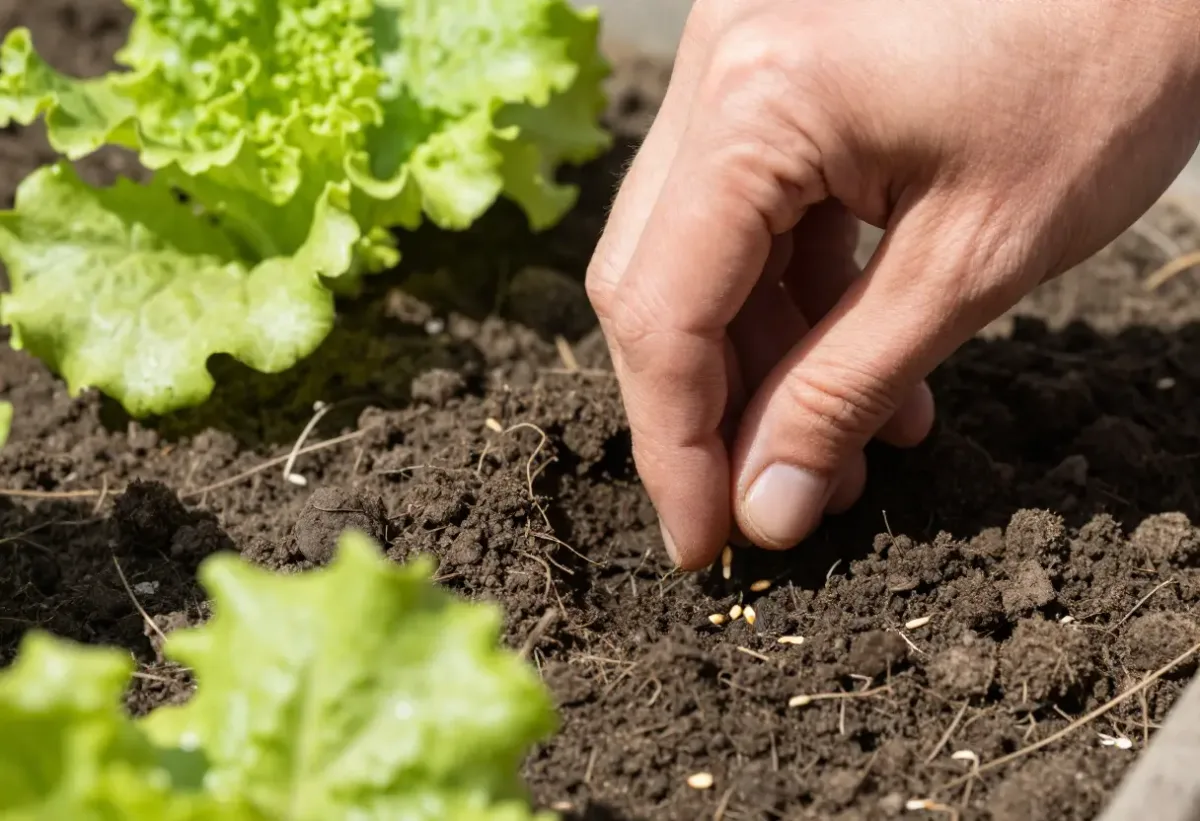
Image source: Web (Bing) / keengarden.com (Web image (fair-use with source credit))
Mistake 1: Harvesting too early. Seeds that are still soft, white, or pale green will not germinate. They need to turn dark brown or black before they are viable. A simple test: press a seed between your fingernails.
If it dents, it is not ready. If it resists and stays firm, it is mature.
Mistake 2: Harvesting too late. The fluffy pappus acts like a tiny parachute. Once the head is fully dry, even a light breeze will scatter the seeds. You will come out to harvest and find an empty stalk.
Check the heads daily as they approach ripeness. Bagging early solves this problem.
Mistake 3: Bagging with a plastic bag. Plastic traps moisture. Condensation forms inside, and the seeds mold or rot in just a few days. Always use a paper bag or a breathable mesh bag.
Paper lets moisture escape while still catching falling seeds.
Mistake 4: Skipping the final drying step. Seeds that go straight into a jar after cleaning still contain residual moisture. Within weeks, they can develop mold or lose germination strength. Spread them out and let them dry for 3 to 5 days before storage.
Mistake 5: Not labeling the envelope. You think you will remember which variety is which. By next spring, you absolutely will not. Lettuce seeds from different varieties look nearly identical.
Use a permanent marker to write the variety name and the harvest year on the envelope. Your future self will thank you.
Storage Conditions That Keep Seeds Viable for Years
You've cleaned and dried your seeds. Now the real trick is keeping them alive long enough to plant next season. Lettuce seeds are remarkably durable when stored properly, but they lose viability fast in heat or humidity.
The ideal storage environment is cool, dark, and dry. Per seed science data, lettuce seeds stored at room temperature (around 70°F) generally remain viable for 2 to 3 years. Drop the temperature to the low 40s, and that window stretches past 5 years.
Here is what matters most.
Temperature. Keep seeds below 50°F if you can manage it. The refrigerator is the most reliable option. A consistent cool temperature slows the metabolic activity that causes seeds to age.
Avoid the freezer unless your seeds are bone dry. Freezing can damage seeds with even trace moisture.
Humidity. Lettuce seeds are small and absorb moisture easily. The storage container should be airtight. A glass jar with a tight lid works well.
Add a silica gel packet or a small spoonful of uncooked rice inside to absorb excess moisture. Target relative humidity below 20 percent in the container.
Light. Darkness is ideal. Light exposure, especially sunlight, can trigger chemical reactions that shorten seed lifespan. A drawer, a cupboard, or an opaque container solves this.
Labeling. You will not remember which is which in two years. Write the variety name and the harvest year on the container. Use a permanent marker.
Tape a paper label to the jar if you prefer.
Here is a quick reference table for storage conditions.
| Storage Condition | Recommended | Avoid |
|---|---|---|
| Temperature | 32 to 50°F | Above 70°F |
| Humidity | Below 20% | Above 40% |
| Container | Glass jar with airtight lid | Plastic bags or envelopes alone |
| Location | Refrigerator or dark cupboard | Windowsill or garage |
| Moisture control | Silica gel packet or rice | No desiccant in humid climates |
One more tip. Do not open the container often. Every time you open it, warm humid air rushes in.
If you need seeds for planting, take out what you need and reseal the jar immediately. Repeat exposure to warm air reduces storage life noticeably.
Pro Tips for Better Germination and Longer Storage
You have done the hard work of harvesting, cleaning, and storing. These extra practices raise your success rate even further.
Conduct a germination test before planting season. Take 10 seeds from your stored batch. Place them on a damp paper towel. Fold the towel, put it in a plastic bag, and keep it in a warm spot (around 65 to 75°F).
Check after 7 days. Count how many have sprouted. If 8 or more germinate, your seed is excellent.
If fewer than 6, plant extra seeds per cell or replace the batch. This test takes almost no time and saves you from empty garden rows.
Store in small batches. Dividing your seeds into multiple small containers reduces the number of times each batch is exposed to air. If you have 500 seeds, split them into two or three envelopes. Open one at planting time, leave the others sealed.
Use desiccant packs intentionally. Silica gel packets are cheap and reusable. Dry them out in a low oven (200°F for an hour) after they become saturated. They can be used season after season.
Pre-chill seeds for better germination in warm soil. Some lettuce varieties, especially summer types, germinate poorly when soil is above 75°F. If you are planting in warm conditions, place the sealed seed packet in the refrigerator for 5 to 7 days before sowing. This cold treatment breaks any remaining dormancy and encourages even sprouting.
Avoid saving seed from hybrid varieties. F1 hybrid lettuce does not produce true offspring. The seeds you save will grow into plants with mixed traits. Only save seeds from open-pollinated or heirloom varieties if you want predictable results.
Check the seed packet from your original purchase. If it says F1 or hybrid, do not bother saving seeds for replanting.
Watch for cross-pollination in the garden. Lettuce is mostly self-pollinating, but bees and other insects can still transfer pollen between varieties. If you grow multiple varieties that flower at the same time, separate them by at least 10 to 50 feet. Or bag the seed heads before flowers open to keep the strain pure.
Wild lettuce growing nearby can also cross with your garden plants.
Rotate your seed stock. Use the oldest seeds first. Keep a simple inventory with harvest years. Plant from the oldest envelopes each season and save fresh seed to replace them.
This keeps your collection cycling with high-viability stock.
One final thought on storage location. A refrigerator is ideal, but not all refrigerators are equal. The vegetable crisper drawer tends to have higher humidity than the main compartment. Store seeds in the main compartment or the door if the crisper is too moist.
A small digital hygrometer inside the storage container costs a few dollars and removes all guesswork about humidity.



