Growing chives is one of those gardening wins that feels almost too easy. You plant them once, and they keep coming back year after year with very little fuss. Whether you've got a full garden bed or just a small pot on a windowsill, growing chives fits into almost any space.
The real decision isn't whether to grow them, it's how to start. As of 2026, home gardeners have three clear paths: seeds, transplants from a nursery, or dividing an existing clump from a friend's garden. Each route has different timelines, costs, and success rates.
Let's walk through which one makes sense for your situation.
Quick Answer
Growing chives requires full sun and well-draining soil. Plant seeds 1/4 inch deep. Water lightly until germination happens in 7 to 14 days.
Harvest by snipping leaves 2 inches above the soil. Chives are perennials in USDA zones 3 through 9.
The Only Choice That Matters First: Seeds, Transplants, or Division
This is the fork in the road that determines everything else. Your starting point changes your timeline, your effort level, and your first harvest date. Here's how the three options stack up.
Starting from seed is the cheapest route and gives you the widest variety selection. A packet of common chive seeds costs a few dollars and contains hundreds of seeds. The tradeoff is time.
Seeds need 8 to 10 weeks indoors before they're ready to transplant outside. If you're starting in spring, that means beginning in late winter. Direct sowing outdoors works too, but only after the last frost when soil temperatures hit 60°F.
You'll wait 60 to 90 days from seed to your first real harvest.
Buying transplants is the shortcut. Nurseries sell small chive starts in 3-inch or 4-inch pots for a few dollars each. You skip the germination and seedling care phase entirely.
Plant them in the ground or a container after hardening them off for a few days, and you're harvesting in as little as 3 to 4 weeks. This option is best if you missed the seed-starting window or want immediate results.
Dividing an existing clump is the speediest method of all. If you know someone with a well-established chive patch, you can dig up a section of the root ball, replant it, and harvest within a couple of weeks. Mature clumps should be divided every 3 to 4 years anyway to maintain vigor, so you're doing the original plant a favor.
This approach costs nothing and gives you an instantly mature plant.
Know Your Chives: Common vs. Garlic vs. Something Else
Not all chives are the same. The two main types you'll encounter are common chives and garlic chives. Choosing between them depends on how you plan to use them in the kitchen.
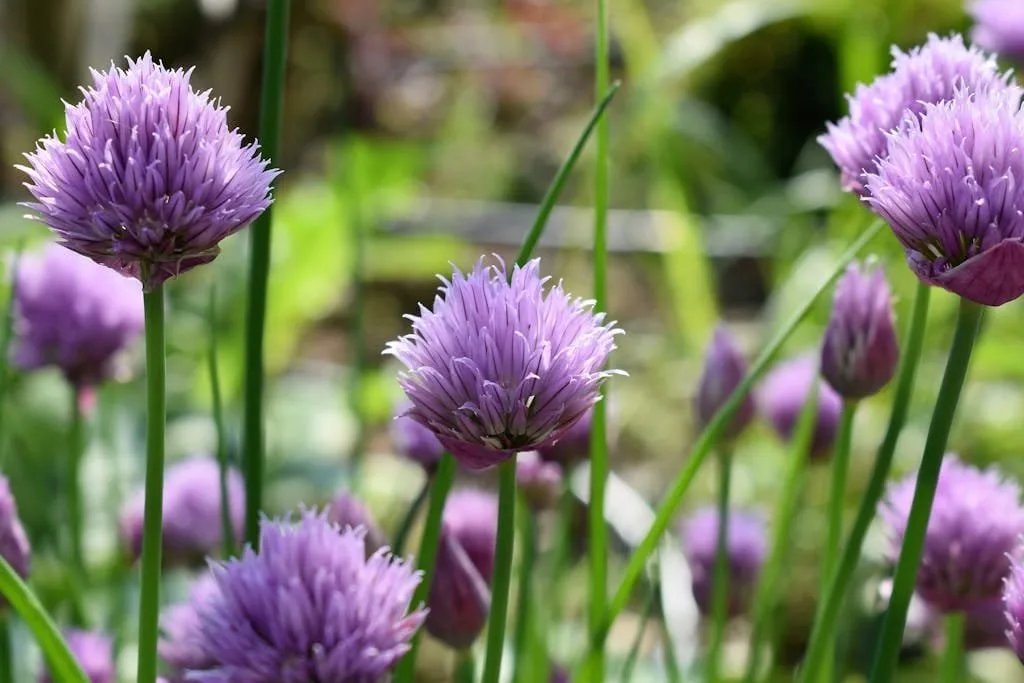
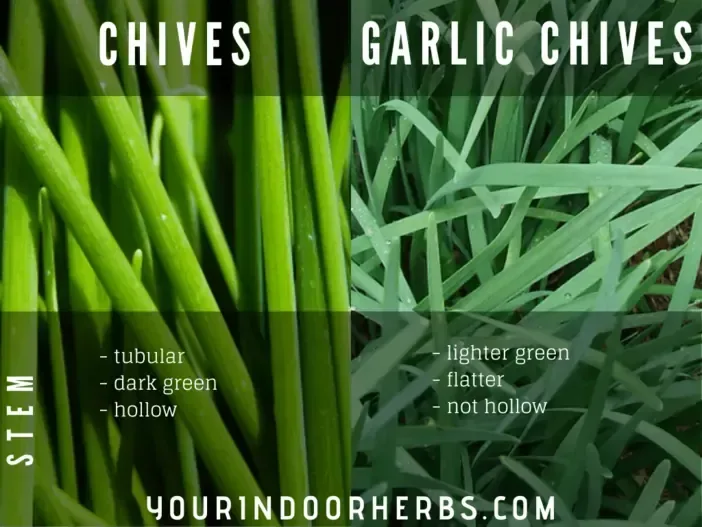
Common chives (Allium schoenoprasum) have thin, hollow, dark green leaves. They taste like a mild, grassy onion. The purple pom-pom flowers bloom in late spring and are edible too, with a slightly stronger onion flavor.
Common chives are the standard choice for garnishing soups, baked potatoes, and salads. They blend into dishes without overpowering other ingredients.
Garlic chives (Allium tuberosum) look different. The leaves are flat, wider, and a lighter green. They smell and taste like a gentle garlic, not onion.
The flowers are white, star-shaped clusters that bloom later in summer. Garlic chives hold up better to heat, making them a good choice for stir-fries, dumplings, and cooked dishes where you want a garlic note without cloves.
There's a third category worth mentioning: the ornamental varieties. Some nurseries sell chive cultivars bred primarily for their flowers rather than flavor. They're beautiful in the garden and attract pollinators like bees and butterflies, but the leaves often have a weaker taste.
If your goal is cooking, stick with the standard culinary types.
Where to Grow: Indoor vs. Outdoor, Containers vs. In-Ground
Your growing location affects how much light your chives get, how often you water, and whether they survive the winter. Here's how to decide based on your space.
Outdoor in-ground beds work best if you have full sun, meaning 6 to 8 hours of direct light daily. Chives are cold-hardy down to -30°F in zone 3, so northern gardeners can leave them in the ground with a layer of mulch for winter protection. The soil needs to be well-draining.
Heavy clay that stays wet will rot the roots within weeks. If your soil is dense, amend it with compost or build a raised bed.
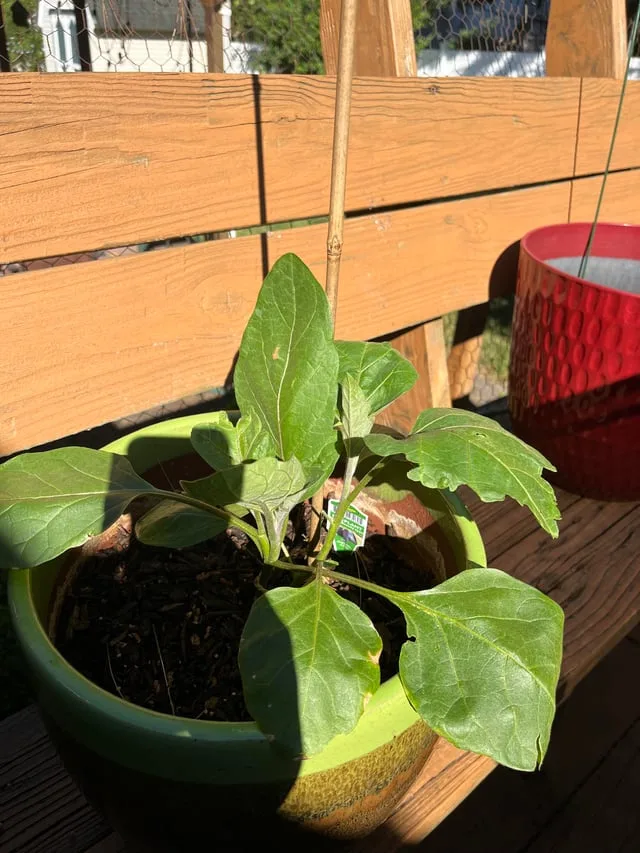
Outdoor containers are ideal for patios, balconies, or small yards. A pot that is 8 to 10 inches wide and at least 6 inches deep gives chives enough room for their root system. The advantage of containers is mobility.
You can move the pot to catch the best sunlight throughout the season. The downside is that potted chives dry out faster and need more frequent watering, especially in summer heat. Check the soil every 2 to 3 days.
Indoor growing works year-round if you provide enough light. A south-facing windowsill that gets direct sun for most of the day can support chives through fall and winter. If you don't have a bright window, a basic LED grow light placed 4 to 6 inches above the plants for 12 to 14 hours daily will keep them growing.
Indoor chives grow more slowly and produce thinner leaves than outdoor plants, but they're perfectly usable for cooking.
Here's a quick comparison to help you decide:
| Growing Method | Best For | Key Consideration |
|---|---|---|
| In-ground bed | Northern climates, large harvests | Needs soil amendment for drainage |
| Outdoor container | Small spaces, mobility | Water twice as often as in-ground |
| Indoor windowsill | Year-round harvest | Requires 6+ hours of direct light |
| Indoor with grow light | Low-light homes | 12-14 hour daily light cycle needed |
How to Plant Chives from Seed, Start, or Division — Step by Step
The planting process changes based on your starting material. Let's break each one down.
If you're starting from seed indoors. Fill a 4-inch pot or seed tray with moistened seed-starting mix. Scatter seeds on the surface and cover them with about 1/4 inch of soil. Chives need light to germinate, so don't bury them deep.
Keep the soil consistently damp but not soggy. Cover the container with a clear plastic dome or bag to hold humidity. Place it in a warm spot around 65 to 70°F.
Seeds sprout in 7 to 14 days. Remove the cover once you see green. Thin seedlings to 1 inch apart after they grow their second set of leaves.
Transplant outdoors after hardening off for 5 to 7 days, once all frost danger has passed. Space plants 6 to 8 inches apart.
If you're using nursery transplants. Water the plant in its original pot thoroughly an hour before transplanting. Dig a hole in your garden bed or container that's slightly wider than the root ball but the same depth. Gently loosen the roots if they're circling the pot.
Place the plant in the hole, backfill with soil, and press down lightly. Water deeply right after planting. Space multiple transplants 6 to 8 inches apart.
No hardening off needed if you're planting after frost has passed, but a few days of gradual outdoor exposure helps reduce transplant shock.
If you're dividing an existing clump. Dig up the entire clump or cut a section from the edge. Use a sharp spade or garden knife. Each division should have at least 4 to 6 individual bulbs with roots attached.
Replant immediately at the same depth the clump was growing before. Water thoroughly. Divisions establish fast because the root system is already developed.
Do this in early spring or early fall for best results.
Chive Care 101: Water, Light, and Cutting Without Checklist Overload
Chives are low maintenance, but a few specific practices make the difference between a scrappy patch and a lush clump that lasts for years.
Watering is the most common place people go wrong. Chives prefer even moisture but hate sitting in wet soil. The goal is soil that feels like a wrung-out sponge, damp but not soaked.
In the ground, water deeply once a week if there's no rain, more often during dry spells. In containers, check every 2 days in moderate weather and daily in summer heat. Stick your finger about an inch into the soil.
If it feels dry, water. If it feels moist, wait.
Light requirements are straightforward. Chives grow best in full sun. That's 6 or more hours of direct sunlight daily.
They tolerate partial shade, especially in hot southern climates, but the leaves will be thinner and the plant less vigorous. If you notice your chives falling over or looking leggy, they're reaching for more light. Move them to a sunnier spot or add a grow light for indoor plants.
Cutting and harvesting is where most new growers hesitate. The rule is simple: never cut more than one-third of the plant at once. Snip leaves 2 inches above the soil line using sharp scissors or garden shears.
This leaves enough leaf surface for photosynthesis to continue. Harvest from the outside of the clump, leaving the inner leaves to keep growing. The plant will regrow full leaves in 3 to 4 weeks during active growth.
Stop harvesting in late fall to let the plant store energy for winter dormancy.
Fertilizing needs are minimal. Chives are light feeders. A thin layer of compost spread around the base in early spring provides enough nutrients for the whole season.
If you want an extra boost, use a balanced 10-10-10 fertilizer at half strength once in early spring. Don't fertilize after August. This encourages tender new growth that won't survive frost.
Overfeeding leads to floppy leaves and reduced flavor.
Flower management is a personal choice. Chive blossoms are edible and beautiful. They attract bees and other pollinators.
If you leave the flowers on, the plant will eventually set seed and may self-seed around your garden. If you want to prevent spreading and keep the plant focused on leaf production, snip the flower stalks at the base as soon as buds appear. The flowers taste like a stronger version of the leaves and make a nice garnish or infused vinegar.
The Most Common Chive Growing Mistakes (and How to Avoid Them)
Even experienced gardeners make a few predictable errors with chives. Here are the ones that show up most often in gardening forums and extension service reports.
Overwatering is the number one killer. Chives need consistent moisture, but they cannot tolerate waterlogged roots. If the leaves turn yellow or the plant looks droopy despite wet soil, root rot is likely setting in. The fix is simple.
Let the top inch of soil dry out before watering again. For container plants, make sure the pot has drainage holes. For in-ground beds, dig in compost to improve drainage before planting.
Cutting too much at once stunts regrowth. New growers often harvest the entire plant down to the ground. This leaves no leaf surface for photosynthesis.
The plant struggles to recover. Always leave at least 2 inches of growth above the soil. Never take more than one-third of the leaves in a single harvest.
Planting in too much shade produces thin, weak leaves. Chives tolerate partial shade, but they won't thrive there. Leaves become pale and flop over.
If your chives look leggy, move them to a spot with more sun. Indoor growers should increase grow light time to 14 hours daily.
Letting flowers go to seed can be a problem if you want a tidy patch. Chives self-seed readily. A few flowers are fine, but unchecked seeding leads to dozens of volunteer plants.
Snip flower stalks at the base once blooms fade to control spread.
Skipping division for years reduces harvest quality. Mature clumps get crowded. The center thins out and leaves become smaller.
Divide every 3 to 4 years in spring or early fall. This rejuvenates the plant and gives you free transplants for other spots.
Harvesting, Storing, and Overwintering Chives for Years of Growth
Harvesting chives correctly ensures you get a steady supply without damaging the plant. The best time to harvest is in the morning after dew dries but before the heat of the day. Leaves are crisper and more flavorful then.
How to harvest. Use sharp scissors or garden shears. Snip leaves 2 inches above the soil line. Cut from the outside of the clump first.
Leave the inner leaves to keep growing. You can harvest every 3 to 4 weeks during spring and summer. Stop harvesting in early fall to let the plant prepare for winter.
Storing fresh chives. Fresh leaves last 5 to 7 days in the refrigerator. Wrap them loosely in a damp paper towel and place them in a plastic bag. Don't seal the bag tightly.
A little airflow prevents rot. Do not wash them until right before using. Moisture encourages spoilage.
Freezing for long-term storage. Chives freeze better than most herbs. Chop leaves into small pieces. Spread them on a baking sheet in a single layer.
Freeze for 2 hours, then transfer to a freezer bag. This prevents clumping. Frozen chives keep for up to 6 months.
Use them directly from frozen in cooked dishes. They lose their crisp texture, so they work best in soups, sauces, and stir-fries.
Drying chives. Drying works but the flavor is weaker than fresh or frozen. Hang small bundles upside down in a dark, dry, well-ventilated place for 1 to 2 weeks. Crumble the dried leaves into a jar.
Store in a cool, dark cabinet for up to a year.
Overwintering outdoors. In zones 3 through 8, chives survive winter easily. Cut back all leaves to 2 inches above the soil after the first hard frost. Apply a 4 to 6 inch layer of straw, shredded leaves, or mulch over the crown.
Remove the mulch in early spring when new growth appears.
Overwintering in containers. Pots freeze faster than ground soil. In zones 5 and colder, move containers to an unheated garage or basement for winter. Water lightly once a month to keep roots from drying out.
Bring them back outside after the last spring frost.
Chive Growing FAQs: Quick Answers for the Edge Cases
Should I cut chives back before winter?
Yes. After the first hard frost, cut the entire plant down to 2 inches above the soil. This prevents disease from decaying leaves and encourages strong regrowth in spring.
Can I grow chives indoors year-round?
Yes, with enough light. Place them in a south-facing window or under an LED grow light for 12 to 14 hours daily. Indoor chives grow more slowly, but they produce usable leaves for months.
How often should I water chives in a container?
Check the soil every 2 days in moderate weather. Water when the top inch feels dry. In hot summer weather, check daily.
Potted chives dry out much faster than in-ground plants.
Do chives come back every year?
Yes, chives are true perennials in USDA zones 3 through 9. The leaves die back in winter, but the roots survive underground and send up new growth each spring.
What is the difference between chives and garlic chives?
Common chives have thin, hollow leaves with a mild onion flavor. Garlic chives have flat, wider leaves with a gentle garlic taste. Garlic chives handle cooking heat better and bloom with white flowers later in summer.



