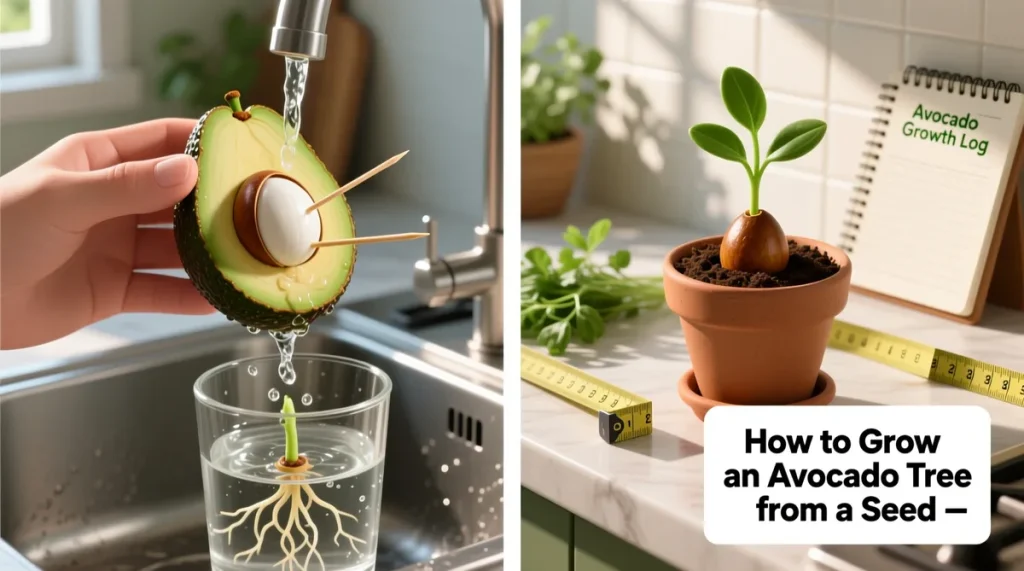
Growing avocado seeds is one of those kitchen-counter projects that starts with excitement and too often ends with a sad, mushy pit in a glass of murky water. If you've tried it before and got nothing but mold, you're not alone. The truth is, the process isn't hard.
It just demands that you pay attention to what the seed is telling you.
The classic toothpick-and-jar method works, but success depends on reading visual cues at every stage. From identifying the correct end to knowing when roots are long enough for soil, your eyes are your best tool. As of 2026, university extension guides confirm that most failures trace back to one or two easily avoided visual mistakes.
Let's walk through the entire process so you can spot them before they ruin your seed.
Quick Answer
Growing an avocado seed means suspending it over water until roots and a stem appear. Stick three toothpicks into the seed's middle. Place it flat-side down in a glass.
Keep the bottom half submerged in water. Change the water weekly. Wait two to eight weeks for roots.
Pot it when roots reach two to three inches.
Why Your Avocado Seed's Success Depends on What You See
Here's the thing about avocado seeds: they don't give you a progress bar. You have to read the physical signs. A seed that looks fine on the outside can be rotting on the inside.
A stem that seems slow-growing might actually be thriving underground. Visual cues are the only reliable way to know what's happening.
The process follows a predictable sequence. First the seed absorbs water and the brown outer skin wrinkles. Then the seed splits down the side.
A pale taproot emerges from the bottom. Finally, a stem pushes upward from the top. Each of these moments looks different and requires a different response from you.
Most online guides hand you a timeline and call it done. They say "roots appear in two to six weeks" and leave you to guess whether your own seed is on track. That's where the visual stuff matters.
You need to know what a healthy root looks like versus a moldy one. You need to recognize when the seed is sitting too deep in water. You need to see the difference between a dormant seed and a dead one.
The good news? Once you know what to look for, the whole thing becomes almost foolproof. The seed basically tells you exactly what it needs.
Your job is just to look at it regularly and respond.
Take one seed from a grocery store avocado and one from a farmer's market avocado. Set them up side by side. You'll notice the farmer's market seed often sprouts faster because it hasn't been refrigerated for weeks.
That's a visual comparison worth remembering.
Water vs. Soil: Which Method Gives You Better Visual Cues?
You've probably seen both methods online. The water method uses toothpicks to suspend the seed over a glass. The soil method plants the seed directly in potting mix.
Both work, but they offer very different visual experiences.
The water method wins for visibility. You can watch the root grow day by day. You can spot mold early.
You can see when the water gets cloudy and needs changing. That's why it's the better choice for beginners who need feedback. If something goes wrong, you see it immediately.
The soil method hides everything underground. You plant the seed, water it, and wait. You might not know if it's alive for weeks.
When a stem finally appears, you celebrate, but you never saw the root development. You also can't check for rot without digging the seed up, which risks damaging delicate roots.
Here's a quick comparison:
| Factor | Water Method | Soil Method |
|---|---|---|
| Root visibility | High | None |
| Rot detection | Easy | Difficult |
| Transplant shock | Moderate | Low |
| Mold risk | Higher | Lower |
| Overall difficulty | Easier to learn | Easier to maintain |
Our research suggests starting with the water method for your first attempt. It teaches you to recognize every stage of development. Once you've successfully sprouted one seed, you can try soil-planting with confidence.
The visual knowledge carries over.
That said, the soil method has a real advantage: no transplant shock. When you move a water-sprouted seed to soil, the roots must adapt to a new medium. Soil-sprouted seeds skip that transition entirely.
But you lose the ability to monitor progress. For a visual learner, that trade-off rarely feels worth it.
The First Critical Cue: How to Tell the Top from the Bottom
This is where most people mess up without realizing it. You have to identify which end of the seed goes in the water. Get this wrong, and your seed will never sprout.
The good news is that the answer is right there in front of you, if you look.
The bottom end of an avocado seed is the flat one. It might have a slight indentation or a small circular scar. This is where the root emerges.
The top end is the pointy, slightly conical one. It's often lighter in color and may look slightly drier. The top is where the stem will break through.
Hold the seed in your hand and look at it from the side. You'll notice it's shaped like a teardrop. The wide, flat base is the bottom.
The narrow, pointed tip is the top. If you're ever unsure, look for the hilum. That's the technical name for the small scar or depression left where the seed attached to the fruit's inner cavity.
It's always on the bottom.
Here's a practical test: place the seed on a flat counter. Does it sit stable on one end? That's the bottom.
The pointed end will wobble or fall over. It seems obvious in hindsight, but when you're staring at a brown seed with dim light, it's easy to flip it backward.
If you plant the seed upside down, nothing happens. The seed just sits there, absorbing water, doing nothing. After six weeks, you'll assume it's dead.
It's not dead. It's just confused. But by the time you figure that out, it's often too late, because the submerged top end has started rotting.
Aggregate reviews from gardening forums report that upside-down planting accounts for a surprisingly large share of failed attempts. It's an easy mistake to make and an easy one to fix once you know what to look for.
Reading the Stages: What a Healthy Sprout Looks Like (Crack → Root → Stem → Leaves)
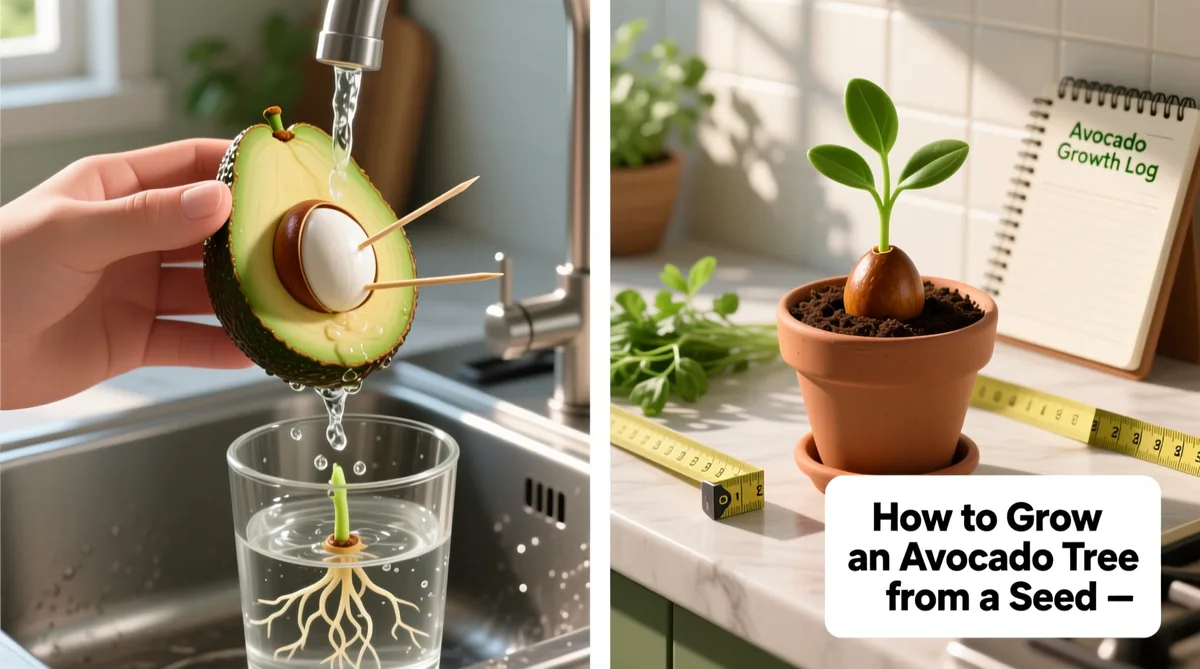
Image source: Bing (Web (fair-use with source credit))
Once your seed is suspended correctly, the waiting game begins. But you're not just waiting. You're watching for a specific sequence of visual changes.
Each stage tells you whether you're on track or need to adjust something.
Stage One: The Crack
Within two to six weeks, you'll notice the seed starting to split. A crack forms along the side, often at the top. This is completely normal.
It's not a sign of damage or failure. It means the seed is germinating. The two halves of the seed are beginning to separate to make room for the sprout inside.
If the crack doesn't appear after eight weeks, something's wrong. The seed may be too old, or the water level might be incorrect. Check that only the bottom half is submerged.
If the entire seed sits underwater, it will rot before it sprouts.
Stage Two: The Root
The taproot emerges from the flat bottom end. It looks like a thick, pale white or cream-colored strand. A healthy root grows downward into the water.
It should look firm and smooth. The root needs to reach about two to three inches long before you can pot the seed.
Don't rush this stage. A root that's too short will struggle when transferred to soil. Give it time to develop a few small secondary roots around the main taproot.
These little branching roots help the plant absorb water and nutrients after transplanting.
Stage Three: The Stem
After the root is established, a stem pushes upward from the top of the seed. It starts as a thin green shoot. It will have a few small nodes where leaves will eventually form.
This stem grows surprisingly fast once it starts, sometimes several inches in a week.
At this point, the plant needs light. Place it on a bright windowsill but out of direct afternoon sun. Too much direct sunlight can scorch the young stem.
If the stem grows tall and thin, reaching toward the window, it needs more light. That's a visual cue called etiolation, and it means your light levels are too low.
Stage Four: The Leaves
Eventually, the stem produces leaves. The first pair of leaves may look slightly different from mature avocado foliage. They're often a bit more delicate and lighter green.
Once several leaves develop, your avocado plant looks like a real plant rather than a science experiment.
A healthy plant has leaves that face the light and feel firm. If leaves curl, droop, or turn brown at the edges, you've got a problem. That usually means inconsistent watering or too much direct sun.
Pay attention to how the leaves look, because they respond quickly to poor conditions.
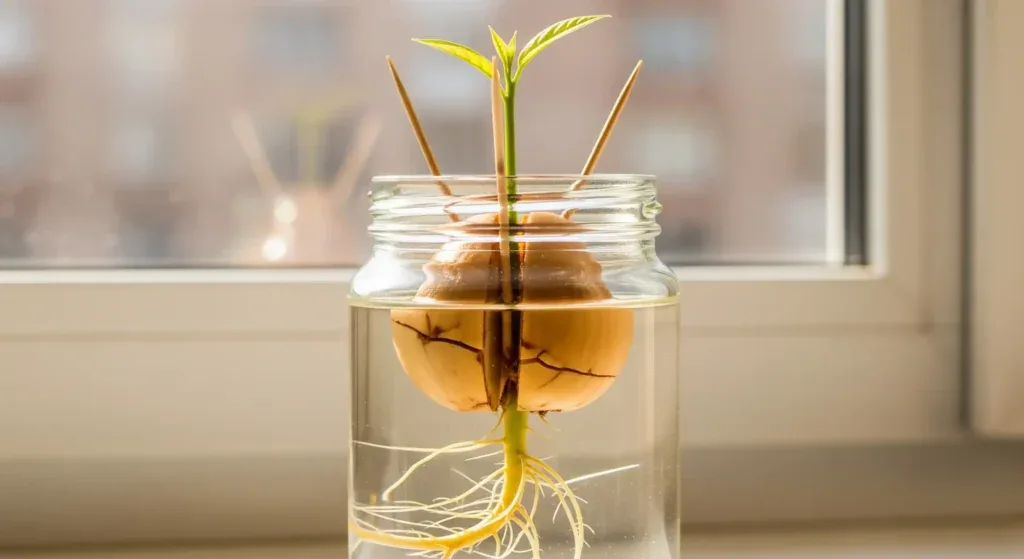
Image source: Web (Bing) / bloomingexpert.com (Web image (fair-use with source credit))
Visual Red Flags: Rot, Mold, Leggy Growth, and Yellow Leaves
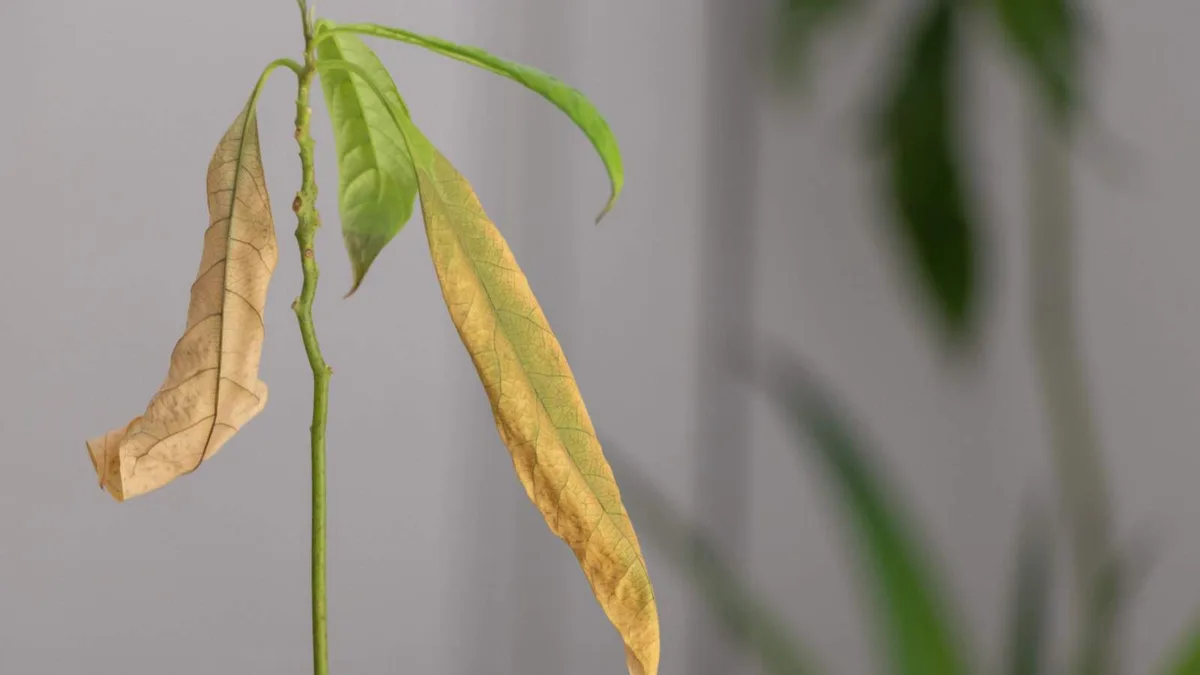
Image source: Bing (Web (fair-use with source credit))
Not every visual cue signals progress. Some warn you that something's gone wrong. Catching these red flags early gives you a chance to save your seed.
Ignoring them almost always means starting over.
Rot
The seed's brown skin should stay firm. If it turns soft, dark, or mushy, that's rot. It happens when the seed sits too deep in water or when the water goes stale.
Remove the seed immediately. Rinse it gently under cool water. Scrape away any soft, brown spots with a clean spoon.
Let the seed dry for a few hours before resetting it with fresh water.
The water level is the most common culprit. Only the bottom one to two centimeters of the seed should touch water. If you've submerged half the seed, you're risking rot every single day.
Examine the water level each time you check your seed and adjust it if needed.
Mold
Mold appears as fuzzy white, gray, or green spots on the seed surface or roots. It thrives in stagnant water. Change the water every five to seven days without fail.
If mold develops, wash the seed with mild soap and warm water. Rinse the jar thoroughly. Some growers use a diluted hydrogen peroxide solution to gently wipe the seed, but plain soap works for mild cases.
Mold on the seed's surface is less alarming than mold on the roots. Root mold appears as a gray-brown slime rather than dry fluff. If your roots develop this slime, the seed is in trouble.
Remove it from the water and give the roots a gentle rinse. Then place the seed in a new, clean jar with fresh water.
Leggy Growth
A stem that grows tall and spindly, with long gaps between leaves, is leggy. It stretches because it's searching for more light. Move the plant to a brighter location.
A south-facing window is ideal in winter. East or west-facing windows work well in warmer months. Rotate the plant a quarter turn every few days so it doesn't lean toward one side.
Yellow Leaves
Yellow leaves on an established avocado plant usually mean overwatering or nutrient deficiency. If you've recently transplanted to soil, keep the soil moist but not waterlogged. If your plant has been in soil for months without fertilizing, it may need nutrients.
A balanced liquid houseplant fertilizer works well.
Sometimes yellow leaves simply mean the plant is shedding older foliage. If the yellowing hits lower leaves first and the new growth stays green, that's natural. If the whole plant starts yellowing at once, check your watering routine and light levels first.
| Visual Cue | What It Means | Action to Take |
|---|---|---|
| Soft, dark seed skin | Rot | Rinse, scrape, reduce water level |
| Fuzzy white/gray spots | Mold | Wash seed, change water more often |
| Tall, thin stem | Not enough light | Move to brighter spot |
| Yellow lower leaves | Natural aging | No action needed |
| Yellow new leaves | Overwatering or nutrients | Adjust watering or fertilize |
| Root slime | Root rot or bacterial growth | Rinse roots, fresh jar and water |
The University of Minnesota Extension offers a helpful resource on indoor seed starting practices that reinforce these visual troubleshooting steps. Check their guide at extension.umn.edu for broader indoor gardening advice.



